6 Port Keystone Patch Panel for 6"/12" Network Cabinet
thingiverse
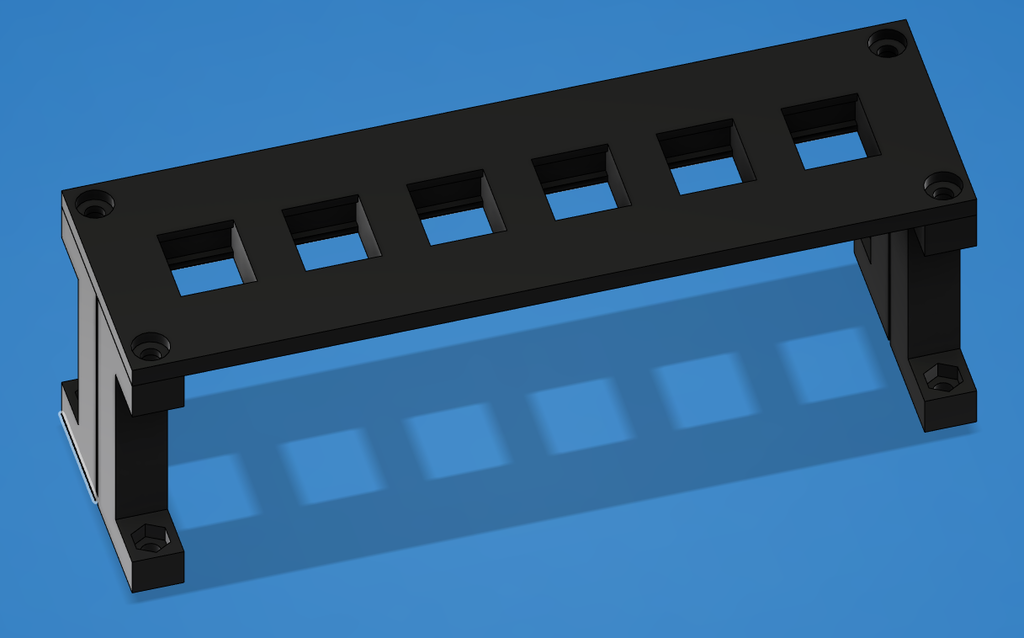
*Note*: If you cannot remove the pegboard from your networking cabinet, this design will not work for you. Needed a patch panel for my networking cabinet and couldn't easily find one that would fit the 6"/12" mounting holes in it. So, I designed my own! This design allows 6 keystone jacks to be mounted in a networking cabinet with 6"/12" mounting holes. The attached DXF file shows one section of mounting holes in the cabinet. My specific cabinet is manufactured by Suttle, your mileage may vary. Required Hardware: * 8x #6-32 *narrow* hex nut (1/2" width) [90760A007 from McMaster-Carr] * 8x #6-32 x 1/2" pan head screw [90272A148 from McMaster-Carr] Printing: For each panel you want to make, you will need to print: * 4x Support * 1x Plate * 4x Washer All components can be printed in one go. I recommend using support for the countersunk screw holes and for the locating pins on the supports. I don't recommend using support for the nut retaining cutouts, they will print fine on their own. Assembly: * Remove the pegboard from the cabinet (if this cannot be done, this design cannot be used) * Attach each support to the pegboard using a nut in the retaining cutout and a screw. * Add a washer between the back of the pegboard and the screw head if needed * In my case, I needed to cut the side off two of the washers. Using the 3D printed washers made this very easy * Insert the keystone jacks into the back of the plate * Secure the keystone jack plate to the supports using a screw and a nut in the retaining cutout.
With this file you will be able to print 6 Port Keystone Patch Panel for 6"/12" Network Cabinet with your 3D printer. Click on the button and save the file on your computer to work, edit or customize your design. You can also find more 3D designs for printers on 6 Port Keystone Patch Panel for 6"/12" Network Cabinet.