64mm 3xPiezo Magnetic Effector
thingiverse
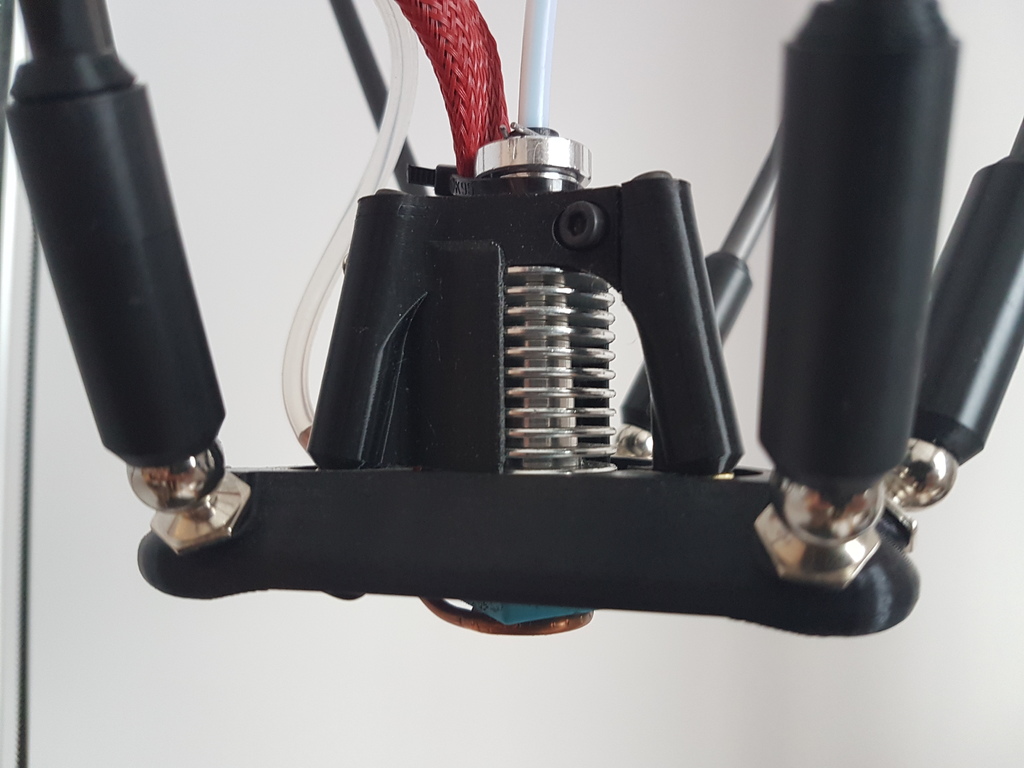
I've changed to a Chimera and I got this for sale now. £13+PP for the two printed parts with the piezo fitted, the cooling pipe and the four M3 bolts and one M3 Nut. If interested message me here or on Facebook https://www.facebook.com/messages/t/makinbug UPDATE 01 Sept '17 - added a fan shroud - the legs of part b are now touching part a. That makes the hot end more stable when cornering at very high speeds. Leadinglights, Moriquendi, ( http://forums.reprap.org/read.php?1,635075,page=1 ) DjDemonD and others ( https://www.duet3d.com/forum/thread.php?id=752&p=1 ) have spent many hours developing what is, arguably, the lightest and most precise bed leveling probe available as of June '17. Here are some of the ways you can use a piezo as a nozzle z-probe: https://www.thingiverse.com/thing:2069480 https://www.thingiverse.com/thing:2319993 https://www.thingiverse.com/thing:2117069 This is a remix of Idris's ( Moriquendi) effector here https://www.duet3d.com/forum/thread.php?pid=10329#p10329 I liked his idea because it offsets the nozzle and you don't lose in printing height. It works with 3x 15mm piezo disc z-probe, Huntley's magnetic arms spaced at 64mm ( other mag arms will work) and Berd-Air cooling. Also see 64mm Magnetic Carriages here https://www.thingiverse.com/thing:2371707 You will need: 1x Piezo probe board ( PM Moriquendi on the RepRap or Duet3d forums) or make your own https://www.dropbox.com/sh/3q38ew98kt7f8sq/AAB_uA6tQL2ETlGcnfdijm2Ra?dl=0 3x 15mm piezo discs ( search Murata 15mm piezo ) each with an M3 brass nut soldered to the back 1x M3x15mm bolt 3x M3x35mm bolts 1x M3 nut 6x M3 Nylon Nuts for the spheres It should print without supports but be cautious when sliding the piezo in place. Use a soldering iron to melt the plastic if you need to make some room for them. First thing I've placed a dab of E6000 where the wires are soldered to make sure they will stay put. I like the E6000 because is strong but easy to remove if need be. Part a, the triangle, should face the z tower with the Bert-Air hole. Part b should be mounted with the fan facing z tower. All the wires are also facing z tower. If part b is printed accurately the 35mm bolts should rotate freely and not exit more than 1.8 mm down the bottom. I hope the pictures are complementing my instructions well enough. To mount, fit the metal spheres first then slide the piezos in their place and using the M3x35mm bolts gently attach part b to the piezos. Not too tight. Center them in place, then glue them as they are using E6000, superglue or the like. When dry, secure the wires with more glue and connect them in parallel to a connector of your choice. I've used the pins from a JST connector. When all is dry, dismantle part b and slide the hotend in it, pass the wires from the bottom of part a, then connect them to the hotend and bolt the fan with the wires facing down. Place part b back on the piezos and bolt it using needle nose pliers to hold the brass nuts. Use little force and make sure the piezo is not moving when tightening. Rotate the hotend for the wires to face the Bert-Air hole, then secure it with the 15mm bolt. Use a 2mm cable tie to secure the wiring loom to the hotend. For setup details please read DjDemonD post here https://www.duet3d.com/forum/thread.php?pid=7726#p7726 or here https://www.thingiverse.com/thing:2069480 To that, I would add the following: -on my Duet digital mode doesn't work, only analog with VR1 at 11 and VR2 at 4 o'clock -I probe on .8mm PEI, bull clipped to on top of a 6mm al bed, at 210c hotend and 65c bed. I've tested the hotend 220c for 3 seconds and it leaves no marks on the PEI. Caution: for some reason probing on PEI glued with 3M 468MP to aluminum plate gives high inconsistencies. I guess is because 468MP is 0.125mm thick and gives a bit under pressure. I the future I would use 3m 467MP which at just 0.05mm, should make for a harder surface. -I've got a -0.15 z offset in my config file and the trigger value is 500 ( G31 X0 Y0 Z-0.15 P500 ) Any questions please contact me Enjoy
With this file you will be able to print 64mm 3xPiezo Magnetic Effector with your 3D printer. Click on the button and save the file on your computer to work, edit or customize your design. You can also find more 3D designs for printers on 64mm 3xPiezo Magnetic Effector.