<7$ Raspberry PI3 Housing, Case, NAS, Server with 0.96 OLED Display showing stats (plus 40mm fan Version/passive cooling Version/DIY top)
thingiverse
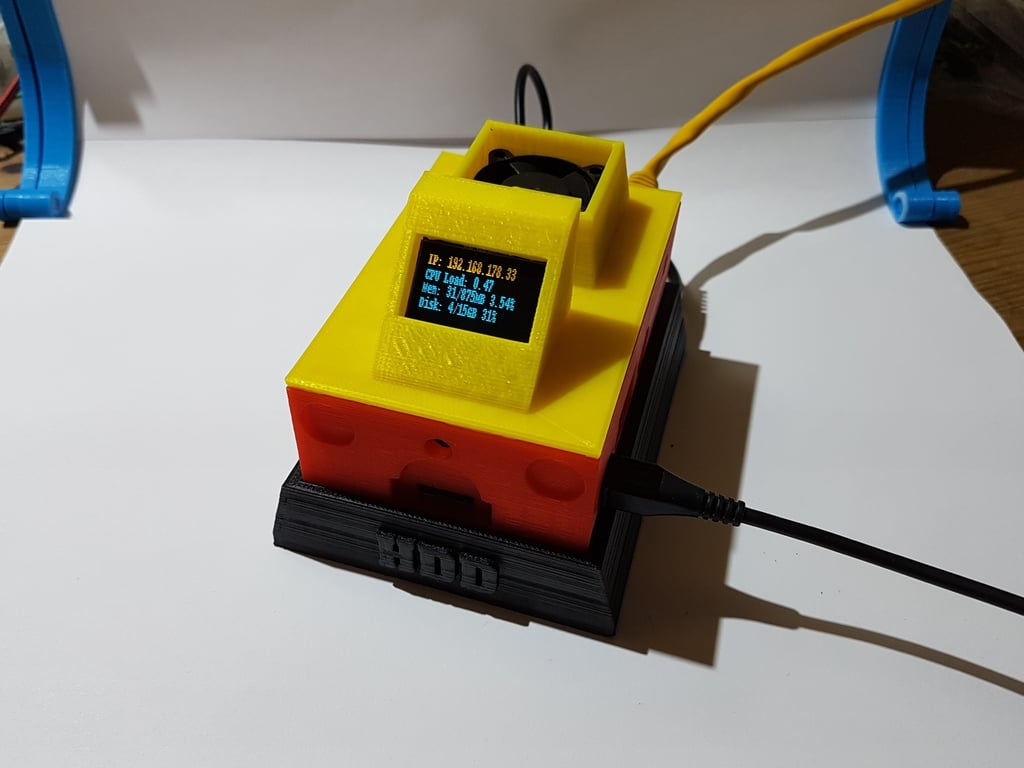
I needed a status indicator for my Raspberry because I wanted to keep an eye on my headless RPI server without having to access it from outside. So, I ordered this affordable 0.96 OLED display (128x64) from China (the link to Ebay is below), and designed a case for it. The wiring for this project was very straightforward - just four cables. There are also plenty of other scripts you can use to feed the display, but don't expect any support from me! Check out this forum post on the Raspberry Pi website for more info: https://www.raspberrypi.org/forums/viewtopic.php?t=150342. This case is also available with a 30mm fan and a passive cooling option. My goal was to create a compact display that could easily be mounted inside my RPI server, and this design fits the bill. Here are the hardware requirements: * A Raspberry Pi 2 or 3 (RPI1 will also work, but you'll need to use a different wiring setup) * The 0.96 OLED Display: https://www.ebay.com/itm/0-96-Blue-Yellow-I2C-IIC-128X64-OLED-Serial-LCD-LED-Display-Module-for-Arduino/142493731292?epid=9019198999&hash=item212d49c9dc:g:e3oAAOSwarNZqPud * A USB 2 SATA Adapter: https://www.ebay.com/itm/SATA-7-15-Pin-22Pin-to-USB-2-0-Cable-Adapter-For-2-5-Laptop-Hard-Drive-HDD-Disk/121849219162?hash=item1c5ec7885a:g:ypIAAOSwNyFWfg1Y * The fan: https://www.ebay.com/itm/Cooling-Cooler-Fan-for-Raspberry-Pi-Model-B-Raspberry-Pi-2-3-5V-0-2A-New/322506239062?hash=item4b16deac56:g:abkAAOSwrhBZDMWl Here are the software steps: 1. SSH into your Raspberry and run the following commands: * `sudo apt-get update && sudo apt-get upgrade -y` (update your system first) * `sudo raspi-config` (go to Interfacing Options, select I2C, and enable it) * `sudo apt-get install -y python-imaging python-smbus i2c-tools` (install the necessary dependencies) * `i2cdetect -y 1` (detect the display - in my case, it was "3c") * `git clone https://github.com/adafruit/Adafruit_Python_SSD1306.git` (clone the Adafruit library) * `cd Adafruit_Python_SSD1306` (change into the library directory) * `sudo python setup.py install` (install the library) * `python stats.py` (run the example script - it should work!) 2. To make the display reboot automatically, add the following line to your crontab: * `@reboot /usr/bin/python /home/pi/Adafruit_Python_SSD1306/examples/stats.py` 3. Save and exit the editor. If your 2.5" HDD won't work, try editing the `/boot/config.txt` file by adding `max_usb_current=1` at the bottom, then rebooting your RPI server.
With this file you will be able to print <7$ Raspberry PI3 Housing, Case, NAS, Server with 0.96 OLED Display showing stats (plus 40mm fan Version/passive cooling Version/DIY top) with your 3D printer. Click on the button and save the file on your computer to work, edit or customize your design. You can also find more 3D designs for printers on <7$ Raspberry PI3 Housing, Case, NAS, Server with 0.96 OLED Display showing stats (plus 40mm fan Version/passive cooling Version/DIY top).