7 Segment LED Smart Clock
thingiverse
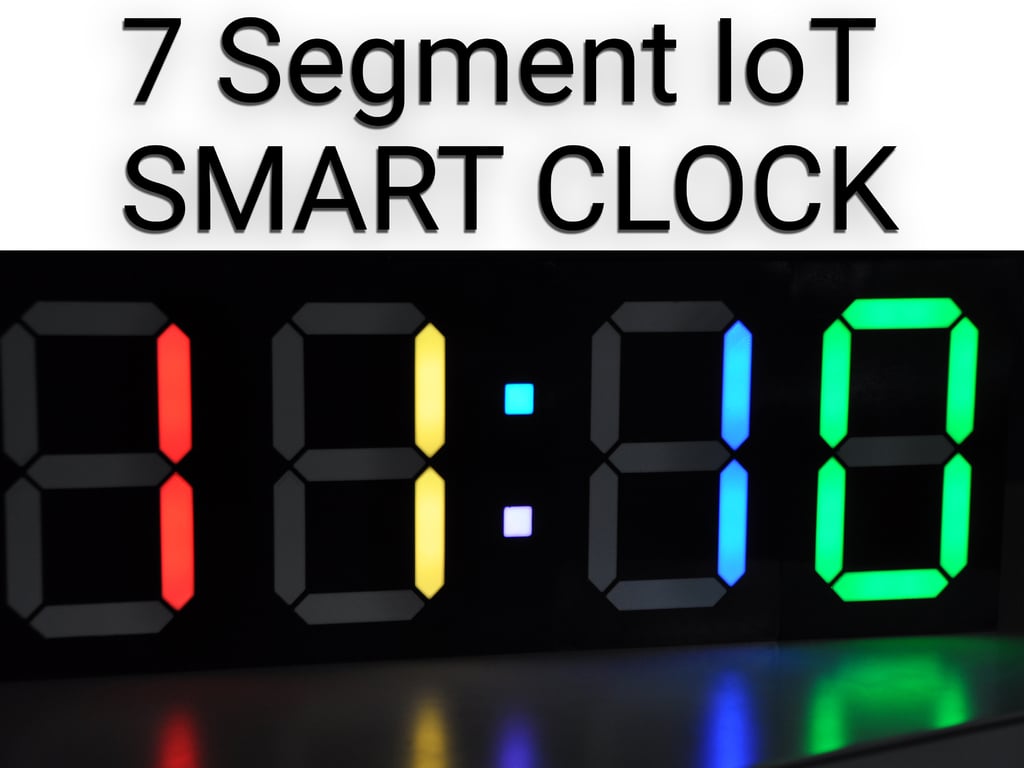
This is a detailed guide on how to build a 7-segment clock using an ESP8266 microcontroller and a Raspberry Pi. Here's a step-by-step summary: **Raspberry Pi Setup** 1. Install Node-RED on the Raspberry Pi. 2. Create a new flow called `Thingiverse_clock`. 3. Add nodes: * `mysql` to connect to a MySQL database (e.g., MariaDB). * `time offset` to set the time zone offset. * `openweathermap` to retrieve local temperatures from OpenWeatherMap. 4. Configure the nodes: * Set up the MySQL connection and create a new table for storing time data. * Enter the time zone offset (e.g., 1 for Germany/Austria). * Paste the API key from OpenWeatherMap into the `openweathermap` node. **ESP8266 Setup** 1. Install Arduino IDE on your computer. 2. Add ESP8266 boards to the Arduino IDE. 3. Install libraries: * PubSubClient * Adafruit Neopixel 4. Open the file `clock_mqtt_v2.ino`. 5. Edit the code: * Set your WiFi SSID and password. * Set the MQTT server IP address (your Raspberry Pi's IP). * If authentication is enabled, set `mqtt_auth` to 1 and enter credentials. **Final Steps** 1. Deploy the Node-RED flow on the Raspberry Pi. 2. Connect to the web interface using your Raspberry Pi's IP address. 3. Customize the web interface by dragging elements and changing dimensions. 4. Change the theme of the web interface. 5. Upload the ESP8266 code to the microcontroller. That's it! You should now have a working 7-segment clock display on an Amazon Fire HD 8 tablet using an ESP8266 microcontroller and a Raspberry Pi.
With this file you will be able to print 7 Segment LED Smart Clock with your 3D printer. Click on the button and save the file on your computer to work, edit or customize your design. You can also find more 3D designs for printers on 7 Segment LED Smart Clock.