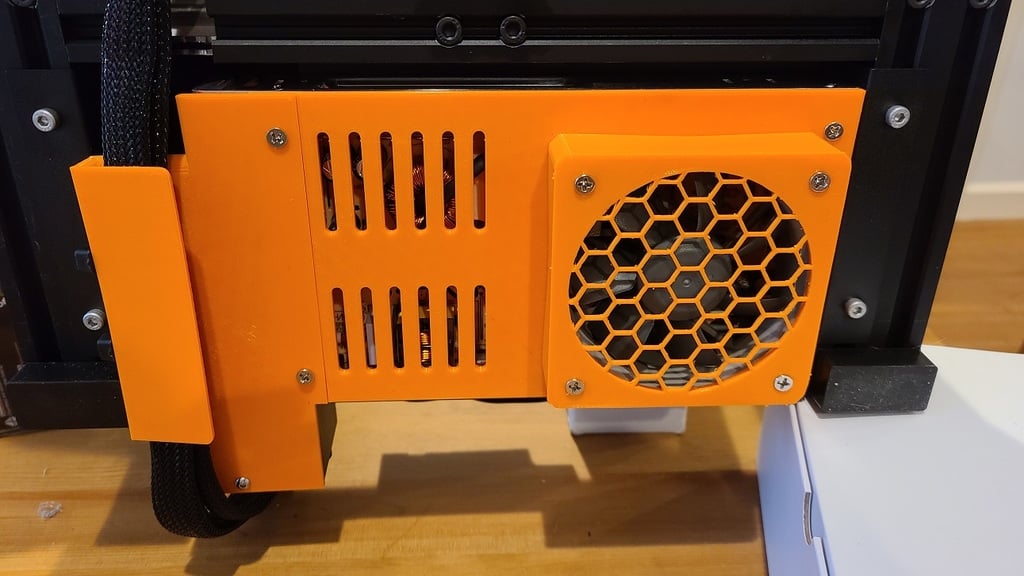
80mm fan PSU Cover for Ender 3 v2 & Aquila with USB ports - No Supports
thingiverse
Let me first give credit to the designs that inspired mine. I drew this one from scratch but I originally liked the idea from TerraVestra's design (https://www.thingiverse.com/thing:4548187) as well as CyberwareDK's remix (https://www.thingiverse.com/thing:4601320). In fact, I originally remixed that design myself, (https://www.thingiverse.com/thing:4830172) but this one is a new creation. **Why the change?** -------------------------- The original concept had to be printed with lots of supports and be printed vertically. For anyone starting out in 3D printing and looking to quiet their printer, those are probably two of the more challenging aspects to deal with. So this design lets you print everything flat on the bed and almost completely eliminates supports... Almost (just 1.4mm worth remain). The other thing I wanted to eliminate was something that bothered me from the way the PSU is mounted on the printer. In order to remove the PSU's cover for any reason, I had to entirely remove the PSU from the printer because the cover screws for the PSU are on the sides. This design eliminates that problem and gives me quick access to the terminals or even to the inside of the PSU itself. **What you'll need:** -------------------------- <ul> <li>One 80x80x25 case fan. (1200 RPMs works best)</li> <li> 8 total fan screws (4 for the fan, & 4 for the PSU frame)</li> <li> At least 4 printed sections - 5 if you chose the USB output converter</li> <li> Optional: 1 USB buck-converter (https://www.amazon.com/gp/product/B07ZKPDWS4/)</li> <li> Optional: A couple of wires to connect the USB buck-converter to the PSU</li> <li> Option 3 is to print the main section that houses just one USB port (https://www.amazon.com/gp/product/B08DKPZYGX/). Just one more choice in case you only want one USB connection in the back.</li> </ul> **How does it work?** --------------------------- The cover prints in 3 parts to minimize or eliminate the need for supports but you also need to print the fan cage for a total of 4 parts. If you decide to use the buck converter, instead of printing the normal "Main Section," replace it with the optional "Main Section for USB ports," and add the USB ports cage and you'll end up with a total of 5 printed parts. Installation is simple but I recommend attaching the frame to PSU first and then the main section to the frame using two screws before attaching the rear section to the frame and main section using the two remaining screws. After that, the frame should remain attached the PSU and never have to come out. **A note about the Rear Section** ------------------------------------------- This is the only part that needs to be printed with supports. That said, it only requires the supports on the overlapping lip that will join with the Main Section (it's only 1.4mm tall). You can block out the supports under the cable-guide overhang because I've placed three support pillars there that will enable the printer the bridge the initial layer. Trust me this is much better than trying to remove the supports from that section and the pillars will snap right off. There will be some slack on the first layer of the overhang, but it shouldn't affect functionality. **A note about the USB-ports buck-converter** ------------------------------------------------------------ I added this because I'm running a RaspberryPi with OctoPrint on it and wanted it powered directly from my printer. However, you can also use it to power any other USB device. To wire it, run wires from the + and - terminals on the printer's 24V power supply. This converter takes the 24V and turns it into 5V USB current. **Option 3** -------------- Another version of the main cover that incorporates the USB cage into the print. This one though, uses a different buck-converter that has only one USB port. (link is above). It can still be printed without supports if your printer can bridge decently. -------------- **Risers** ------------- You'll need your printer at least 30mm off the ground for proper clearance with these mods. For that purpose, I've created a couple of different riser/feet options: This one uses the stock rubber pads: https://www.thingiverse.com/thing:5238215 This one uses the v-slots: https://www.thingiverse.com/thing:4937295 =============================== *Update 26-09-2021* --------------------------- Made slight modifications to the frame model for a better fit. *Update 08-02-2022* --------------------------- Thank you to aod_fan for pointing out that the holes on the USB cage were too small. I've enlarged them just like he did in his remix.
With this file you will be able to print 80mm fan PSU Cover for Ender 3 v2 & Aquila with USB ports - No Supports with your 3D printer. Click on the button and save the file on your computer to work, edit or customize your design. You can also find more 3D designs for printers on 80mm fan PSU Cover for Ender 3 v2 & Aquila with USB ports - No Supports.