85mm Pusher Cinewhoop FPV Drone Conversion - Analog
thingiverse
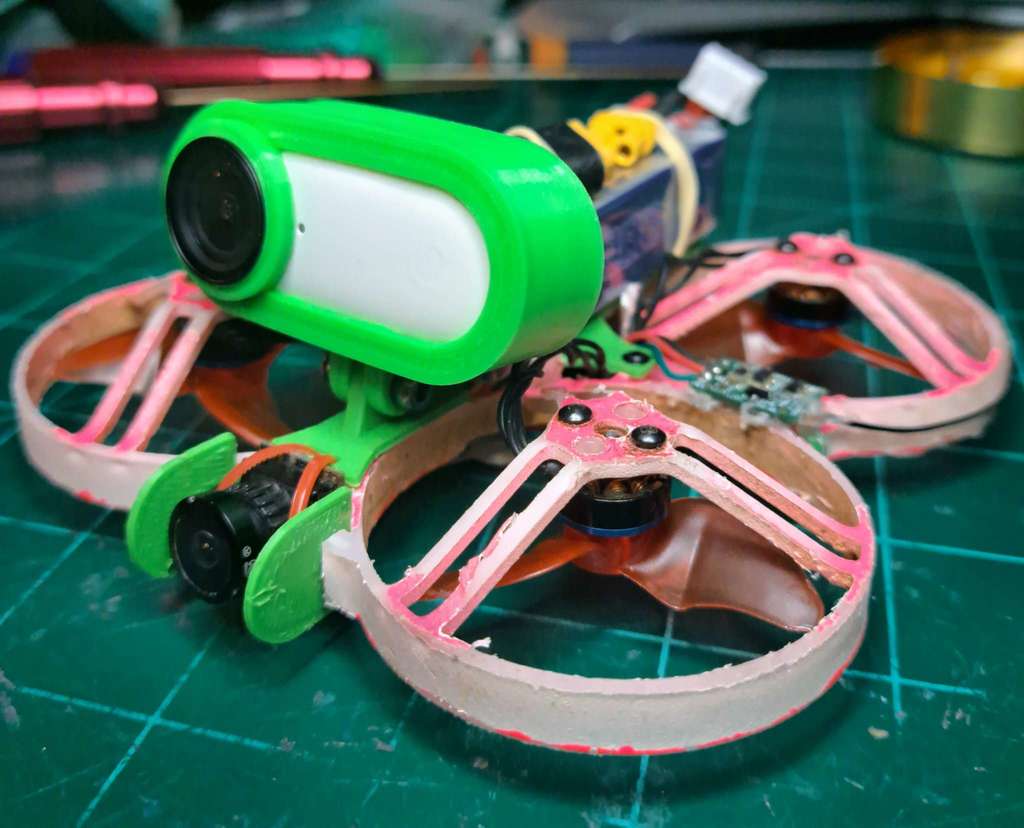
I wanted an easy way to convert my 85 mm whoop frame into a micro pusher Cinewhoop capable of carrying an Insta360 GO 2 or naked GoPro/Runcam Thumb type action camera VIA a standard Insta360 style single loop mount. You can attach many of these popular light weight cameras today with holder designs already available. The main base plate is to be mounted on the underside of the whoop frame with its orientation being upside down or as we call it "pusher style" and is attached to the frame with the same size screws you mount the FC with on the other side. The front of the base plate will point towards the actual rear of the frame to utilize the original LED hanger posts to attach a 14mm - 19mm FPV camera VIA the ends of nylon screws cut to fit the gap and securely fastened with a spliced Zip-Tie to the frame and the front base slat. I've also included my own method of protecting the FPV cam. Attach the cam guard to the cam by pushing the cam stud screws through the holes in the guards on both sides before sliding the whole cam/screw/guard into the LED hanger posts. Secure with custom Zip-Tie. It all sounds confusing and over complicated but I can assure you that once the pieces are printed most of the process is fairly straightforward and the other parts to be used can be sourced quite economically. Finally, I will recommend a minimum setup configuration based off of what I have built previously: * 2s - 3s 12a FC * MOTORS: 1103 8000 kv, 2s for cool motors, 3s motors will get hotter 1202.5 and/or lower Kv may be better. Use your best judgement here. * PROPS: EMAX Avan Blur 2x1.9x3 Tri-Blade 2" have given me the most satisfaction. * 85MM WHOOP FRAME - I used the Beta85 for designing but I would love to know if the mount base will fit adequately on other frames so please feel free to message me on Instagram with your findings! * 2s lipos: 300 -600mahyo * 3s lipos: 450 - maybe can go up to 850 with the right setup? * External RX of your preference ( with these two you could also ) * External VTX of your preference ( do internal components for a lighter build.) If you already have: 85mm whoop setup that you love and know can handle the extra weight of a lightweight action cam? By all means, SEND IT! Other Parts needed for this build: Zip-Ties - I use the tiniest ones I have and they measure 2.5mm wide 100mm long but feel free to experiment. One is used to secure the FPV cam to the frame and front of the base with about a 33mm splice. Pictures are there for reference. Also, secure one to each side of the frame and orient them where they are facing down. These are here to act as landing nubs and help the craft stay stable when sitting on a flat surface. Cut the slack, but before trimming off all the way, lay the drone flat and try to trim the excess to create a level and stable(not wobbling around)landing surface. The last one will secure the end of the base down to the end of the frame. In the end, you want all the zip-tie landing nubs to be even in length. Nylon Screws - I take two m2 nylon screws and cut the ends (the head) off and screw the shaft into the holes of the FPV cam on both sides so I can slide the whole configuration of Cam/Screw/Guard into the LED holder that is molded into the frame. Rubber Band - 60mm long and about 3mm thick. Used to hold the lipo in place. From underneath the base, put one end of the rubber band through the rectangular slats and the other end through the other slat making two loops to hold the battery down.
With this file you will be able to print 85mm Pusher Cinewhoop FPV Drone Conversion - Analog with your 3D printer. Click on the button and save the file on your computer to work, edit or customize your design. You can also find more 3D designs for printers on 85mm Pusher Cinewhoop FPV Drone Conversion - Analog .