9mm PA dummy cartridge
prusaprinters
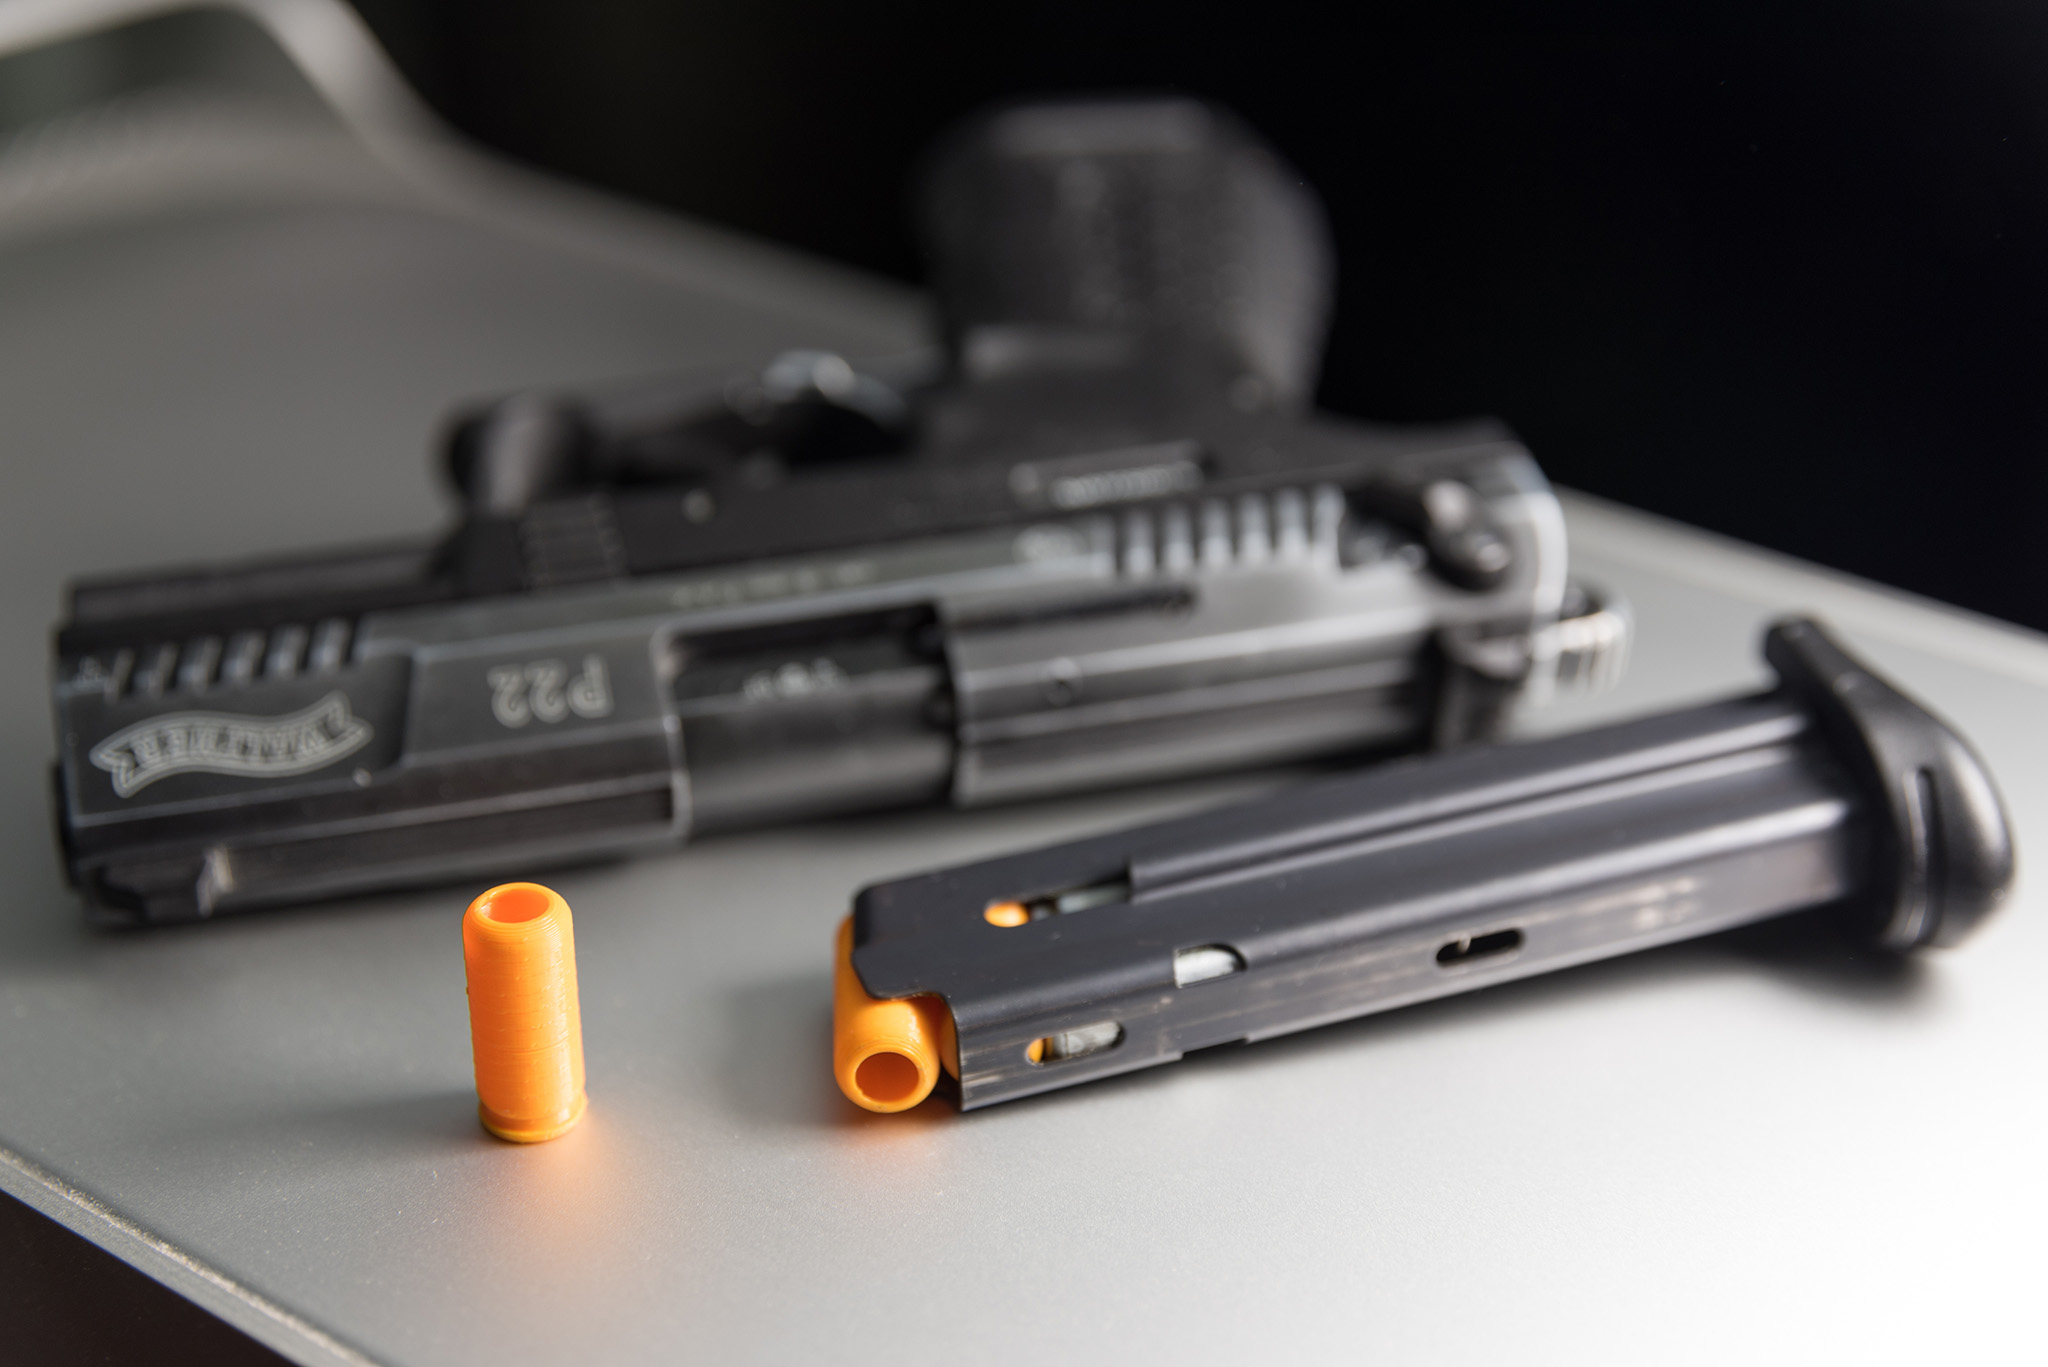
<p>To increase the safety of my dry training, I was looking to buy a couple of dummy rounds that I could use instead of actual blank cartridges. Accidental discharge can always happen, so I'd feel safer using dummies.</p> <p>Problem: The price. The cheapest dummy rounds I could find (with spring-buffered primer, but anyway) cost a whopping 40 bucks for a pack of five. Plus, all of them - even the more expensive ones - had very bad customer reviews, claiming the cartridges didn't fit.</p> <p>I figured my dummies don't necessarily need to survive dry firing as my own gun can be uncocked properly - if it does happen, it would be an accident. So why not print my own dummy cartridges for much less money? Heck, even if I do accidentally break one by dry-firing, I can simply print a replacement within ten minutes and consume less than a gram of material.</p> <p>Built this after C.I.P.'s technical drawings: <a href="https://bobp.cip-bobp.org/uploads/tdcc/tab-viii/tabviiical-en-page10.pdf">https://bobp.cip-bobp.org/uploads/tdcc/tab-viii/tabviiical-en-page10.pdf</a></p> <p>Bottom thickness is around 3 millimeters, so it can withstand a couple times of dry firing. My PETG test prints survived ten trigger pulls with only a dent in them; I didn't try further. Please do keep in mind that I did not design the model for that purpose even if it works.</p> <p>Given a well-calibrated printer - both Z offset and print temperatures for your material of choice - the resulting objects' dimensions should have a perfect fit. They move smoothly in a well-maintained (i.e. oiled) gun; there only is some friction between multiple 3D printed dummy rounds like when loading the magazine, but working the slide still works just fine. I've reduced the diameter by 0.2 mm vs. the official spec to have some leeway for minor miscalibration or uneven print surface.</p> <p><img src="https://i.imgur.com/Yur93ue.gif"/></p> <p>Stats for a pack of 10 (on Prusa i3 MK3S, using PETG and recommended settings):</p> <ul> <li>1 hour 1 minute print time</li> <li>2.43 meters / approx. 7.42 grams filament</li> </ul> <p>It may be possible to design an improved version that actually contains a moving primer attached to a spring, but the strength of a 3D printed plastic spring likely won't be good enough to protect the firing pin from damage by dry-firing.</p> <h3>Print instructions</h3><p>Use a 0.4mm nozzle and otherwise default settings: 2 perimeters, 5 top layers, 4 bottom layers. Model does not require supports. Do not use a brim or raft, and preferably print on the smooth PEI surface.</p> <p>You may also have success and achieve slightly reduced friction when printing with a smaller diameter nozzle or further reduced layer height, but I didn't conduct any tests here.</p> <p>You can probably print these in any non-flexible material you want, but PETG might give a little extra durability over brittle PLA for example if you accidentally do dry-fire.</p> <p>If you want to increase durability a tiny bit, go with 40% Honeycomb infill. This affects only the bottom part of the model.</p> <p>Print one by one if you have trouble with filament stringing.</p> <p>Demo print filaments from photos:<br/> DasFilament.de PETG "Melonengelb" and "Transparent Neongrün"</p>
With this file you will be able to print 9mm PA dummy cartridge with your 3D printer. Click on the button and save the file on your computer to work, edit or customize your design. You can also find more 3D designs for printers on 9mm PA dummy cartridge.