9V Duracell Container
thingiverse
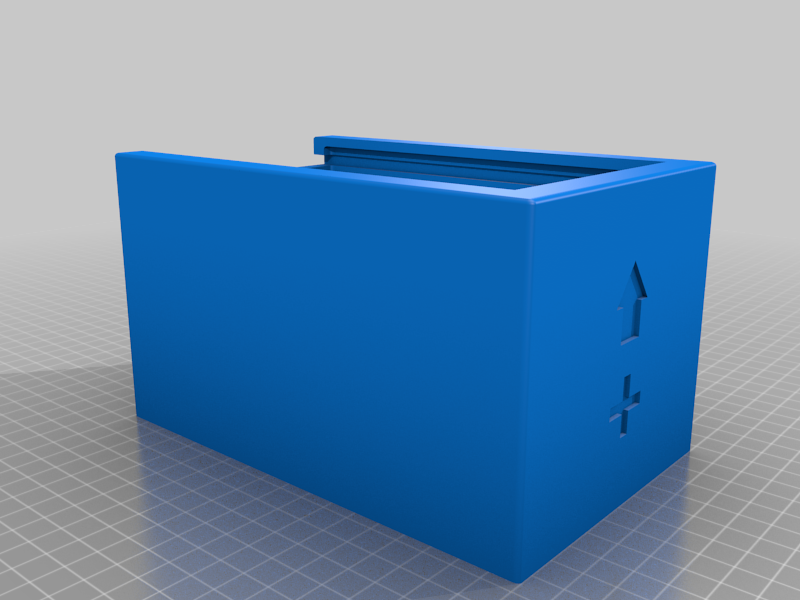
After downloading & printing the Used Battery Container by Elite_Worm (https://www.thingiverse.com/thing:4881782) I seen one comment asking for a 9V version. I thought to myself I could probably design something like that so I tried it out and am very happy with the result. This was my 1st attempt a making a multi part model. At full size it measures approx. 7" x 4-3/8" x 13" (177.8mm x 111.13mm x 330.2mm). I now present to you all this ridiculous approx. 7:1 ratio Duracell 9V Battery Container! ;-) Printing: All 5 files are in the correct build plate orientation for printing. Just load, adjust your settings, print & enjoy. Be sure to adjust your Seam Position to Rear. This will ensure a nice print finish & also position the seam to match that of a real 9v battery. Only the CopperTop & Lid need supports. CopperTop - Set Seam Position to Rear, Supports needed for inside lid track, the Arrow & Plus sign will print without supports. I used a Brim to help with warping. Bottom - Set Seam Position to Rear, NO Supports. I used a Brim to help with warping. Lid - Set Seam Position to Rear, Supports needed around the Negative Terminal only. Perform a color change from Black to Silver when bottom ring of Positive terminal starts. I used a Brim to help with warping. Letters - Print 2 sets of these as the battery is double sided, at Full Size the letters push in and do not need to be glued, at Half Size they will need to be glued. Pay attention to the location of the "L"s as they are slightly different from each other and also the round/pointy corner location of the other letters. They all should only fit in 1 way except the "C". Arrow & Plus - at Full Size they will push in and do not need to be glued, at Half Size they will need to be glued. My Print Settings: Sliced in Prusaslicer with Prusament PLA default settings with these changes: .4mm nozzle .15mm layer height 3 shells 10% Rectilinear Infill Skirt Loops set to 0 6.35mm Brim (CopperTop, Bottom & Lid) Elephant Foot Compensation set to 0 Heat Bed 1st layer 210, Other layers 205 Approx. 87h29m for all 5 print files at Full Size Post Printing: Remove Support Materials from Negative Terminal on Lid and from CopperTop. If printed at Full Size push in the Black Arrow & Plus sign into their spots on CopperTop. Push in all the White Duracell letters into their spots on Black Bottom paying attention to their orientation. Again each "L" is slightly different. Slide Terminal Lid into slot on CopperTop. If this is tight a few in & outs should help loosen it up. Finally line up the Rear Seam and Glue the CopperTop to the Black Bottom. Materials used: Eryone Black PLA+ Eryone Cool White PLA Eryone Silk Silver PLA Eryone Ultra Silk Copper PLA Loctite Super Glue Bob Smith Industries 5-10 second Insta-set
With this file you will be able to print 9V Duracell Container with your 3D printer. Click on the button and save the file on your computer to work, edit or customize your design. You can also find more 3D designs for printers on 9V Duracell Container.