A Glue Stick Actuator!
thingiverse
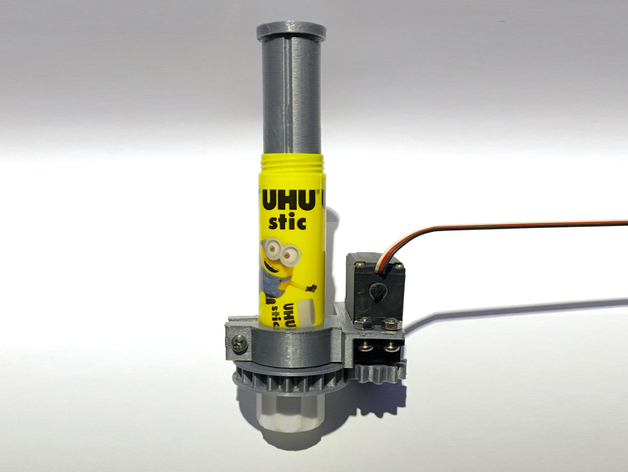
Convert your Glue Stick into a Linear Actuator! Video: https://youtu.be/0SEahIQyB8A If you are into 3D printing, chances are you have a bunch of used glue sticks lying around, the best way to get your prints to stick on your print beds. Why throw it away? Turn it into a linear actuator! After toying around with several designs, I finally simplified it to a basic minimalistic design. This is made for a "UHU" brand, large 21g glue stick. You can probably scale it to fit other brands or sizes. As you can see in the pictures, mine is a special edition with a picture of a minion on it ;-) You do not need to get one with a minion on it but in case you do, do not place it near a banana. You'll need a continuous servo for this. You can easily find instructions on the net to modify a standard servo into a continuous servo. I have a tutorial on my blog showing an alternative way to modify one while leaving the pot exposed to make fine adjustments or to use it as speed control. You can check it out here: http://www.kikitayblog.com/2012/07/electronics-new-way-of-modifying.html Assembly is pretty straightforward, as you can see in the picture. You'll need to glue the shaft to the bottom inside the tube. I've included 2 versions of the larger gear. One can be print it as a single piece, the other can be printed in 2 pieces without support, but you'll have to glue them together. You'll only need to print one of these gears. All the screws used in the design are M4 size except for the servo horn. Use the screw that comes with your servo. Tips: As there are no limit switches inside the glue stick, make sure you don't turn below or beyond its maximum points. One method is to loosen the grip on the glue stick. So that once it reaches its limit, the entire stick has room to rotate. When trying to fit the gear horn onto the servo, I would use a soldering iron to heat up the servo shaft a little so that the geared horn could soften/melt slightly and form a tight fit when it cools. Of course only do this only if you're using a metal gear servo, for obvious reason :-P I've also included a gear horn without a centre hole so that you can drill it to fit your desired size. Use my "Simple Center Finder" to accurately find the center of the gear: http://www.thingiverse.com/thing:1241609 The top of the shaft has a mounting hole for an M4 size screw. You can use it to mount your object or a platform to it. I've also included one without a mounting hole. You can drill it to your specific size. Notice the shaft has 3 grooves along its side. You will find that your glue stick has 3 tracks inside that you'll need to align it with. STL Files: 1. Glue_StickActuator-_Printbed.stl - Print-bed-ready file. Print the entire assembly on a single print bed.2. Servo_Bracket.stl - Servo holder + Glue Stick holder.3. Large_Gear_Split.stl - Large gear to rotate the bottom of the glue stick. Prints without support but requires sticking the two parts together4. Large_Gear.stl - Large gear to rotate the bottom of the glue stick. May require support.5. Small_Gear.stl - Small gear to fit onto your servo. Refer to the tips above to better secure it to your servo.6. Shaft.stl - Fits inside your glue stick where your glue is supposed to be. Has a hole on top to mount object or platform. Requires M4 size screw.7. Shaft_Without_Mounting_Hole.stl - Same as above, except without a mounting hole. Remember to share your prints or project! Click on my profile to see my other designs! Check out my blog: http://www.KikiTayBlog.com
With this file you will be able to print A Glue Stick Actuator! with your 3D printer. Click on the button and save the file on your computer to work, edit or customize your design. You can also find more 3D designs for printers on A Glue Stick Actuator!.