A26 to M42 Lens Adapter
prusaprinters
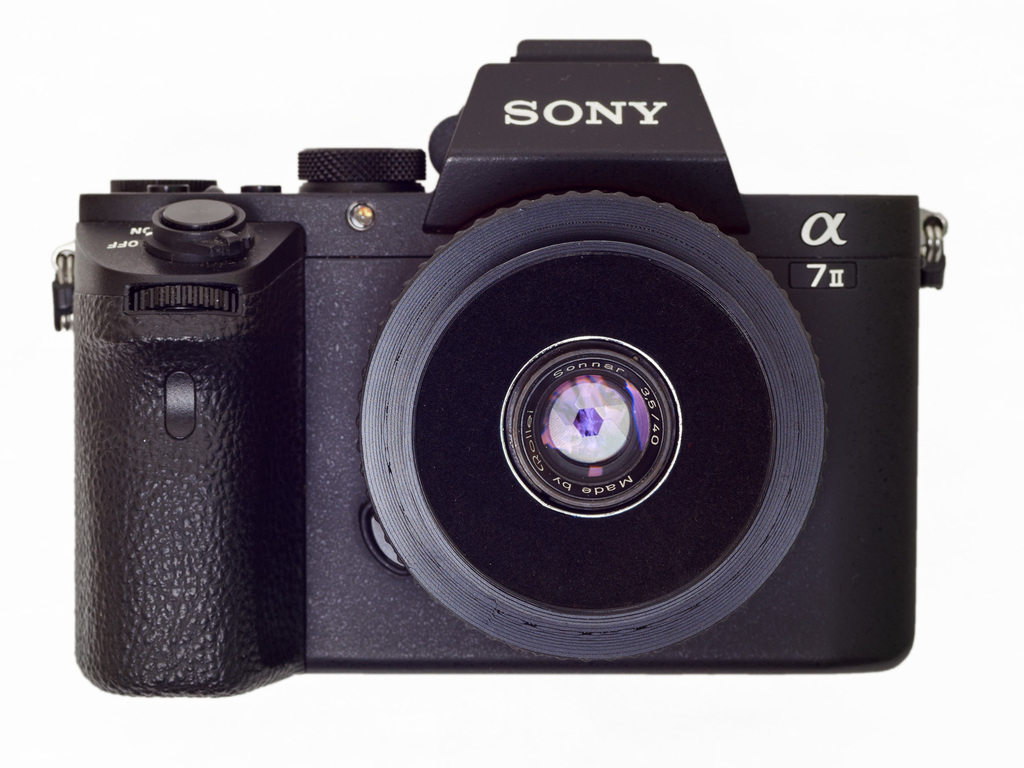
<p>This is a partial solution to adapt a Rollei A26's 40mm f/3.5 Sonnar to your modern digital MILC (SLRs and DSLRs are not compatible). You press-fit the lens assembly into this print to give it an M42 screwmount and almost-standard 49mm filter threads. With a little blue painter's tape filling the gap, it stays in place nicely such that it should be safe to slap on your camera. The lens was not intended to cover a full frame sensor, but it kinda-sorta does albeit with some significant but correctable light falloff! With the square baffle screwed in to the rear of the lens assembly (also harvested from the camera), there is a noticeable vignetting from it, but I do choose to keep it on there because the rear of the lens has lots of reflective bits and bobs. It's minimized if you rotate the assembly just right, and it seems to go away as you focus closer.</p> <p>In the product images, I have this print screwed-in to my M42 to Sony E focusing adapter, "M42-4-E-Var". (<a href="https://www.thingiverse.com/thing:4902657">https://www.thingiverse.com/thing:4902657</a>).</p> <p>If you're curious about this lens and you want a very small, compact, lightweight, and disposable lens setup, I'd encourage you to check it out. It has a very pleasant rendering at close-up distances and seems very clean when it comes to longitudinal CA, but it does suffer towards the edges/corners. This may perform better on a thinner sensor stack, on a BSI sensor, and/or on a smaller sensor (APS-C, MFT), but it does well enough on my A7 II considering how dinky it is. If you want to be able to focus it, you'll need a helicoid that maintains or falls below M42's register distance of 47.46mm at its shortest for your camera setup.</p> <p>Disclaimer: This model is offered AS-IS with no guarantee that it will print for you as well as it did for me. The tube may interfere with the aperture pin ledge of your M42 adapter (it doesn't/shouldn't interfere with my 3D-printed one though) if it has one. Print and use this adapter at your own risk (risks include, but are not limited to, the following: introducing small dust/PLA particles to your camera's internals, having prints break on you, having the lens slip out towards your sensor[!] if you neglected to give it a safe fit and/or you have an unfortunate accident).</p> <h3>Print Settings</h3> <p><strong>Printer Brand:</strong></p> <p>Prusa</p> <p class="detail-setting printer"><strong>Printer: </strong> <div><p>I3 MK3S</p></div> <p><strong>Rafts:</strong></p> <p>No</p> <p class="detail-setting supports"><strong>Supports: </strong> <div><p>No</p></div> <p><strong>Resolution:</strong></p> <p>0.15mm</p> <p class="detail-setting infill"><strong>Infill: </strong> <div><p>25% Grid, Concentric on Top/Bottom Layers</p></div> <p><strong>Filament:</strong> any you trust PLA Black, light-blocking colors recommended</p> <p><br/> <p class="detail-setting notes"><strong>Notes: </strong></p> </p><div><p>There is nothing tricky about this print assuming your printer is well-behaved. Dimensional accuracy needs to be optimal, and layer change zits and/or nozzle oozing need to be minimal. <strong>I would encourage printing this part with a brim</strong> if you're worried about, or are having, first-layer adhesion issues - the front is quite thin. Print orientation is as the file is supplied (filter-threads on the build plate).</p> I only needed a single layer of blue painter's tape wrapped around the lens barrel to get a snug fit. You may need more or less than that depending on how your print turns out, and I'm also not sure how much the Rollei's lens barrel varies between batches. <h3>Post-Printing</h3> <p>You may need to clean/fix the M42 threads and/or 49mm filter threads for a good fit. I'd suggest testing/working thread fit with M42 extension tubes and 49mm filters that you're not in love with, or aren't afraid of needing to clean.</p> <p>You may want to paint or flock the front and rear of the adapter. I included a stencil you may use for self-adhesive sheets of flocking (you'll need to work out how to print it to scale [at 96 dpi I believe?]). Importing the SVG into Inkscape with its defaults and clicking print worked out for me.</p> <p>If you keep the square baffle, you'll need to line it up optimally with your camera's sensor by rotating the lens assembly. Once you get it right, you may want to make it more permanent by using epoxy. This will also reduce the already small possibility of having the lens pop into the throat of your camera towards the sensor.</p> <p>A Neewer extension tube or something like it comes in handy for that, as it has some flat baffles that you can use as a reference for alignment.</p> <h3>How I Designed This</h3> <p>Everything has been coded in-house by me via OpenSCAD. I also do mesh repairs in Freecad as my less-than-ideal code generates some messy STL files. This dinky little lens was sitting on my shelf untested for years, so I sat down and got the register distance close enough for government work, printed it out, pressed the lens in place, screwed it on to my camera, and here we are. My threads are based off of the ISO metric standard (<a href="https://en.wikipedia.org/wiki/ISO_metric_screw_thread">https://en.wikipedia.org/wiki/ISO_metric_screw_thread</a>).</p> <h3>Lens Notes</h3> <p>No focus or aperture controls are available via this adapter, but see my other designs (<a href="https://www.thingiverse.com/thing:4902657">https://www.thingiverse.com/thing:4902657</a>) to be able to mount this and focus it on Sony E-Mount cameras, or grab yourself a well-machined M42 helicoid for your camera that will do the job. Your focusing M42 adapter solution at its shortest will need to maintain or be less than M42's register distance of 47.46mm.</p> <p>The aperture<em>can</em> be adjusted, just not during a shoot - you'll need a small tool (screwdriver, pin, etc) to adjust it from the back. Installing a screw to press down the aperture mechanism will give it the ability to stay put. I salvaged this lens years ago and set it up that way, but I'm only just now adapted it, so unfortunately I'm not too keen on the details of that or the salvage operation. I'm 99% sure I used screws found in the camera. The lens' existing focus ring is meant to be set to infinity and left alone - the register distance is a bit rough and should be underestimated to guarantee infinity focus.</p> </div></p></p></p> Category: Camera
With this file you will be able to print A26 to M42 Lens Adapter with your 3D printer. Click on the button and save the file on your computer to work, edit or customize your design. You can also find more 3D designs for printers on A26 to M42 Lens Adapter.