Absolutely flat 40x70 cm plates for "Fast Operation Vise"
prusaprinters
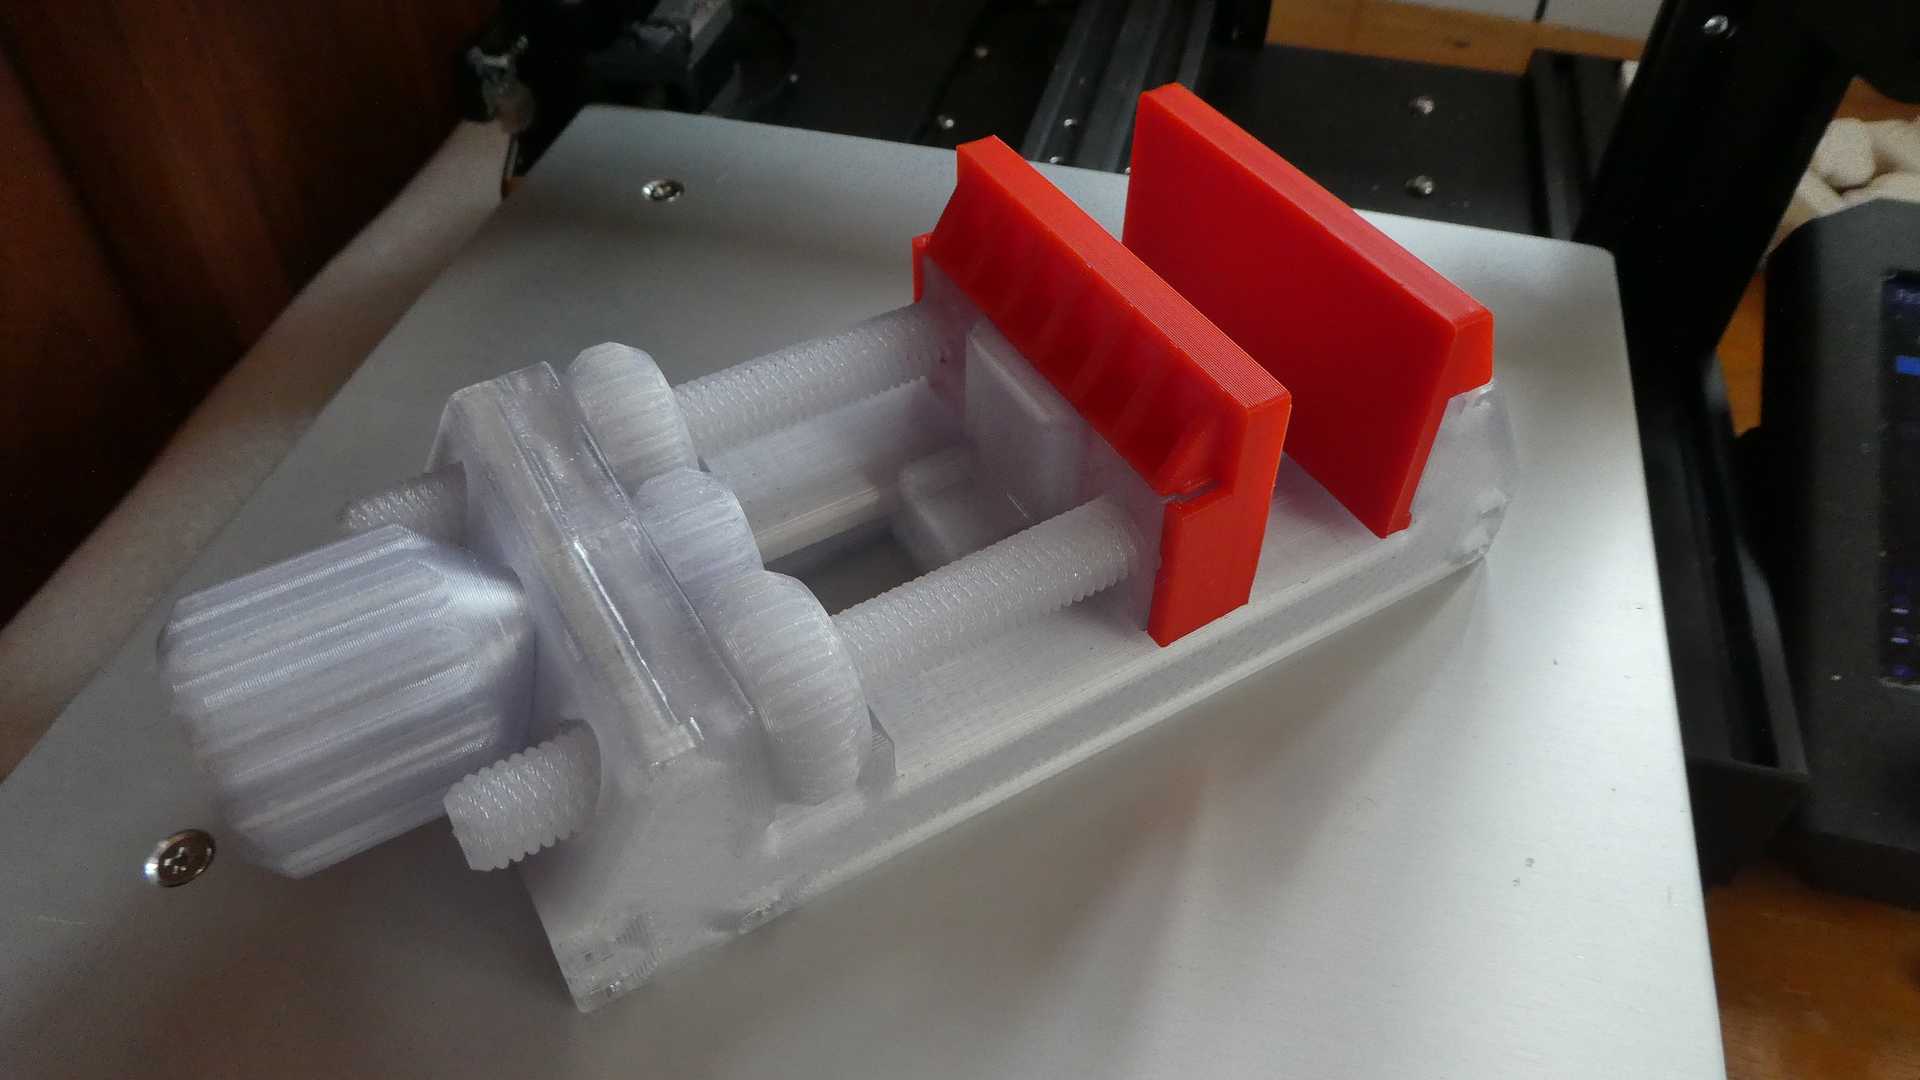
<p>The main reason why I made these plates was to learn FreeCAD - I wanted to learn and make something useful at the same time!</p><p>These plates compatible with:<br>* <strong>Fast-Operation Vise </strong>by bitsplusatoms(https://www.prusaprinters.org/prints/51074-fast-operation-vise).<br>* <strong>Yet ANOTHER Machine Vise</strong> by TheGoofy (https://www.thingiverse.com/thing:2064269).<br>* Other clones and remixes of these...</p><p>The original plates are too small (26x70 cm) and have holes in the middle, so they are not very good for gluing things together. I've made larger plates and their surface is absolutely flat to ensure the best contact of the things in the area of gluing. I found that this size of 40x70 cm is optimal for repairing damaged bike tubes with rubber patches. Larger plates can be less reliable and will require more plastic to make walls thicker and harder.</p><p>I fixed both plates on my vise easily, but I've attached a FreeCAD FCStd file so that you could modify some dimensions to fit your copy of vise better in case of tolerance issues - I didn't have the exact dimensions of the original plates so there can be a difference of a few microns due to measurement and print tolerance.</p><p>I printed the ones on the photo with red ABS using 0.6 nozzle and 0.32 layer height (high resolution is not needed here because the table will make the working surface of the plates absolutely flat). They should be printed flat side on the table. The only thing to be cared of is the 45 degrees rise of the mount in the non-movable plate, but my printer did it perfectly. Of course you can try printing it vertically but in this case you will never get as flat working surface as in the horizontal alignment. I recommend printing both parts completely solid (set the number of bottom layers to some large number like 999). In this case you will never bend or crack them when high pressure is applied. I printed the first layer with "concentric" pattern to make it look more attractive and the rest layers with "lines" pattern to make layer adhesion more reliable.</p><p>If you are really going to apply high pressure on your vise, don't forget that it is made from plastic and some of its parts will crack much earlier than these flat plates will! IMHO the first thing to upgrade is the "vise_sliding_jaw_plate.stl" part that should be printed with solid 100% infilled studs because the original studs have a huge hole inside and can break when high pressure is applied. Read my comment in the 'Makes' section of "Fast Operation Vise" if you don't know how to do it (https://www.prusaprinters.org/prints/51074-fast-operation-vise/comments#comment-194507).</p><p>I recommend to apply the max pressure to the place of the pads that is on the same level with the studs whenever it is possible. It is not good to apply the force on the upper part of the plates when there is nothing between the lower parts of the plates because the lower parts of the plates will tend to dismount (see my image for explanations). Unfortunately, the problem here is in the original mounting system and it can't be fixed without redesign of the vise. Just position your stuff according to the image instructions and everything will be fine.</p>
With this file you will be able to print Absolutely flat 40x70 cm plates for "Fast Operation Vise" with your 3D printer. Click on the button and save the file on your computer to work, edit or customize your design. You can also find more 3D designs for printers on Absolutely flat 40x70 cm plates for "Fast Operation Vise".