Acrylic Laser Cut Direct Drive Extruder
thingiverse
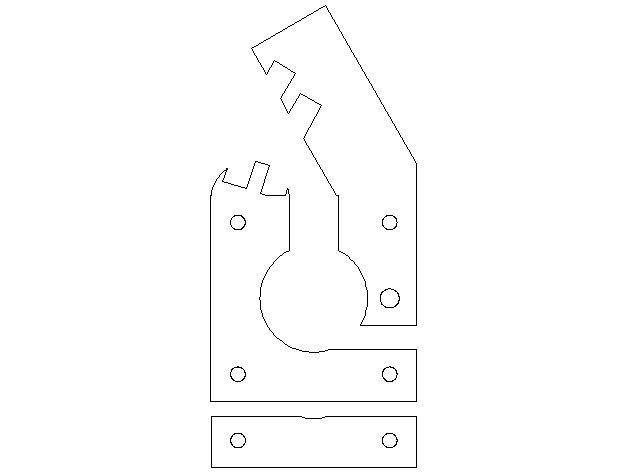
A direct drive extruder which can be cut in acrylic. Instructions Updated Design on 10 April I built this extruder, and found that there was no space for me to mount a pneumatic push fit connector, and hence, I have replicated the bottom of the extruder. Based on the size of the drive gear/hobbed gear, you can cut as many pieces of the bottom horizontal bar in the design, and while assembling stack them and stick them with CA glue or epoxy. Measure the center of the filament and then drill, tap to have space for the bottom of the Push Fit connector to be fixed. I used a 4mm to M5 Push fit connector which grips the 4 mm PTFE tube snuggly, which acts as the bowden tube. The hole for the M5 screw which fits for the bearing also has been reduced in diameter for 5 mm to 3.9 in design, to ensure there is sufficient acrylic to tap an M5 thread in the hole. Other changes include increasing the size of the spring notches to ensure the part is strong under the stress of the spring and doesnt break off. I Designed the entire extruder parts in Openscad, then projection on z=0 plane yielded the dxf. Use atleast 8mm thick acrylic to ensure stiffness. The bearing used is 625ZZ, but the design can be edited to accommodate a smaller bearing. This bearing is most commonly available in window rollers and can be purchased from hardware stores. Mounting directly on the motor is not recommended, because the 2mm flange of the shaft will interfere with this extruder. Use a spring to maintain even tension on the filament between the notches provided on the arm and the mount( see dxf to understand how this is done.)
With this file you will be able to print Acrylic Laser Cut Direct Drive Extruder with your 3D printer. Click on the button and save the file on your computer to work, edit or customize your design. You can also find more 3D designs for printers on Acrylic Laser Cut Direct Drive Extruder.