Active Cooler Fan Duct for Replicator 1 / Duplicator 4 / FlashForge / CTC / Makerbot / Bizer / Dual / extruder Cooling fan
thingiverse
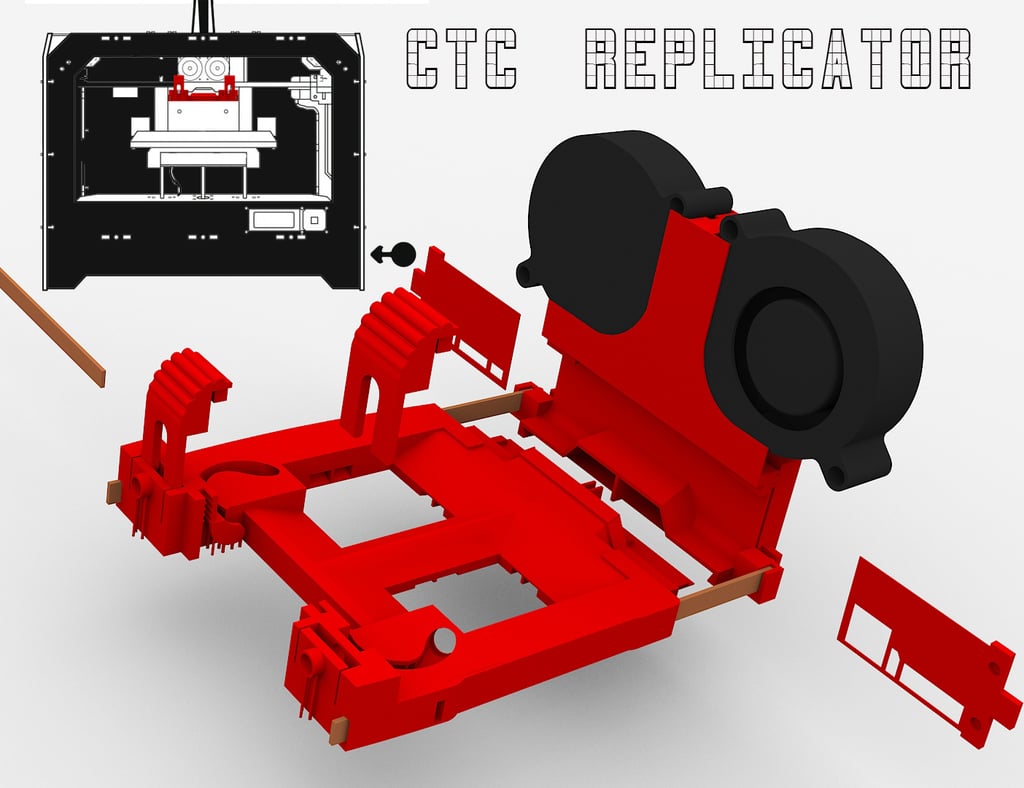
Here is the rewritten text: Make it Quick! Tl;DR 0 – Prerequisite 1: You Need to Have Done Extra Mosfet on the Board First Please see https://www.thingiverse.com/thing:1035348 0 – Prerequisite 2: The Rear Mounted Fans Need 3.0mm More Clearance So You Will Need to Glue On a 3mm Spacer for the Y Axis End Stop and Use Flush Counter Sunk Screws on the Logo Plate of the Z-axis. 0 – Optional Prerequisite 3: Because You Are Losing 3mm from the Rear of the Build Plate, You Can Reclaim This from the Front If You Use a Glass Bed with These Clips https://www.thingiverse.com/thing:3484743 1 Get All the Parts Together - Coffee Stirrers / M4 Nuts and Bolts / LED / 2x 5015 Blower Fans. 2 Print the Main Part Without Supports (Supports Are Already Built In) but Bridge Small Gaps. 3 The Back Part Holding the Fans Do Need Supports. 4 Sand and Cut the Coffee Stirrers Then Insert Them into the Holes, Put the Front One in First About This Active Cooler Was Designed for Use with the CTC Clone of the Original Makerbot Replicator 1 / Flashforge Creator. This Active Cooler Started in 2015 and Has Been Updated Periodically After Continued Use but I Haven't Updated It in a While Because It Is Working as Intended and Has Improved the Print Quality and Usability of My Printer Immensely. I Think It Is Good Enough to Release Now! It Doesn't Mean Its Perfect, It Can Always Be Improved and I Encourage Anyone to Do That. This Cooler Is Special Because It Can Be Printed in PLA and Won't Sag or Droop in the Heat! It Can Switch Airflow to Both or Only One Extruder to Control the Flow Giving You More Power. It Has an LED Holder That Focuses Light on the Part Below the Nozzle. It Lets You See Your Model Being Built and Doesn't Obscure View. Why Make Yet Another Cooler? Cooling Plastic Just After Its Been Extruded Is Essential on FDM Printers and There Is a Lot of Choice for Cooling on the Makerbot Clones. I Tried All of the Available Coolers but Found Problems with All of Them, They All Needed More Work. I Really Liked Some of the Ideas and the Different Ways They Solved the Problem But Some Didn’t Blow Out Enough Air and Others Started to Sag Under the Heat, Some Would Cause Parts to Warp Because of Badly Targeted Airflow and Most of the Coolers Were Not Compatible with My Printer. Installation With Your Printed Components in Hand Snip Off Any Support Structures and Sand Off Any Nasty Lumps Then Make Sure Everything Fits Together. 1 The Rear Fan Holder (Twin Fan Holder 3.6) Should Be Placed onto the Extruder Carriage First, It Has Hooks That Fit into Holes on the Carriage. 2 Fit the LED’s into the Main Body (AC Body 84.16.LPS.R) Then Bend the Wire Around and Clip it in to the Gripper. (I Run the LED’s Off the Fan Voltage). Put Two Nuts into the Front Clamps. 3 Slide the Main Body (AC Body 84.16.LPS.R) into the Rear Fan Holder (Twin Fan Holder 3.6), Hold the Body (AC Body 84.16.LPS.R) in Place While You Insert the Fork Hooks (ARM3) into the Carriage and Main Body (AC Body 84.16.LPS.R) Then Insert the Bolt and Tighten Lightly. BOM (Bill of Materials) Prerequisite: You Need to Have Done Extra FET on the Board First. Please See https://www.thingiverse.com/thing:1035348 McDonald’s Splints: Wooden Splint Coffee Stirrers (Order a Meal and Thief a Handful) Bolts: 2X M4 Diameter Screw Head Bolts 12mm Long with 2X Nuts LED's: 2X LED's with a Resistor to Work Off 24v or 12volt If Used in Series. Centrifugal Fans: 2X 12v the Blower Fans Are Called “5015 Fan”
With this file you will be able to print Active Cooler Fan Duct for Replicator 1 / Duplicator 4 / FlashForge / CTC / Makerbot / Bizer / Dual / extruder Cooling fan with your 3D printer. Click on the button and save the file on your computer to work, edit or customize your design. You can also find more 3D designs for printers on Active Cooler Fan Duct for Replicator 1 / Duplicator 4 / FlashForge / CTC / Makerbot / Bizer / Dual / extruder Cooling fan.