Adafruit Feather Case v2
prusaprinters
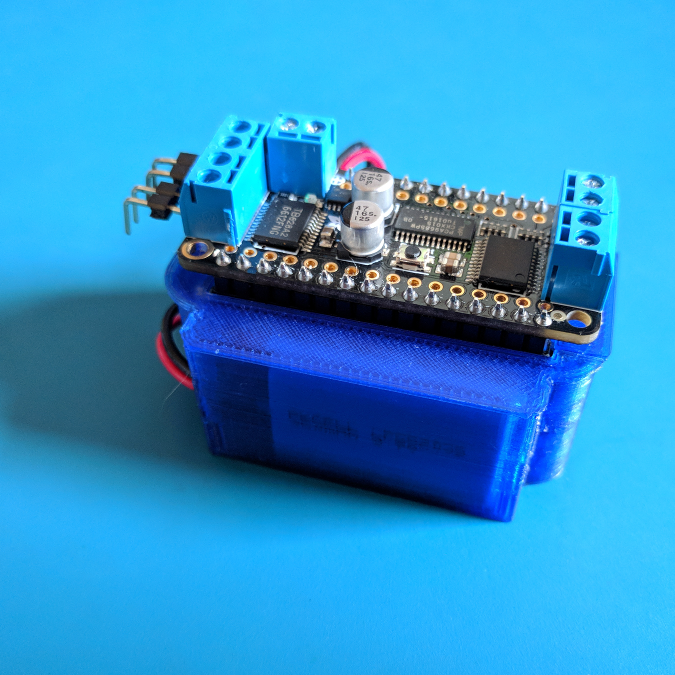
<h3>Features</h3><ul><li>Optional compartment for a 350mAh LiPoly battery (with a zip-tie strain relief slot)</li><li>Slot for a rare earth badge magnet (source provided)</li><li>Support for Adafruit's stackable Feather wings</li><li>Cable management and routing slots</li><li>Upside down board support (battery version only)</li></ul><h4>Materials Required</h4><ul><li>1x Adafruit Feather (ESP8266, Bluefruit, ESP32, Adalogger 32u4 were used during prototyping/building)</li><li>2x M2.5 x 6mm socket head cap screws (source: <a href="https://www.trimcraftaviationrc.com/index.php?route=product/product&product_id=182">Trimcraft Aviation RC</a>)</li></ul><h5>Battery (optional)</h5><ul><li>1x Lithium Ion Polymer Battery - 3.7v 350mAh 552035 - <a href="https://www.adafruit.com/product/2750">PKCell 552035, Adafruit</a>. There are shipping restrictions on lithium polymer batteries, so a local source with the same model/dimensions might be more suitable.</li></ul><h5>Magnet</h5><ul><li>1x Badge Magnet - Amazon 10-pack -- the one <a href="https://www.adafruit.com/product/1170">sold by Adafruit is tested as well</a><br> </li></ul><h3>Printing</h3><p>Print these parts:</p><p>1x - Case (choose between the battery and non-battery version)</p><ul><li>1x - Cover (choose between the JST access and more enclosed version)</li><li>1x - Magnet retainer</li><li>1x - Reset button</li></ul><p>2x - M2.5 plastic spacers</p><h3><br>Assembly</h3><h5>Battery</h5><p>After printing all three parts, place the battery in first. The battery wiring can be routed through the front of the case, and looped up the side to the Feather's JST header. If desired, add a small zip tie (for a bit of strain relief) on the front of the case.</p><p>For the visually inclined, photos are provided below.</p><h5>Badge magnet and retainer</h5><p>The badge magnet goes into the case with the warning symbols facing up.</p><p>For magnets with a metal-only plate: Insert the magnet retainer with the 1st printed layer facing upward.</p><p>For magnets with a plastic backing: Flip the magnet retainer over so that the last printed layer faces upwards.</p><p>Press the retainer through the clips. The retainer should click in and press against the magnet. If there is space between the retainer and magnet, the retainer might need to be flipped over.</p><h5>Feather PCB</h5><p>Finally, add the Feather PCB into the case, ensuring the board seats into the case's rear notches fully. Carefully press the board down in front.</p><p>Attach a printed spacer to a screw by screwing it on.</p><p>Finally, attach the screw to the Feather PCB. The LEDs will be in close proximity to the screw heads, but should not interfere.</p><h5>Reset Button</h5><p>Attach the button to the lid. It requires a bit of force, so the best way may be to either shave off a bit of filament on the button with a file, or to press it in by tapping the cover onto the button.</p>
With this file you will be able to print Adafruit Feather Case v2 with your 3D printer. Click on the button and save the file on your computer to work, edit or customize your design. You can also find more 3D designs for printers on Adafruit Feather Case v2.