Adafruit Pi Box - With LCD & RS232 DB9
thingiverse
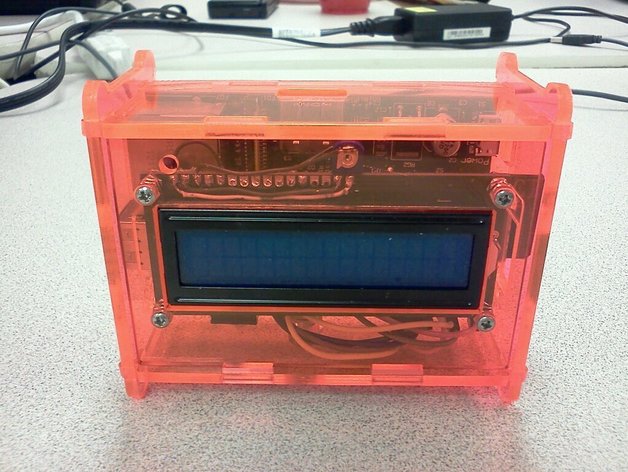
Modified a Raspberry Pi Box to accommodate Longtech 16x2 LCD Module, and added an RS232 port on the side using a Max3232 chip for TTL UART-to-RS232 conversion. The LCD can be purchased from NKC Electronics, while code for driving it via Python is available on GitHub by Lance "lrvick". To hold the LCD in place, use four 2-56 threaded 1/2" screws and three hex nuts each as makeshift standoffs. These items can be purchased from RadioShack. This design is sized for 3mm acrylic, with proper cuts indicated by colors in the provided SVG files. For a recessed screw look, adjust laser settings accordingly when cutting the acrylic.
With this file you will be able to print Adafruit Pi Box - With LCD & RS232 DB9 with your 3D printer. Click on the button and save the file on your computer to work, edit or customize your design. You can also find more 3D designs for printers on Adafruit Pi Box - With LCD & RS232 DB9.