Adjustable angle mount for Rigidbot LCD panel
thingiverse
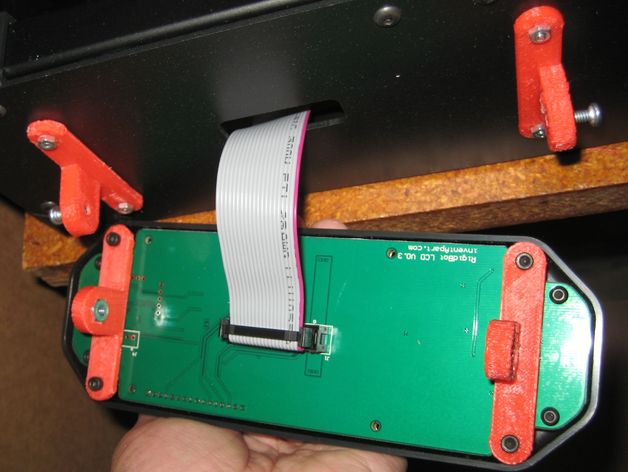
Adjust the display angle without bending over - set it upright instead!\nManufacture four duplicate brackets/standard parts. Press one 6-32 nut into the hex socket of two, and attach those to the LCD screen using M3-8mm screws. Ensure the nuts are angled inward toward each other.\nMount the remaining brackets on the Rigidbot plastic exterior panel, positioning empty cavities facing outward. Secure these with a screw from either side on the LCD attachment.\nThe drill holes intentionally reduced in size should be cleared up with a 9/64" bore tool to allow smooth attachment. For effective results, printing the nut receptacle end-first against the build plate delivered the best outcomes for me.
With this file you will be able to print Adjustable angle mount for Rigidbot LCD panel with your 3D printer. Click on the button and save the file on your computer to work, edit or customize your design. You can also find more 3D designs for printers on Adjustable angle mount for Rigidbot LCD panel.