Adjustable Drive Block Upgrade for Replicator 2 and 1
thingiverse
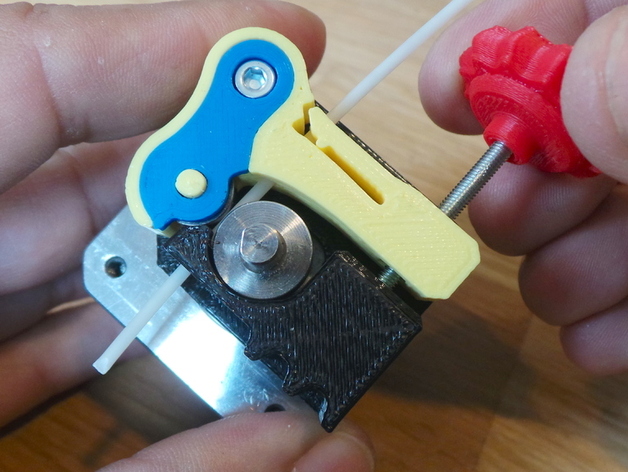
An adjustable drive block for Replicator for experimental use. Via a knob fitted to a screw, the pressure of the axial bearing against the filament can be adjusted and fine-tuned. This design does not need a metal spring and relies on the flexibility of the lever. Alternatively, it can use a rigid lever (supplied) and a small piece of rubber which is compressed by the M3 x 35 mm crew's tip. Two different lever shapes are supplied for testing between flexible and rigid modes. By Creative Tools Home - Things - GooglePlus - Twitter - Facebook - Youtube - Instructables - Instagram - Flickr - Vimeo - LinkedIn Instructions Please note that this is an experimental design to test different and adjustable filament grip pressures. It is not evaluated to perform better or worse than the standard extruder block. For instructional images please see: http://flic.kr/s/aHsjHC7f6H 3D print all the parts of this thing - preferably two sets. Use two shells and 30% to 40% infill. Turn off your MakerBot Replicator and remove the power cord Un-mount your current extruder stepper motor with its block Unscrew the current block from the stepper motor Remove the support material from the base plate Cut a 4 mm long segment of an O-ring with roughly 3 mm width Place the small rubber bit into the 3 mm hole of the base plate and press it firmly down into the bottom of the hole Fix the base plate to the extruder with a small M3 x 6mm flat head cap screw Place the axial ball bearing (4 x 10 x 4 mm) on the lever Place the cover over the bearing and press it firmly to fit into the recession of the lever. If necessary, fix it with glue. Insert an M3 Nylock nut, upside down, into the tip of the lever. Place a drop of glue into the hole of the adjustment screw knob. Insert the M3 x 35 mm screw into the knobs recession. Glue the bottom part of the knob to fix the screw head in place Let the glue set! Insert the screw with the knob into the Nylock nut. Place the lever with the bearing and adjustment screw onto the base plate. Use an allen M3 x 16 mm to attach the lever to the base plate and stepper motor housing. Do not over-tighten! Put a bit of filament into the extruder and adjust the knob to tighten the bearing against the filament and drive wheel. Push and pull the filament and try different pressures to get a sense of how much pressure is optimal. Place the stepper motor with its attached new block into the Replicator in the usual manner. Turn on the power and put the Replicator on mode for loading filament. When the temperature reaches 230 C, insert the filament through the drive block. Unscrew the knob so that the filament passes by the drive wheel with no effort. You should now be able to manually extrude some plastic filament with the force of your fingers. Tighten the knob until you feel that the drive wheel grips the filament and extrudes it by its own power. Try different values to get experience. Remember this is an experimental design! Have fun! :) Rigid or flexible? A rigid version of the lever is supplied if you want to try that. To offer some flexibility or spring action, you can insert a small piece of rubber material into the small hole of the base plate where the tip of the adjustment screw sits. Need one? If you don't have your Replicator running or have access to the screws and bearing, get it at http://bit.ly/16bncdX
With this file you will be able to print Adjustable Drive Block Upgrade for Replicator 2 and 1 with your 3D printer. Click on the button and save the file on your computer to work, edit or customize your design. You can also find more 3D designs for printers on Adjustable Drive Block Upgrade for Replicator 2 and 1.