Adjustable Feet for MakerBot
thingiverse
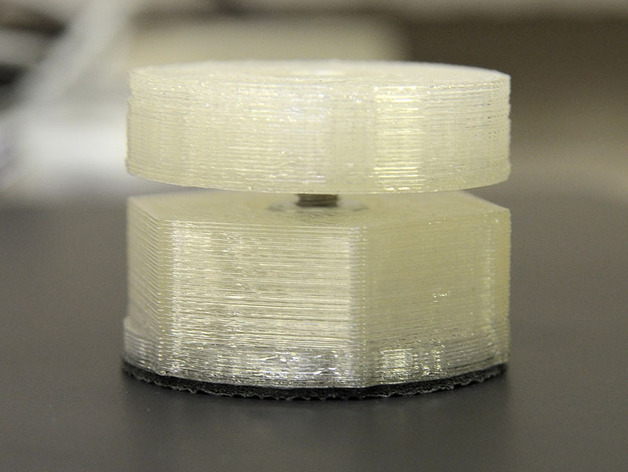
This adjustable foot system, specifically designed for MakerBots, allows for easy leveling. For installation, clean out bolt cavity rings in the foot and add a washer and bolt from the bottom, followed by another washer and tighten the #10-32 nut from the top. As for the receptacle assembly, insert a nut into its hex-shaped cavity, fit the plastic ring over it, and install the foot into the side with the retainer ring. Secure the anti-skid pad using double-sided tape on the bottom of the TOM. This product is brought to you by www.tinkerdepot.com, contact rick@tinkerdepot.com for inquiries.
With this file you will be able to print Adjustable Feet for MakerBot with your 3D printer. Click on the button and save the file on your computer to work, edit or customize your design. You can also find more 3D designs for printers on Adjustable Feet for MakerBot.