Adjustable Raspberry Pi camera mount for PowerSpec Ultra 3D Printer
thingiverse
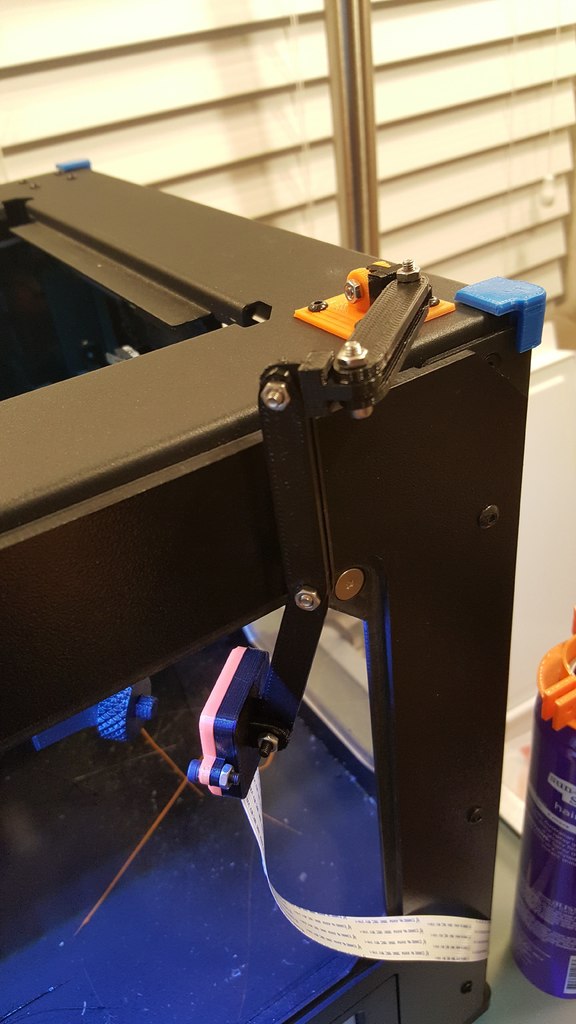
Uses: The PowerSpec Ultra is essentially the guts of the Flashforge Dreamer with the body cloned from the Flashforge Creator Pro, although I think some early models were actually full FFCP clones. Unfortunately, this means it's not open source and therefore incompatible with most open source print aid services like OctoPrint. Although there has been great discussion on getting it going here. While OctoPrint may not work, 3DPrinterOS managed to support the PowerSpec Ultra somehow. I've used it a bit now and it works pretty well, but there's a bug that multiple people have reported where the print will fail, but the entire printer will lock up and maintain temperature directly on the print. This is obviously a pretty significant safety hazard, so I've stopped using it. Hopefully they work out the kinks and I can come back to it later. While services like OctoPrint and 3DPrinterOS allow you to monitor your prints via camera, you can still set it up yourself with a Raspberry Pi using these instructions. What you need: I've included arm linkage at 40, 50, & 60mm lengths, but you really only need 6 of the 60mm lengths. You should also print 2 of the arm_joint model. M3 screws are required. That's just to replicate the setup that I have, but it's honestly very customizable. Print whatever you want! How to set up a streaming webcam with your Raspberry Pi: https://pimylifeup.com/raspberry-pi-webcam-server/ The different bases: If you have the PowerSpec Ultra, I recommend printing the large base as it'll allow you to perfectly connect the base to existing screws. You can still use the small base; it just connects at opposite corners and looks a little funny. I'm really just including it for anyone that might not have the PowerSpec Ultra since it may work better for them. If you are using the large base, do not unscrew all 4 bolts at once! You don't want to drop one of your axis arms down. Unscrew 3 of them, screw the base most of the way in on one corner, and then unscrew the forth bolt and swing the mount around to line up with the other holes. The different front cases: I removed the pins out of the case for the v2 version of the camera because they seemed more likely to break than do anything useful. I haven't modified the v1 version from the original that u/ReMake posted since I don't have the v1 camera. Just wanted to put everything in one place for everyone else. Adjusting the camera: If you have the v2 version of the camera, I would print this adjuster: https://www.thingiverse.com/thing:1574661. I recommend printing the taller socket style one as I was constantly hitting my M3 bolts using the wrench style one. Print a case mount while you're at it: I created this Raspberry Pi case mount: https://www.thingiverse.com/thing:2856788
With this file you will be able to print Adjustable Raspberry Pi camera mount for PowerSpec Ultra 3D Printer with your 3D printer. Click on the button and save the file on your computer to work, edit or customize your design. You can also find more 3D designs for printers on Adjustable Raspberry Pi camera mount for PowerSpec Ultra 3D Printer.