Air Arms S410 magazine - .22
thingiverse
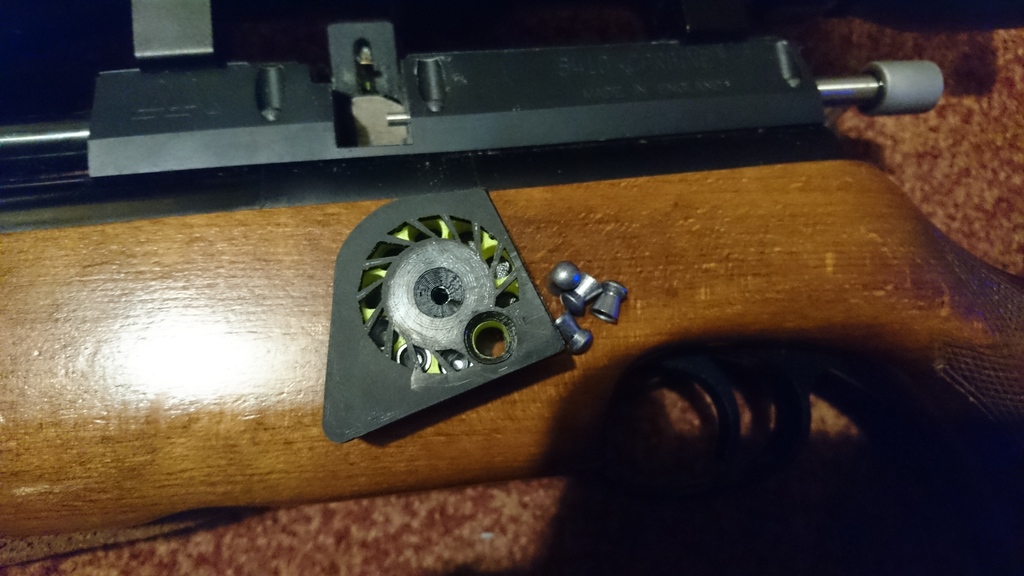
Complete replacement/spare 10 shot magazine for the Air Arms s410. I finally managed to finish it!! the version 2 mag housing and mag cover with the V1 mag barrel are a complete success and I can happily say it's working just as good as the original! UPDATE: I've been testing these mags for a little while now and all seems pretty good with them, all still working just as good as the original with no problems. Mag barrel: Printed in Hobbyking ABS with a 0.2mm nozzle at 0.1mm layer height, 20mm/s extrusion 230 degC, bed 100C using ABS slurry. It will "work" with a 0.4mm nozzle but i found the 0.2mm gave far superior results, minimal post processing and greater dimensional accuracy. Print with supports for the cut outs, PLA can be printed in current orientation but I found flipping it 180deg for ABS gave better cut outs for the o-ring. Mag housing: Printed in VANGogh ABS, 0.4mm nozzle, 0.2mm layer height, 240C EXT, 100C bed. must be printed with supports in supplied orientation, highly recommend using support roof with at least 3 layers to give best results. For ABS increase all axis by 1%, PLA, print at standard size. Mag cover: printed in VANGogh ABS, 0.4mm Nozzle, 0.2mm layer height, 240C EXT, 100C bed. no supports necessary and print in supplied orientation. For ABS, increase all axis by 1%, for PLA, print as is. Post processing and build: clean up all parts as necessary with a fine file/ sand paper. ensure all pellet holes in mag barrel are clear of protrusions, a .22 pellet should drop strait through the hole but equally it shouldn't be too baggy if you have got it right. fit barrel to mag housing and check the rotation, it should spin with very slight friction and no snagging (I found mine were catching slightly on the lower R/H opening of the mag housing but a couple of file strokes were all that was needed). Fit cover to housing and test fit to rifle, you will need to file/sand the rear of the mag housing until you get a nice "snug" fit (an unfortunate side effect of having to use supports for this job). once you're happy with the fit and you have tested to ensure the mag cycles correctly, remove the mag barrel and fit an O-ring (i'm using the original AA mag O-rings pt/no: S556, (they cost me £3 for 10 off ebay). re-fit barrel into the mag housing and rotate the mag barrel so a detent lines up with the spring retainer. Drop a 4mm steel BB into the spring retainer. I found the correct size springs hard to find so I bought a 20mm long, 4mm O/D, 0.5mm carbon steel wire spring and cut it down into 6mm lengths (to be honest i could get away with shortening the spring a bit as mine is producing a bit too much force) other springs will work but you will need to experiment. when fitted, the mag should not take too much effort to index. Refit the mag housing cover and secure with a short countersunk head self tapping screw (the hole is 3mm so it's your choice of screw), ensure the screw head is completely flush or below the surface of the mag housing cover or you'll do some damage to your rifle! If you make one, please click the "made one" button and upload your results I'd love to see how others turn out, i'm thinking of printing some red or florescent ones for using at the range so it's easy to see a mag is fitted and I'm also going to try printing a mag barrel in glow in the dark ABS to see if it's possible to determine shots left without using a torch.....may even try a wood fill casing! and if you come across any issues please let me know and I'll do my best to help out enjoy!
With this file you will be able to print Air Arms S410 magazine - .22 with your 3D printer. Click on the button and save the file on your computer to work, edit or customize your design. You can also find more 3D designs for printers on Air Arms S410 magazine - .22.