Air Filtration System for 3d printers
thingiverse
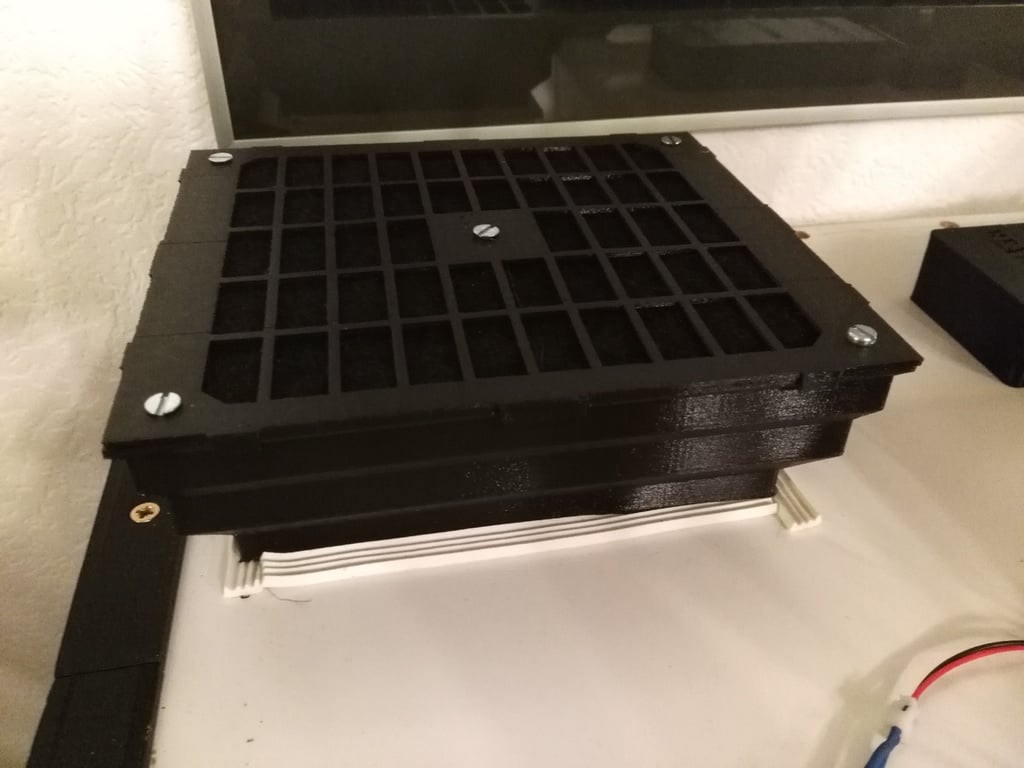
2018-02-15: Updated the filter towers a little bit, now better printable. 2018-02-16: Coarse Filter updated to V4, was a little bit too large, fits better now. I love 3d printing but I hate the smell of it and some research papers indicate, that the flue might be harmful, so I designed this air filtration system. Before you can install the filter, you need to cut a 116mm hole into the housing. If you put the fan into the filtertower, make some extra space for its cable. You will also need the following things: - a 120mm fan (mine can make up to 2000rpm, the fan should be powerful. Don't be scared, you won't hear it through the whole filter material). - some kind of coarse filter material (I used a pollen filter). - a fine filter of a vacuum cleaner (I used Rowenta ZR004801, any other filter with a size of 166 x 142 x 37mm or lower should work - and activated carbon filter (I used hh50705-v0parent activated carbon filters for cat-it cat toilets, 3-4 Euros at amazon). Any other filter with a thickness of up to 8mm and a size of 160 x 149mm will do. - 5 screws M3 x 14 and nuts - 4 screws for the filtertower itself, length according to housing and if you install a fan or not The filter system consists of 3 types of filter which need to be installed in the following direction: - Everything goes into the filtertower. There are two versions: One has enough space to install a 120mm fan in it, another one is smaller, to have to install the fan under the filtertower. The tower can be printed without any support, put the side with the fan grill onto the heat bed. It will work, even my stock A8 printed it perfectly. - Coarse filter: That's the first layer of filtration. I used a pollen filter for my windows. But any thin filter material should work. Put the filter material in an cover it with the "coarse_filter_without_fan_V3.stl" or "coarse_filter_with_fan_V3.stl". If you don't install the fan on top of it, put 4 screws (up to M4) through all of it and also use these screws to connect the filter tower to the housing. The distance between the 4 holes is 105mm. - You can install the 120mm fan on top of the coarse filter and install it with the screws for the coarse filter and filtertower. You might want to use the fan frame stabilizers I uploaded: https://www.thingiverse.com/thing:2782394 - Now put the fine filter on top. First you need to cut off the extra thing which is used to fasten it in the vacuum cleaner. Best use a small saw for it. - Put the activated carbon filter into the "activated_carbon_filter_bottom_V2.stl" and then put the activated_carbon_filter_top_V5.stl on top. The middle parts of both fit together pretty tightly. Use the M3 screws to fasten both parts together tightly. Now put it on top of the filter tower. This part of the system has not yet been tested, but I'm pretty sure it will work. Any ideas, questions, suggestions? Just comment. You made one? I'd love to see some pictures! :) Disclaimer: I don't know a lot about air filtration, I did some research, but I can not guarantee the efficiency of this filter system. You're responsible for yourself. I used the following filters for the system: Rowenta ZR004801 Hepa-Filter Compact Power H12 (available at amazon germany): https://www.amazon.de/gp/product/B004T30CVQ/ref=oh_aui_search_detailpage?ie=UTF8&psc=1 cat-it active charcoal filter: https://www.amazon.de/gp/product/B001NOEG3E/ref=oh_aui_search_detailpage?ie=UTF8&psc=1
With this file you will be able to print Air Filtration System for 3d printers with your 3D printer. Click on the button and save the file on your computer to work, edit or customize your design. You can also find more 3D designs for printers on Air Filtration System for 3d printers.