Air filtration unit with HEPA and Active Carbon filtration (Phillips compatible)
prusaprinters
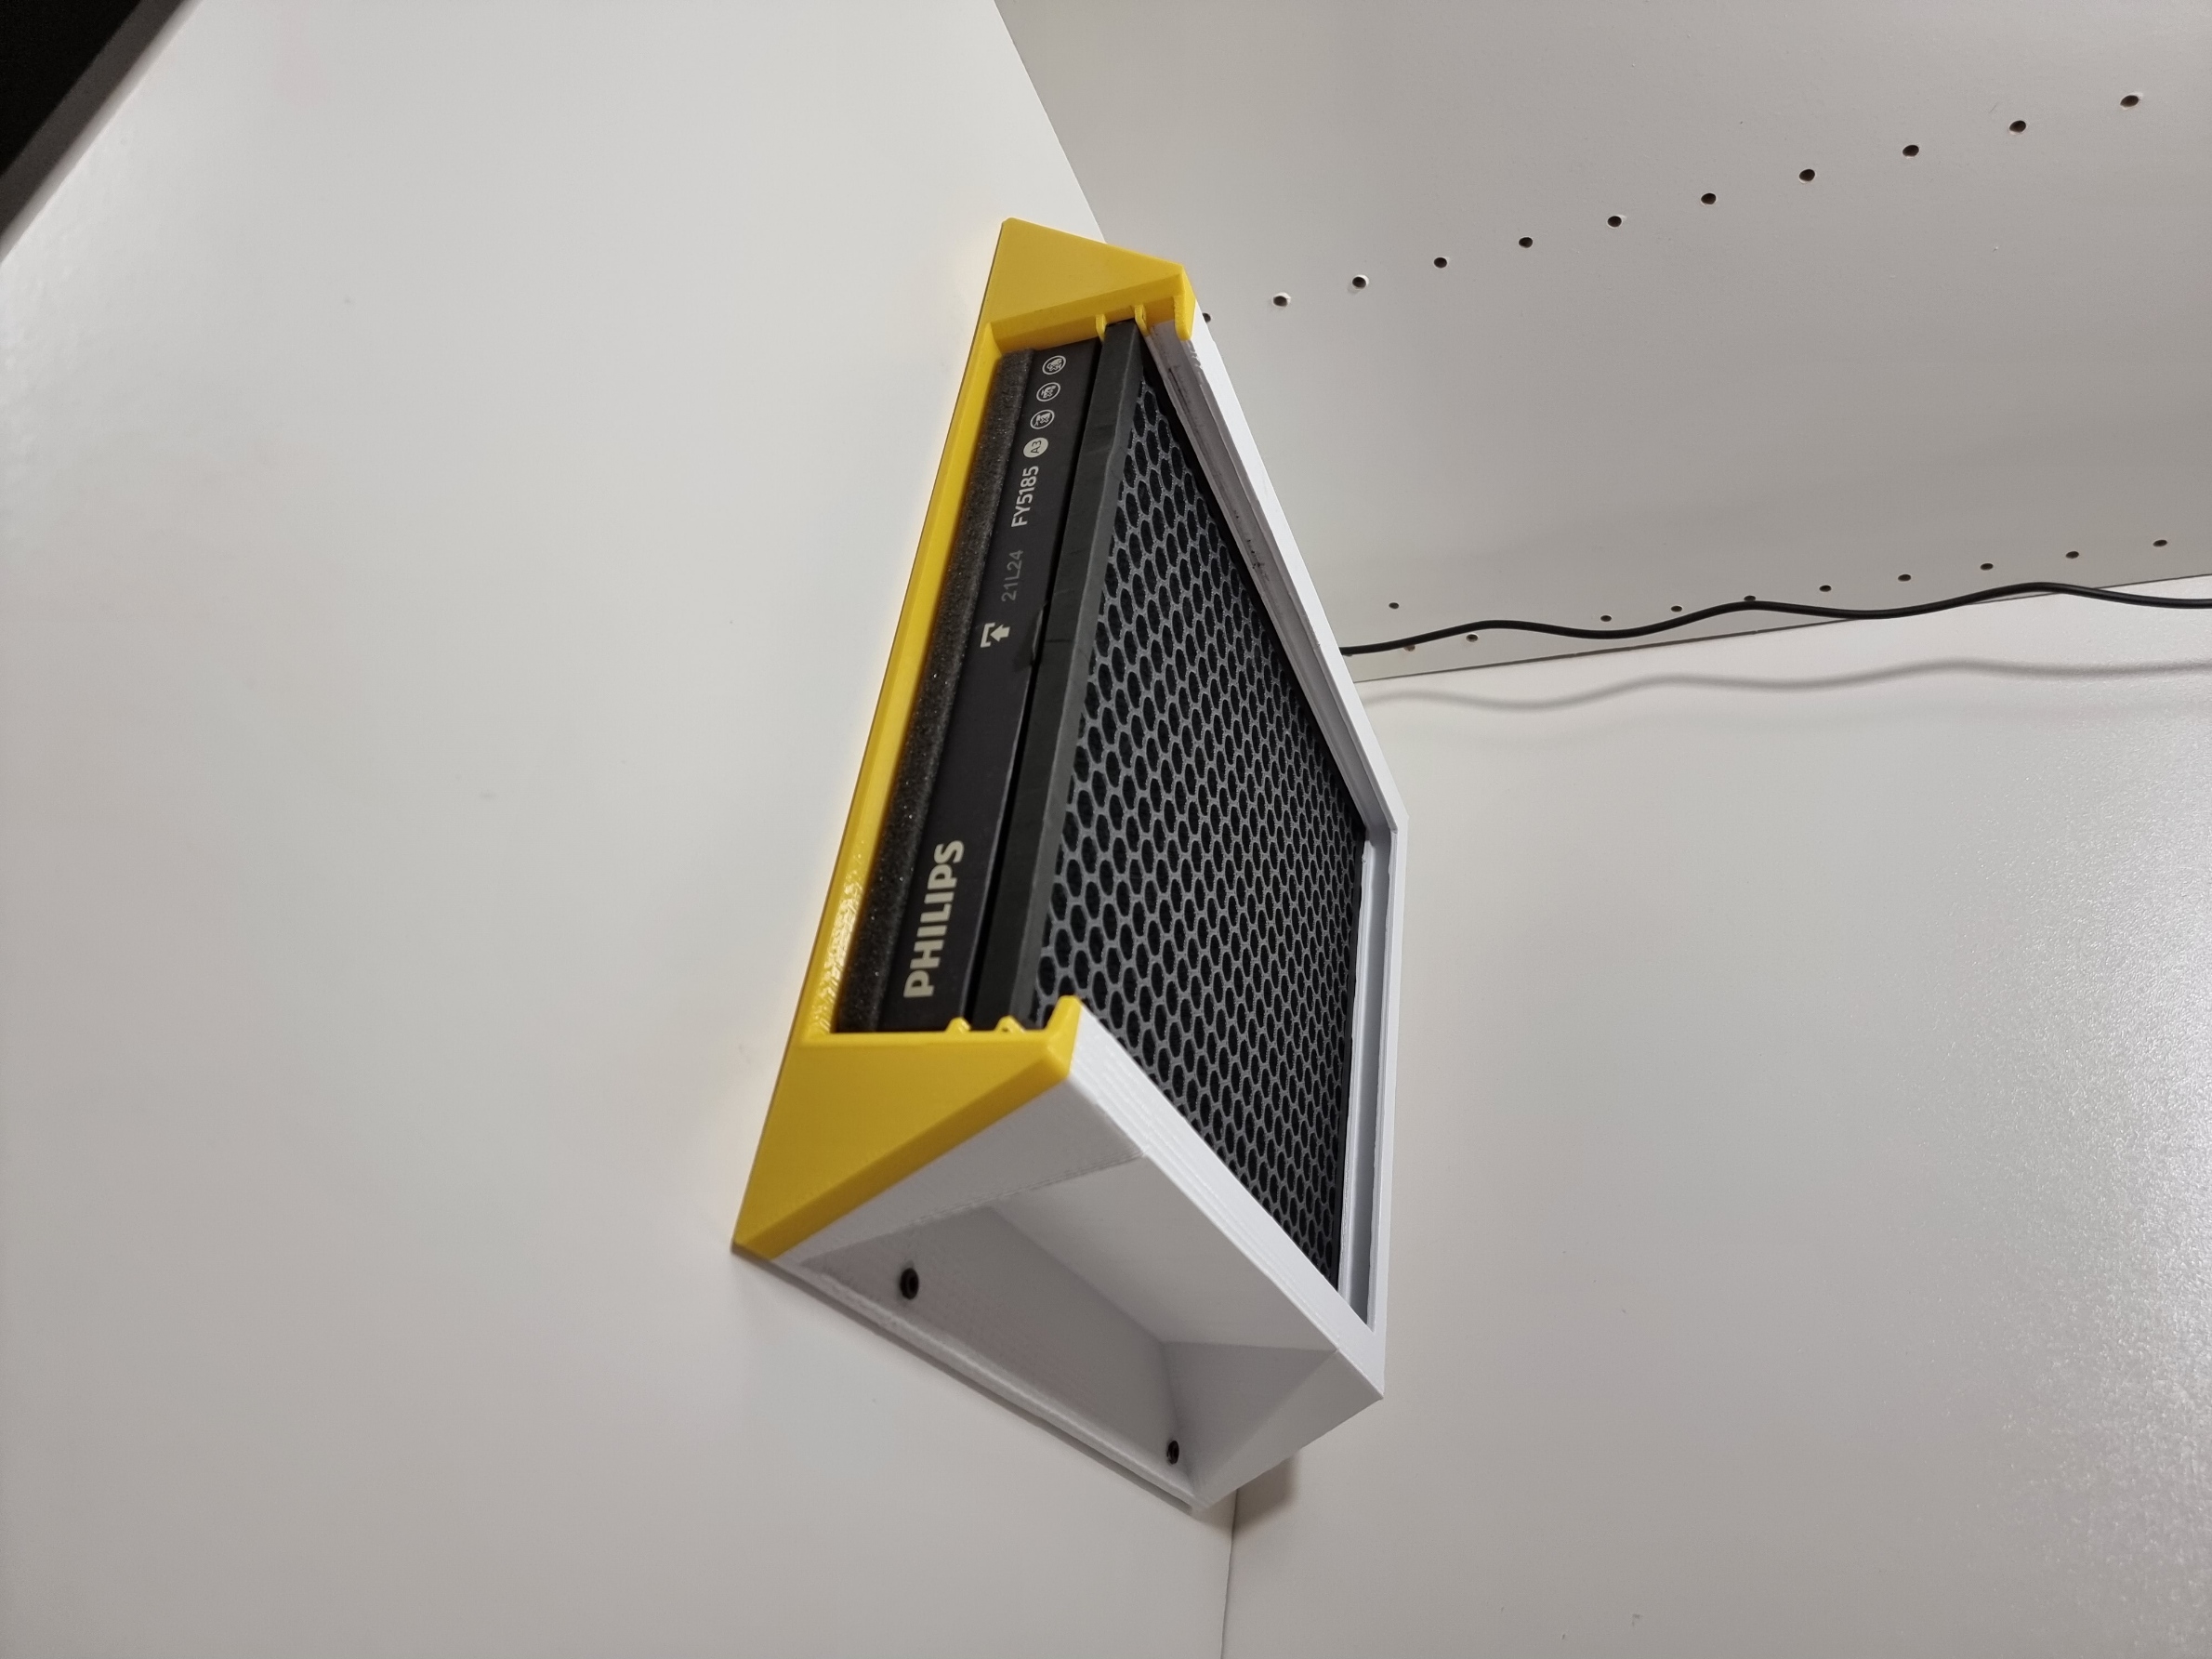
<p> </p><p><strong>What;</strong><br>I recently started resin 3D printing and did some research on the harmfulness of 3D printing in general.<br>While some filaments/brands are better than others, it appeared that melting 3D printing in your bedroom might not be such a great idea.. (who thought) Even PLA emits small amounts of particles and harmful odours that will not benefit your health. <br><br><strong>Why;</strong><br>Because of this, I built an enclosure for myself to capture these fumes. However, I noticed that if you do not suction out these fumes, they will always leak out, or escape when you are going to grab your print.<br><br>That is why I chose to take the effort and design an easily printable, 120mm fan air filtration system that uses shelf-parts for filters, fans, as well as controls<br><br><strong>You'll need;</strong><br><i><strong>4 fan type;</strong></i><br>- 3D print “3DP1-Fanholder_4fan”<br>- 4x 120mm Computer case fan (recommended PWM)<br>- 1x 1-to-4 way PWM fan splitter<br>- 1x Noctua na-fc1 PWM controller<br>- 1x 12V power supply with connector to + and - wires<br>- 1x Phillips FY5185/30 HEPA filter<br>- 2x Phillips FY5182/30 Active carbon filter (1x also possible)<br><i><strong>6 fan type;</strong></i><br>- 3D print “3DP1-Fanholder_6fan”<br>- 6x 120mm Computer case fan (recommended PWM)<br>- 1x 1-to-6 way PWM fan splitter<br>- 1x Noctua na-fc1 PWM controller<br>- 1x 12V power supply with connector to + and - wires<br>- 1x Phillips FY3433/10 HEPA filter<br>- 2x Phillips FY3432/10 Active carbon filter (1x also possible)<br><br><strong>How / Assembly;</strong><br><i><strong>Air filtration unit;</strong></i><br>1) <br>Put the cables of the case fans thru the holes inside of the printed part and carefully guide them out while you slide the fan in place. Secure the fan with the screws supplied with the fans. I used “Noctua NF-P12 redux-1700 PWM”<br>(note: make sure the blowing direction is facing outwards)</p><p>2)<br>Attach the fan cables to your PWM splitter, and if necessary glue/attach it to the top of the 3D print.</p><p>3)<br>Carefully make a square hole in the top of your enclosure with a jigsaw. If you are using the 4fan version the hole needs to be 252x295mm, for the 6-fan version it should be 258x385.</p><p>4)<br>Place the air filtration unit in the hole from the inside of your enclosure and mount it using screws. (watch out for the cables so they do not get pinched.) Depending on your enclosure you might need to pre-drill the holes.</p><p><i><strong>Controller and power;</strong></i><br>1)<br>Cut off the PWM motherboard header cable of the Noctua controller unit.</p><p>2)<br>Snip the SATA connector just after the connector.</p><p>3)<br>There are 2 wires, 1 yellow(+) and 1 black(-). Attach them to your 12V power supply</p><p>4) (optional)<br>Drill some holes in a corner to guide the power and PWM wires inside of the enclosure. Now you can place the Noctua control unit somewhere more accessible if your enclosure is high up on a table or closet. Alternatively, you can just stick it on the outside.</p><p>5) connect the PWM out of the controller to the PWM in the connector of your splitter.</p><p><i><strong>Finishing;</strong></i><br>Place the Hepa filter in the holder from the inside, and the AC filter below that. With the controller, you can set the speed of the PWM fans of the filter. </p><p>Depending on the fans you choose, you can get <strong>up to 611 cubic meters/hour of air circulation. (with 6 fan)</strong> or <strong>407 cubic meters/hour with 4 fan.</strong> (with Noctua NF-P12 redux-1700 and optimal airflow)</p><p> </p><p><strong>Tips;</strong><br>- Leave some holes in your enclosure, like handles. This way the air can circulate, and filter more. If you enclose it completely, it cannot suck the air out because it would create a vacuum<br>- Works best with IKEA lack or IKEA pax (which I used)<br>- If using Lack; please do not place it on the top since the cartonboard will lose too much rigidity. Please attach the unit to the sides or back panels of your enclosure</p>
With this file you will be able to print Air filtration unit with HEPA and Active Carbon filtration (Phillips compatible) with your 3D printer. Click on the button and save the file on your computer to work, edit or customize your design. You can also find more 3D designs for printers on Air filtration unit with HEPA and Active Carbon filtration (Phillips compatible).