Air Scrubber for LACK Enclosure
prusaprinters
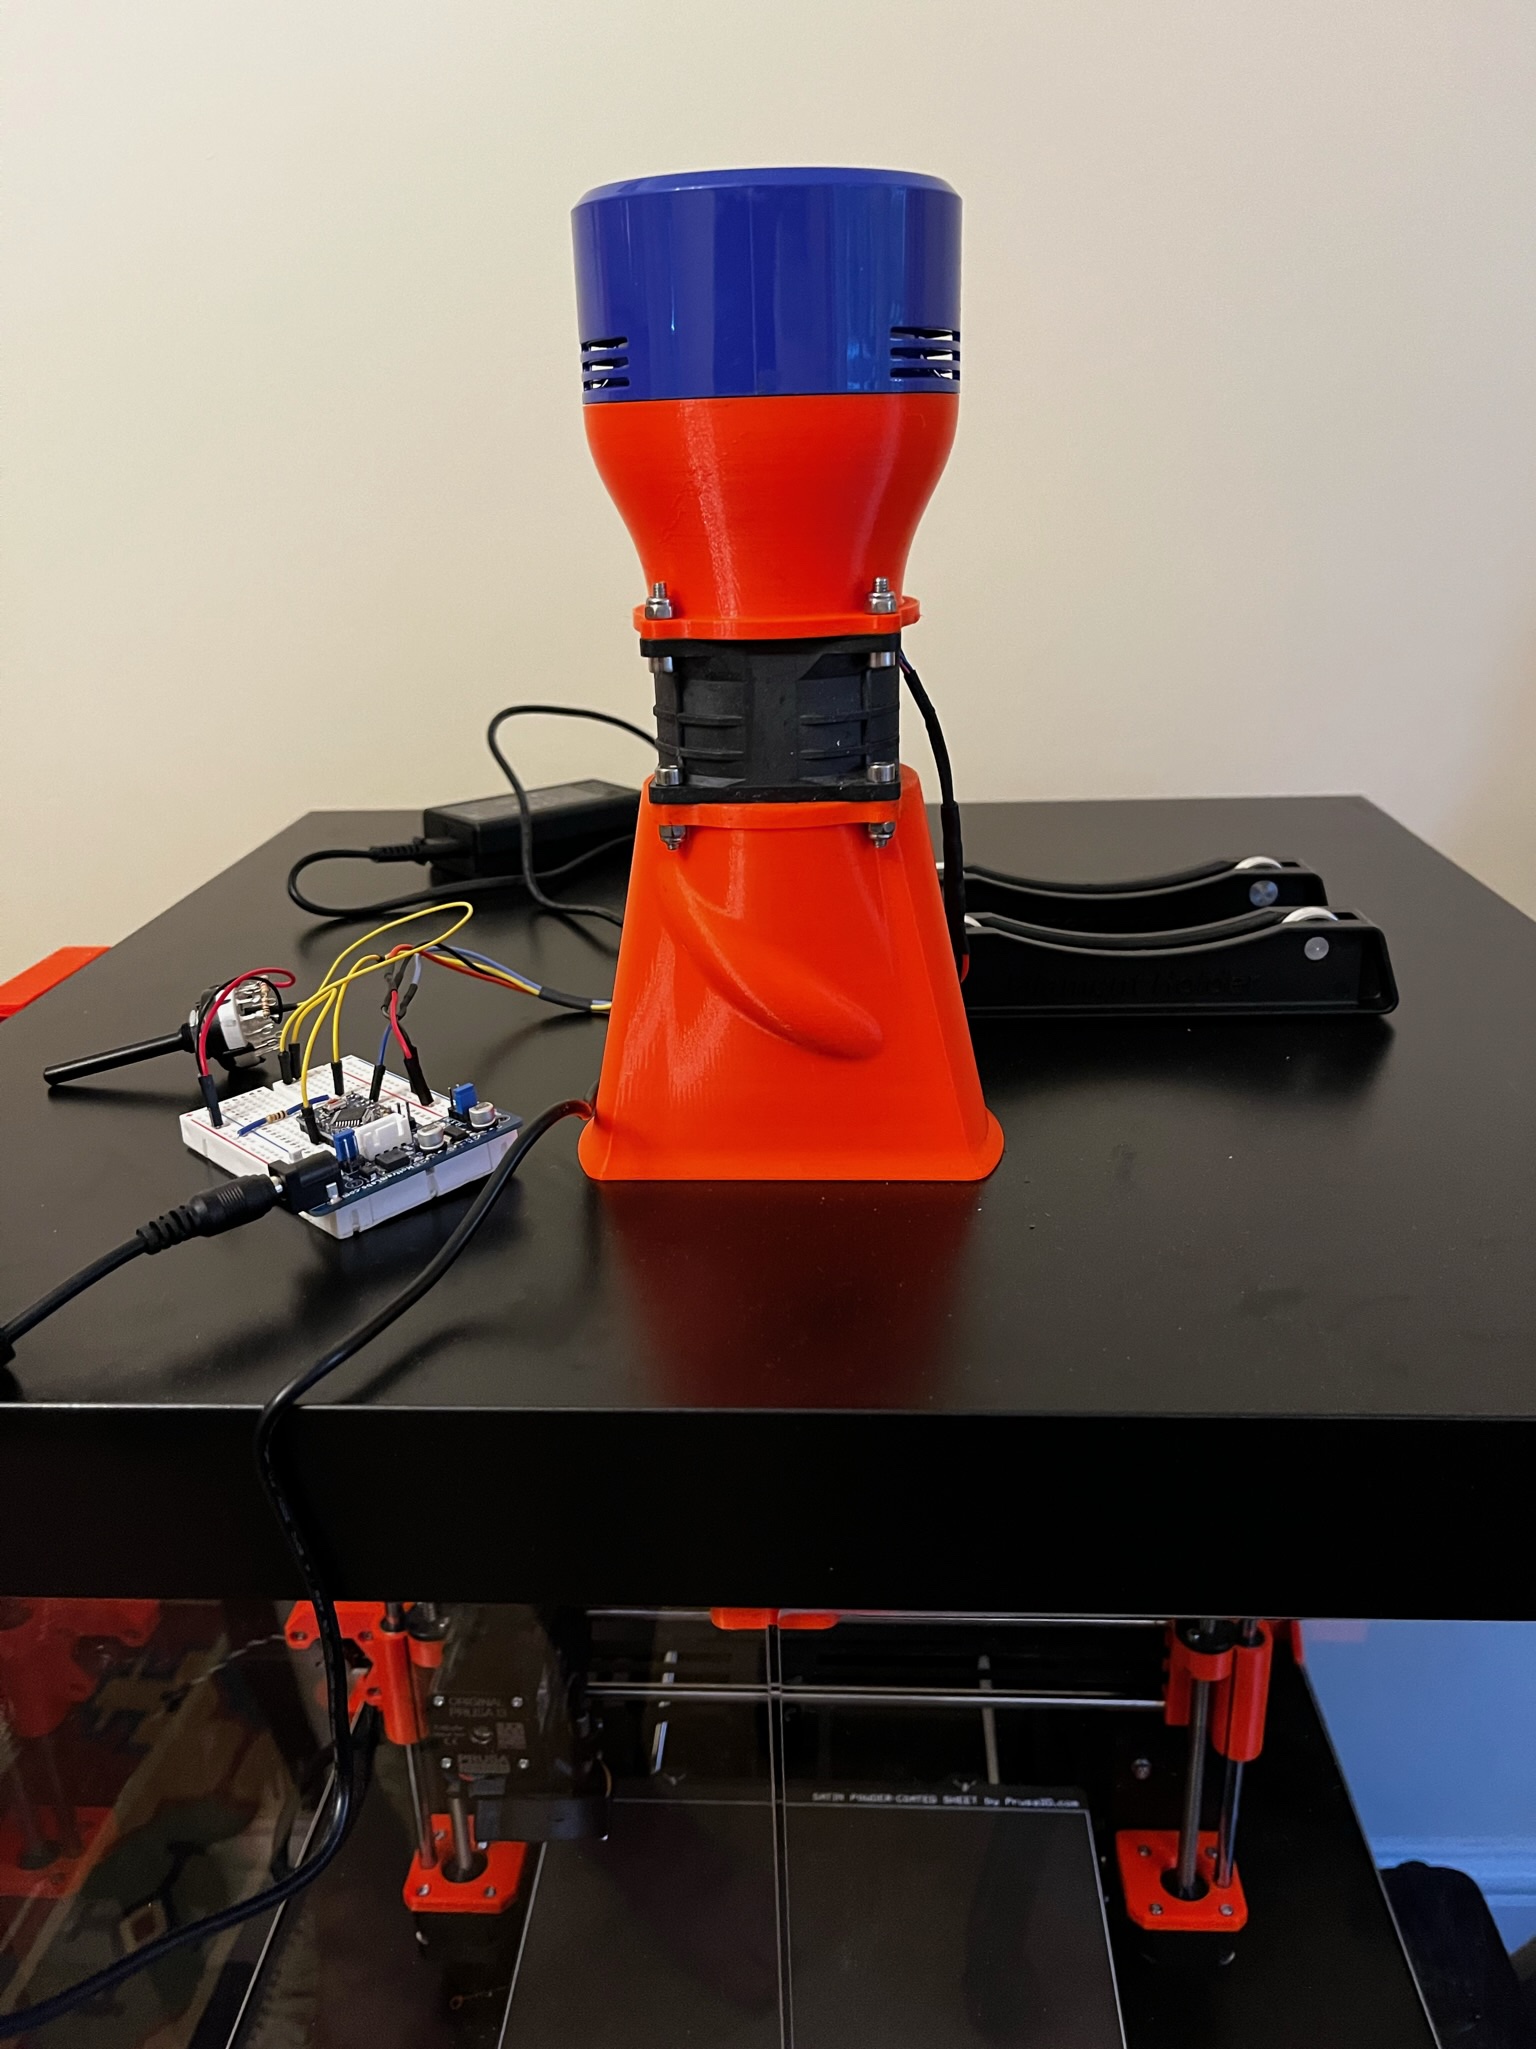
<p>Whether you need an Air Scrubber for your 3D printing enclosure will always be up for debate but I consider it cheap insurance. So I have designed a unit that draws air out of the enclosure through a pair of 3M vapour filters and then exits this air to atmosphere through a Dyson v7/v8 vacuum HEPA filter. I chose 3M & Dyson because in my opinion they are leaders in their field.</p><p>The 3M filter is a 3M 6059 Reusable Respiratory Filter A1B1E1K1 2 Pack. They protect against organic and inorganic vapours, acid gases, ammonia and its derivatives.</p><p>As a design it's somewhat over engineered but when your learning a new CAD system (Fusion360) you have to push yourself. This design certainly did that!</p><p>It comprises 3 sections. the first sits inside the enclosure and mounts the two 3M filters. the second part sits on top of the enclosure. These two parts fix together with screws. The third part is the exit from the fan and mounts the HEPA filter.</p><p>2 off 26mm ID X 5mm CS Silicone O-ring seals the 3M filters</p><p>1 off 38mm ID X 4mm CS Silicone O-ring seals the HEPA filter</p><p>The 3M filter mount and the fan inlet duct fix together using 2 off 4mm x 20 and 5 off 3mm x 12 self tapping screws for plastic. The fan bolts to the ducts using 4mm x 20mm machine screws and self locking nuts. </p><p>To assemble the filter mount and the entry duct drill two 25mm holes and 5 off 3mm holes through the LACK table. Use the 3M filter mounting plate as a jig. Then open up the 3mm holes on the upper surface to 7mm. Once bolted together they clamp the lower surface of the LACK table between them.</p><p>It is designed around a high capacity fan at ~68CFM and capable of a high static pressure of ~2.58 inchH20. The fan is DELTA PFR0612XHE and available on the usual auction sites. It is speed controlled using a PWM signal from a microcontroller. I used an Arduino Pro Mini running on 5v so I could vary the speed depending on the position of a rotary switch. This fan is noisy when run flat out and you may not need to do this all the time. I'm experimenting. Note: the instructions say the Yellow wire is for PWM control BUT on my unit it was the BLUE wire which is the common colour on PWM controlled fans. Check this before you hook up the Yellow wire because if this is the Tacho output wire, more than 5mA will destroy it. I discovered this to my cost.</p><p>Here are some links to the parts I used. Some are affiliate but at no cost to you.</p><p><a href="https://ebay.us/iNddO1">The Fan</a> <a href="https://ebay.us/iNddO1">https://ebay.us/iNddO1</a></p><p><a href="https://www.screwfix.com/p/3m-6059-reusable-respiratory-filters-a1b1e1k1-2-pack/9662g">The 3M filter </a> <a href="https://bit.ly/3DjRZhQ">https://bit.ly/3DjRZhQ</a></p><p><a href="https://amzn.to/3IJoF5a">The HEPA filter </a> <a href="https://amzn.to/3IJoF5a">https://amzn.to/3IJoF5a</a></p><p><a href="https://ebay.us/tRmCrK">4mm Fan Bolts</a> <a href="https://ebay.us/tRmCrK">https://ebay.us/tRmCrK</a></p><p><a href="https://ebay.us/JRWNur">4mm Fan nuts</a> <a href="https://ebay.us/JRWNur">https://ebay.us/JRWNur</a></p><p><a href="https://ebay.us/PgwwTN">4mm assembly screws</a> <a href="https://ebay.us/PgwwTN">https://ebay.us/PgwwTN</a></p><p><a href="https://ebay.us/iEjWA1">3mm assembly screws</a> <a href="https://ebay.us/iEjWA1">https://ebay.us/iEjWA1</a></p><p><a href="https://ebay.us/eIm1v3">3M filter O-ring</a> <a href="https://ebay.us/eIm1v3">https://ebay.us/eIm1v3</a></p><p><a href="https://ebay.us/ZWLlpP">HEPA filter O-ring</a> <a href="https://ebay.us/ZWLlpP">https://ebay.us/ZWLlpP</a></p><p>The 3M filter mounts need painted on supports for the lugs that lock the filter on.</p><p>The Main entry duct prints without supports, fan entry side to the bed.</p><p>The exit duct, fan exit side to the bed, needs a 28mm diameter support under the teardrop, paint on supports for the tips of the vanes (even though they are at 45 degrees) and painted on supports for the lugs that retain the HEPA filter.</p><p>All this is taken care of in the supplied gCode.</p><p> </p>
With this file you will be able to print Air Scrubber for LACK Enclosure with your 3D printer. Click on the button and save the file on your computer to work, edit or customize your design. You can also find more 3D designs for printers on Air Scrubber for LACK Enclosure.