(AIRSOFT) Hi-Capa 5.1 Carbine Kit (OBSOLETE - see description!)
thingiverse
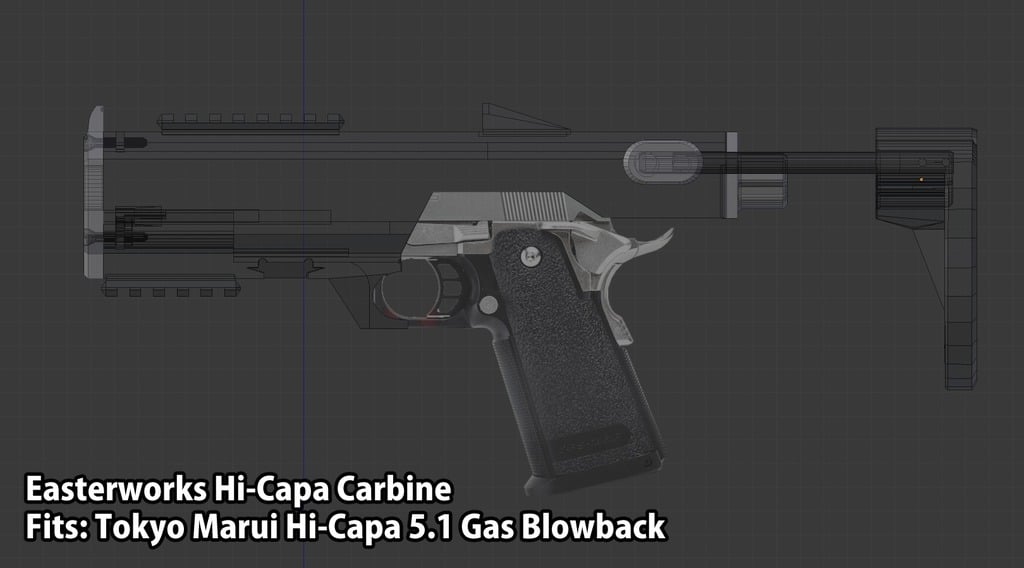
Edit 06/21/2019: This version of the kit is now obsolete with the release of the V2 kit, which you can download here: https://www.thingiverse.com/thing:3712294 1) PREAMBLE Compatible with Tokyo Marui airsoft gas Hi-Capa 5.1-model toy pistols only! NOT FOR USE WITH FIREARMS! Follow the development on https://easterworks.blogspot.com/ 2) CONCEPT The idea of this model is to create an open-source Hi-Capa 5.1-compatible carbine kit for airsoft gas pistols, as there are no open source projects for a carbine kit for Hi-Capas elsewhere currently. When I say open source, I MEAN open source – want to print your own? The files are and will forever be COMPLETELY FREE. Want to print some to sell? You’re absolutely allowed to – with personalization/customization/other modifications as well – as long as you link back to this Thingiverse post in your ad listing! The V1 kit has been fully printed and tested by TheMidget and I, and seems to be working for both of us. I would really appreciate if anyone with a WE, KJW, etc-branded 5.1 Hi-Capa could give this file a test and report back any dimensional inconsistencies/tight areas. This is the version 1 (V1) of the kit. A version 2 (V2) is currently in development to address a few concerns/problems with this model. Any feedback or ideas for features/modifications will be considered, and if your idea is incorporated, you will be credited. If you have any suggestions for new features, or ways to improve the existing features, let me know! If your idea is added to the kit in some way, I’ll credit your contribution! 3) DETAILS/ASSEMBLY There are many parts to this project, and you can hopefully tell how they're all meant to be attached from the image (the “final” version will have an assembly guide attached). Using this model requires having a Tokyo Marui or derivative Hi-Capa 5.1 with the accessory rail. It will NOT work without the accessory rail! Other stuff you will need: -4x Countersunk M4x16 Screw -4x M4 nut -3/8" steel rod (length depends on what length you want the stock to be) -3DFuze or another PLA adhesive You will need the adhesive to permanently attach the rail sections, stock tabs, and rear sight using a strong adhesive. A heavy-recoil spring should not be necessary for this kit, but may be necessary for Tokyo Marui 5.1 Hi-Capa models older than 5 years due to parts wear. The largest piece of this print is the receiver, which is around 27cm long. This may be printed flat, though it was designed to print vertically with minimal supports. Therefore you will need either 30cm of clearance on either the X or Y axis, or you will need 30cm of Z clearance. If your printer is sub-30cm class (22cm class, for example), a split-receiver file will be added later. For now, there is a glue-in-place Remix on this file contributed by TheMidget which separates the receiver into two more manageable pieces. Assembly Instructions: 1) Insert Charging Handle into Receiver (looped section should be pointed to the bottom of the receiver). Ensure for clearance and fit (may require sanding). 2) Install front plate using 4 M4 screws and M4 nuts. 3) Install picatinny rails, rear sight, and stock tabs if desired using 3DFuze or other PLA glue. 4) Insert Hi Capa with accessory rail. 5) Insert dovetail lock to bottom of receiver (this keys the accessory rail to the receiver). 6) Install rear plate (it slides into place from the bottom). 7) Install 3/8" rod to stock tabs (these should be held in by friction). 8) Install stock to 3/8" rods (you will need to drill a 1/8th" hole that matches with the side holes on the mounting points on the stock and insert a cotter pin or something to keep it installed). Usage Instructions: 1) After installing 1911 to carbine kit, insert magazine. 2) Deactivate safety and pull charging handle. Release the handle and allow it to fly forward. 3) Fire. 4) When out of BBs, the slide will lock backwards. Either release the slide and engage the safety for storage or change the magazine and release the slide to continue firing. 4) FUTURE ADDITIONS Version 2 concepts to implement: -Buffer tube-compatible stock option -Folding stock option -Interchangeable muzzle plate (for adding tracer units, etc) -Forward magazine holder and grip (to interchange with dovetail piece) -Retention and spring loading for charging handle -Refinement of charging handle system to prevent hang-ups -Multi-piece receiver for printing on medium/small printers. 5) CREDITS they7692 – Creator/Curator Mdigibou – Contributed concept for bolt-in-place two-piece receiver design (concept modified and to be implemented in V2!) TheMidget – Contributed concept for glue-in-place two-piece receiver design (check the Remixes!) Disclaimer: While this file is intended to be open source in perpetuity, I may end up printing and selling these independently. However, as the concept is open source by nature, I give everyone permission to do the same - just be sure to link back to this post so everyone knows where it came from and who contributed to the design! Thanks!
With this file you will be able to print (AIRSOFT) Hi-Capa 5.1 Carbine Kit (OBSOLETE - see description!) with your 3D printer. Click on the button and save the file on your computer to work, edit or customize your design. You can also find more 3D designs for printers on (AIRSOFT) Hi-Capa 5.1 Carbine Kit (OBSOLETE - see description!).