Airtight Filament Box Part
thingiverse
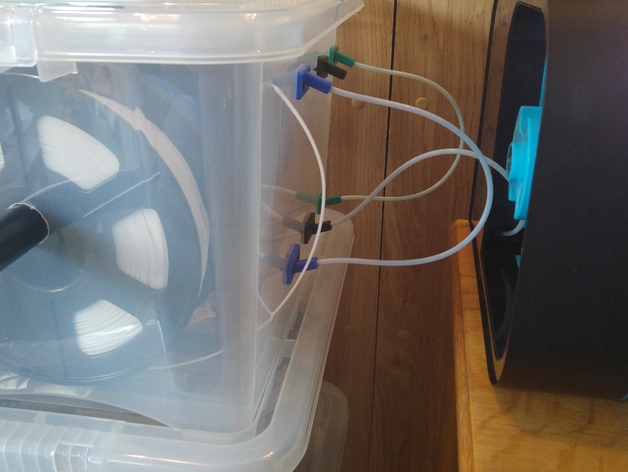
I saw some ideas on how to make an airtight filament box but wanted to create my own version. I use a Robox which has it's own smartreel filament but I use the printer so much every day for work and over a variety of colours (lots of open filament rolls!) and I don't like the fact the filament is left in the open air whilst printing so I tend to avoid buying filament on smartreel and go for the same kind but on generic filament spools. For the box itself I wanted an easy, strong and quick way of adding and storing the filament. I used 25mm conduit tube and cut 25mm holes to slide it into the box and out the other side. It is still airtight this way and I find it to be stronger than adding supports for the pipe inside due to plastic boxes having a bit of give. If you don't cut a good circle and therefore leave a little air gap you can add a hair bobble or a couple elastic bands flush where the pipe meets the box and that covers any hole while still allowing easy removal of the pipe. One tip for the pipe. You want the hole as tight as possible but this makes inserting the pipe difficult. What to do is cut the pipe end at an angle and that makes it so much easier to insert into the hole. Also, I put all the silicone sachets I can find in the bottom of the box as an added measure. You can buy hundreds of them on amazon or ebay for a couple of pound/dollars. For people in the UK or Ireland, I got my boxes from Tesco. They're fantastically strong, look as good as a plastic box can look, fit filament perfectly (4 rolls) have a good closure and only cost £4. The part I've uploaded is for the filament to come out of. You can print one for each filament roll and block it with something when not in use, but what I have done is print two for each filament. One goes at the bottom where the filament comes out and then the other one higher up is for the filament to go back in (making it airtight). I used 4mm (2mm inside) teflon tube which fits inside the hole nice and snugly. When using that filament just take out the teflon tube from the top piece and slot it into the printer (or take the teflon tube off if that's easier) and then when it isn't in use, insert it into the part on the top and that keeps it airtight. You don't necessarily have to add a hole into the box to the top one. I'd suggest not because when you're using that filament roll, the teflon tube isn't covering the hole. I've left the white filament without the parts to highlight the before and after. I'm not great at describing what I mean (that's not what I'm here for!) so the pictures should explain it all. The screws I used are about 3.5mm width and I designed the part to allow the top of the screw to be countersunk. The top of my screws were 9mm which is fairly big so you shouldn't have problems fitting most. Print Settings Printer Brand: CEL Printer: Robox Rafts: No Supports: No Resolution: 0.1 Infill: 20-30 Notes: Very easy and quick print (depending on settings and printer, about 25min). I print each colour in place of a good purge between filament colour changes and that way I'm using filament that would otherwise go to waste. You will require 2 screws for each part you print. I doubt anyone would want to steal this to sell, but with all that is going on in the 3d printing world right now it goes without saying - you can print this to your hearts desire but don't sell it or profit from it. Let's not ruin the 3d printing community with selfish acts. Support Sad Face! http://www.thingiverse.com/thing:1350837
With this file you will be able to print Airtight Filament Box Part with your 3D printer. Click on the button and save the file on your computer to work, edit or customize your design. You can also find more 3D designs for printers on Airtight Filament Box Part.