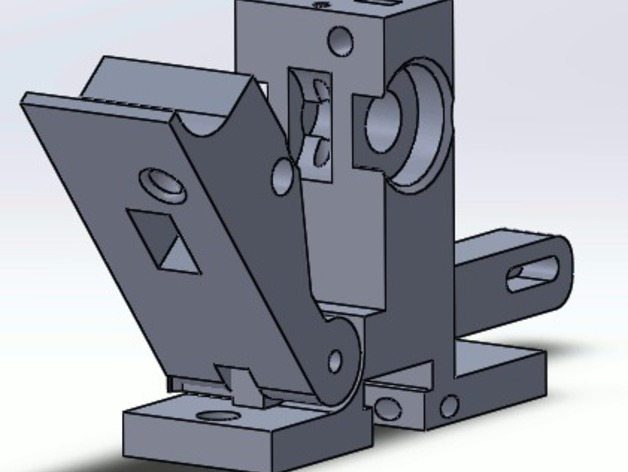
Alex Extruder 1.75mm
thingiverse
ATTENTION: I do not update the files in thingiverse anymore. Download the latest version from my OneDrive: https://1drv.ms/f/s!ApLXJJfQAWPfgnMTI4TwPZj_Js11 After looking for a while for a 1.75mm, I decided to design my own. First I tried some Direct Drive extruders available in the web.. The need for a motor fan for low Tg materials like PLA bored me. The low resolution (low steps / mm) is not something pleasant to me.. And huge gap between the pinion and the filament output duct makes it difficult to push flexible filaments like Nylon.. So I came up with a geared 4:1 extruder, that has been working fine with many 1.75mm filaments, like ABS, PLA, Nylon and PET. It is simple to assembly and low hardware parts count. Just download the correct extruder for your hotend, gears and Idler. Check Assembly Instructions for further information. If you need the extruder for another hotend and/or hobbed bolt/pinion diameter, let me know on comments bellow. Hotends provided: Bowden E3D V4/V5 Magma JHead Generic Sethi3D 3DMachine Movtech Instructions ATTENTION: I do not update the files in thingiverse anymore. Download the latest version from my OneDrive: https://1drv.ms/f/s!ApLXJJfQAWPfgnMTI4TwPZj_Js11 You will need four printed parts: 1) The right Extruder for your hotend; The files are named as follow: Alex-Extruder[Effective Hobbed Diameter][Hotend] For example: Alex-Extruder_8mm_E3D is meant for E3D hotends and 8mm hobbed bolt (effective diameter of 7.6mm) 2) Idler 3) Hobbed Bolt Gear for your bolt 4) Motor gear; All the files can be found in the ZIP package, just download the right one for your hobbed bolt/pulley. The Washer.stl is optional and can be used tight the 8mm hobbed bolt with a nut. For the extruder, you have some options. I have made, besides the generic JHead groove mount with 2 bolts, a "snap fit" mount for some specific hotends like E3D. You just need to insert the hotend in the right place and are ready to go.. no need for bolts, although I have provided a hole for a holding bolt if you fell more comfortable. The same applies for the hobbed bolt. I have provided 2 versions, one for the regular 8mm hobbed bolt (with 7.6mm hobbed diameter) and other for MK8 pulley with M5 bolt. If your hotend or hobbed bolt is not listed here (and probably will not), just ask me in the comments and I can provide you the right extruder... that's a way to make many versions available here. To put the extruder together you will need: Idler: 1 625 bearing 1 M5 x 25mm bolt to mount the bearing 1 M3 x 25mm bolt to mount it in the Extruder 1 M3 x 40mm bolt for spring 1 clothspin spring (see pictures) Extruder: Your favorite Hobbed Bolt or Pinion + Bolt; 2 washer for your hobbed bolt. 2x 688 bearings for 8mm Hobbed Bolt or 625 bearings for 5mm bolt; 1 M3 nut for the spring bolt; 3x M3 x 10mm bolts for mounting the step motor. Optional washer and nut for the hobbed bolt. Since the gears are herringbone, they stay aligned... Optional M3 x 16mm bolt for holding the snap fit hotend; Optional 2x M3 x 25mm bolt for Generic JHead groove mount hotend. Pinion: M3 nut; M3 set screw Since the pinion is made for a flat shaft - it has a D hole - the above nut and set screw are optional but recommended for long term use. Then.... just put all together.. Recommendations: Let the motor for the fina step. Put the gears in contact and fix the bolts.. there is no need for pressing the gears... just touch them and fix the motor bolts. Put 2 washers between the hobbed bolt gear and the extruder. If you choose to use a nut in the hobbed bolt, DO NOT over tight it.. again, DO NOT over tight it.. just tight enough to TOUCH the washer in the bearing.. I mean, TOUCH, no pressure at all. A nyloc nut will avoid the nut from loosening. If your "snap fitted" hotend is a little bit loose, use the M3x16mm to hold it in place. Again, DO NOT tight this bolt as well.. otherwise you will break the plastic piece.. just tight it to touch the hotend. Do not over tight any bolt.. there is no need and you are dealing with plastic not metal.. just tight them to touch its counterpart. Printing recommendations: Layer height = 0.2mm 3 or 4 perimeters 20% infill is enough Use a layer width 0.4mm or less. For gears, I recommend printing external perimeter first. Your printer will need some bridging skills for printing the extruder, but it is not a big deal.
With this file you will be able to print Alex Extruder 1.75mm with your 3D printer. Click on the button and save the file on your computer to work, edit or customize your design. You can also find more 3D designs for printers on Alex Extruder 1.75mm.
