Alignment Blocks For Anycubic Photon MGN9H Mod
thingiverse
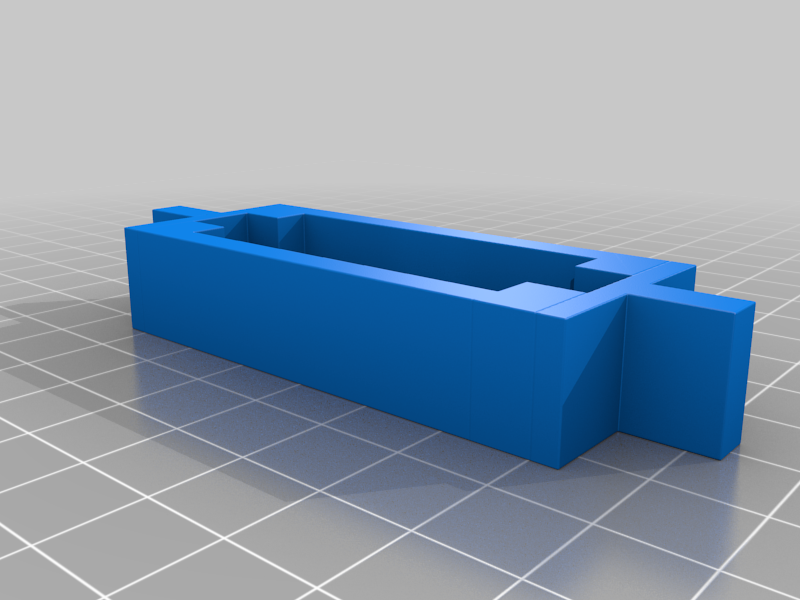
This Remix is meant to include the alignment blocks needed to successfully center the MGN Linear rails onto the Photon Z-axis rail. a basic write up on this mod is as follows as it was not included with the original mod files: Loosen and remove the 4 M5 bolts holding the build plate to the z axis carriage(the carriage will now float freely and your build plate mount should stay on the threaded rod) Remove the 2 M3 bolts holding the optical sensor to the z axis rail. this will allow you to pop the sensor up and out of the rail (do not remove fully or pull out farther than needed!) Remove the rear cover and 4 M3 bolts on your Photon (obviously make sure your vat is removed first) Access the 4 M4ish bolts that attach the z rail to the base plate of the printer, loosen all 4 then remove one by one. (the rail will be free to move around the case now so be sure to not damage your screen or other components) Maneuver the rail around the threaded rod and remove it from the case. (set the case aside now for the remainder of the process) You can now slide the original z axis carriage all the way down and out of the z rail you can either leave the blue top plate installed for he next few steps of remove it now. they should be short M4 bolts now you can line up the linear rails on the z rail and slide your printed alignment blocks over them all. this should allow you to mark the center for your bolt holes that need to be drilled out and tapped. my prints were slightly loose so you may not need this step but i added tap wrapped around the rails to stop them sliding around while i used a automatic center punch to mark the holes where i needed to drill. use said center punch to mark 4-6 holes on each side. i thought 12 bolts per side was a bit overkill so i used 4 and it seems to be secure. remove the rails and blocks and you should be able to use a 2.5mm drill bit to drill your holes. you only need to go in about 1/4" or so. the 6mm M3 bolts don't do in that far. i didn't have one but i recommend an M3 bottoming tap and not just a regular M3 tap as it may not let you get threads all the way to the bottom of the drilled hole. tap all the holes you drilled carefully! the aluminum is quite soft so it will be easy to mess up the threads. clean up any burrs from drilling and tapping and you should be all good to install the linear rails! loosely install the MGN blocks to the printed bracket and slide the block over the rails. you can now trim the bottom of the linear rails flush with the z rail once thats all cleaned up you should be good to reinstall the components and re-level your platform! Happy Printing!
With this file you will be able to print Alignment Blocks For Anycubic Photon MGN9H Mod with your 3D printer. Click on the button and save the file on your computer to work, edit or customize your design. You can also find more 3D designs for printers on Alignment Blocks For Anycubic Photon MGN9H Mod.