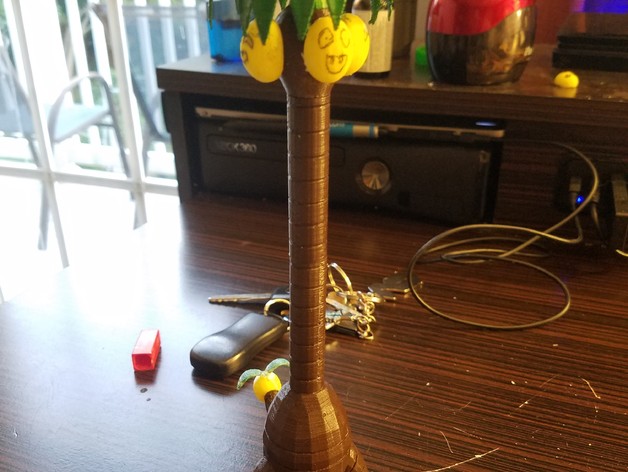
Alola Exeggutor (Expandable Neck)
thingiverse
UPDATE: I have added a sword attatchment, so you can make your very own exeggutor sword. Just place the neck segments and head on the top of the attatchment. Also, I have added a curved neck segment, so your exeggutor can curve all over the place. We all know how funny the new exeggutor is, so I took a few hours to model it. I made the neck expandable so you can print as many neck segments as you want and stack them on top of each other. That way your exeggutor can be as tall as you want. The print is seperated into small pieces for ease of assembly and painting. CHALLENGE: See how tall you can make it! Print Settings Printer Brand: Robo 3D Printer: R1 ABS + PLA Model Rafts: Doesn't Matter Supports: Yes Post-Printing Step 1 Print each piece in the desired color. Step 2 (Optional) Sand and/or paint each part individually. Also, draw the faces on the heads. Step 3 Assemble the head. Put super glue on the pegs sticking out and put each face on its matching peg. Then, put super glue on the top peg and put the leaves on. Step 4 Assemble the body. Apply super glue to the tail peg and push the head into place. Then, stack as many neck segments as you like. There is no limit to how tall your exeggutor can be. Step 5 Attatch the head to the body. Put super glue on the peg on top of the topmost neck segment and push the head into place. Step 6 Try to stand your exeggutor up. Depending on the amount of neck segments you used and how tall you made your exeggutor, it might not be able to balence and fall over. If this is the case, print out the platform and glue the feet to it. Step 7 You're done! Show off that awesome exeggutor!
With this file you will be able to print Alola Exeggutor (Expandable Neck) with your 3D printer. Click on the button and save the file on your computer to work, edit or customize your design. You can also find more 3D designs for printers on Alola Exeggutor (Expandable Neck).
