altoids fishing kit "sunfisher"
thingiverse
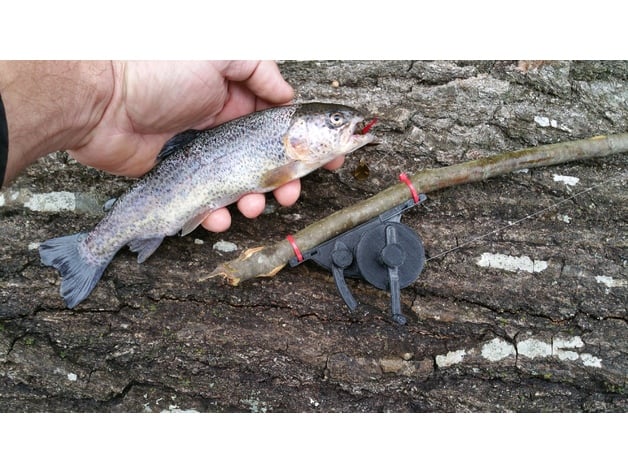
The Altoids Fishing Kit "sunfisher" 1.0 is just what it sounds like. I wanted to design a little fishing reel that is 100% printable and can be packed down into a standard Altoids tin. I got this idea while backpacking in the mountains; I stopped to camp next to a gorgeous little stream for the night and thought (insert thought bubble here): “I wish I had a small packable fishing pole so I could pull one of these trout out of the water for dinner”. As the 1.0 might suggest, this is the first iteration of the design and may evolve over time. The reel is a basic hand crank spool with a small trigger that functions as a friction break for the drum. I find that casting works best if I pay off the line at my feet first and flip-cast the bait with both hands. Use 4” zip ties (that slip right into the tin with a couple of my favorite flies) to fix the assembly and the eye guides to a long flexible branch or piece river cane, and away you go! Print Settings Printer: prusa i3 custom Rafts: No Supports: Yes Resolution: .30 mm Infill: 30% Notes: I printed all the parts in ABS with .30 mm layers and 30% rectilinear infill. The outside drum and the crank handle will need to be printed with support. Tip for the bolts and nuts - I didn't have good luck printing just one bolt at a time. A tall thin part like that didn't cool much in between layers, so by the time the print was halfway done my nozzle was just stirring around gooey plastic. Now I print two or three bolts at a time to give the layers more time to cool and I get much better quality thread definition. Credit where credit is due The nut and bolt hardware was developed using the Nut Job Thing: http://www.thingiverse.com/thing:193647. This is some particularly brilliant work; check it out if you haven't already. It's important to note that Nut Job is licensed under the Creative Commons - Attribution - Share Alike. Thus the nuts and bolts for the Altoids Fishing Kit should be considered under that license as well. Print and assemble Step 1: Get Everything Together Print ONE each: inside drum outside drum (with support) top bracket bottom bracket drag trigger crank handle (with support) m7.5 bolt m8.5 nut m9.5 bolt m10.5 nut Print THREE each: line guides Gather Up: 4" zip ties (small ones pack up in the tin better) fishing line flexible stick, branch or cane pole fishing tackle to suit your needs epoxy or solvent glue Step 2: Assemble Clean up any chaff and scaling from the printed parts. Glue the inside and outside drum halves together with a bit of five-minute epoxy or solvent glue. Take care to keep any glue from getting into the center hole of the drum. After ample drying time, line up the two bracket parts, the drum part, and the crank handle and bolt this together with the long bolt and larger nut. Depending on how the nuts and bolts printed you may have to gall the threads slightly so the nut will stay in place (the way a nylon lock nut stays in place on a bolt without spinning freely) with all the spinning and cranking. You want the parts to be snug enough so the crank handle will stay seated securely into the depression in the outer drum but loose enough that the drum isn't bound up. Use the shorter bolt and smaller nut to fasten on the drag trigger (see pictures) so that the bump on the trigger part can engage the lobes on the rim of the inside drum part. Now grab that branch; use a long, thin, green branch that's about as thick as a magic marker at the base. Use a couple of those zip ties to mount the finished assembly to the pole. The bracket has 4 slots for zip ties, but I have found that 2 will work just fine. Starting at the tip of the pole, space out the line guides and strap them on with one zip tie each. It should be looking like a real fishing pole now. Feel free to use as many guides as you want but at least 3. Take a little time to make sure the insides of the eyes get a once-over with a jewelers file or some sand paper to remove any burrs that might chafe at the line. I had thought that the line guides would benefit from some acetone vapor smoothing, but smooth is the goal so approach as you see fit. Spool on some line and get to fishin'. Note: The brackets will make a reel that cranks with the right hand. if you are a left-hand cranker, you'll want to mirror the top and bottom bracket parts. Custom Section UPDATE 1 update #1, I added 2 new drum parts. The "inside drum large spool" and the "outside drum large spool". These parts are dimensionally similar to the original parts, with the exception of having a 30mm diameter spool. This will hold less fishing line tan the original parts "inside drum" and the "outside drum" but add the benefit of reeling line in faster which makes the whole reel more functional. A larger drum should also have a less dramatic curling effect on the monofilament line. Also it was suggested in the comments to increased the depth of the crank handle indention in the outer drum. I have incorporated this change in the "outside drum large spool" as well.
With this file you will be able to print altoids fishing kit "sunfisher" with your 3D printer. Click on the button and save the file on your computer to work, edit or customize your design. You can also find more 3D designs for printers on altoids fishing kit "sunfisher".