Amadon's Prusa i3 - Wilson hybrid complete printer
thingiverse
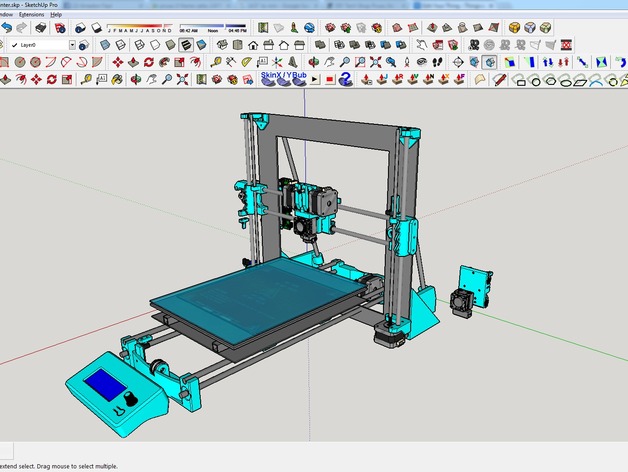
EDIT 6/6/16 Added new version of the idlers for the chimera/cyclops extruder. These new idlers have support for the bearings on both sides so it can't bend over and lose clamping pressure on the filament. There's a 0.4mm thick support material built in that you must cut out. No support needed from your slicer. Use a washer on BOTH sides of the roller bearing. Low profile nut of course. The flat side of the idlers should face towards the motors. Slightly raised sides towards the center. Put the nut on the motor side. EDIT: I reduced the size of the holes for the smooth and threaded rods in the Y ends so they would fit more snugly but not too small that you can't put the rods through them without filing them. 1-22-16 EDIT2: I added an XL frame in the remix list that I'll be working on fitting the parts to. Check out that design when looking into making this printer. I have not checked to see what does and does not fit it yet, and may modify it, but it's a start. Original text: I have uploaded the Sketchup file of the complete printer to help with assembly and any questions you may have. If that's not enough please comment and I'll help you out! This printer is based on parts from my now-defunct diytechshop i3XL. The company went out of business and left no template online for the frame. You can use a standard i3 frame, just make sure you print the right z motor and rod holders, and rear supports. They are all labelled. This design is for a 9"x12"x~7.5" print volume. You can make a smaller standard i3 print bed and frame if you like. I have included all the files for both a cyclops/chimera dual extruder and an E3D V6 single extruder. If a part isn't labelled for the single extruder in the filename it's either part of the printer itself, or the dual extruder. If this doesn't make sense just ask and I'll explain. The single extruder's instructions can be found here: http://www.thingiverse.com/thing:760444 The dual extruders instructions are in this description. I also have just the dual extruder listed separately here: http://www.thingiverse.com/thing:1143466 The PTFE tubes in my print of the dual extruder are 47mm long, but when you first assemble it, cut the two PTFE tubes to about 50mm long and try to put the cold end on. If they are too long trim off about 1mm and try again. Repeat until your PTFE tubes are exactly the right length so they are snug but still let the holes on the back of your cold end match up with the printed extruder body. TIP: Don't make the PTFE TOO snug. If you do, the part that contacts at the bottom of the PTFE tube is resting on a U shaped reduction in diameter. This part gets hot. If your PTFE is too long it'll soften and try to squeeze down into that U shape and get smaller. This will cause the inside of the bottom of the PTFE to be smaller than your filament and it will bind. MAKE SURE THE PTFE IS EXACTLY THE RIGHT LENGTH. I had mine a little too long, by about a mm, and ended up having to heat my hot end hot enough to somewhat liquify the PTFE, and push my filament through by hand until I had extruded the PTFE that was touching my filament and causing it to bind. Big pain in the butt. So make sure your PTFE is not so long that you have to apply a lot of pressure to make the screw holes match up. Either that, or just put it all together with the heat brakes not inserted all the way and then move them up. Then level them. This design includes hardware for a complete printer. The axis' have built in opto endstop mounts. Of course you have to get opto endstops shaped like the ones I have. Where the beam U is on the end facing the long way. You'll see what I mean in the pictures. You can get endstops like this here: http://ow.ly/US8qY I checked the dimensions of this compared to the most common i3 Rework build on here and the parts should be compatible. At least the distance between the Z threaded and smooth rods are. I used this Thing as a reference: http://www.thingiverse.com/thing:858449 I have included the Z rod/motor holders from this i3 rework in my model, unaltered. I have uploaded Z rod holders and rear supports that have the standard i3 screw spacing so if you buy a pre-cut i3 frame those are the ones that will fit. They all have "classic i3" in the filename. It uses one 608ZZ roller bearing for the X and Y idler, like this eBay auction: http://ow.ly/US8uu Put a washer on either side of the bearing to act as belt guides. http://ow.ly/US8yz The difference between the two X carriages is minor. The Chimera one has easier access to the upper rear grub screws on in the Chimera cold end and also allows you to slide the lower bearings out of the way to get to the lower grub screws. Just slide the bearings all the way towards the center once you have both nozzles exactly the same height and have tightened the grub screws again. It should hold the bearings in place just fine. Mine does. Parts for extruder assembly: 2 10mm M5 screws: http://www.mcmaster.com/#93070a121/=wnovg7 2 low profile M5 nuts: http://www.mcmaster.com/#90695a037/=wnndyn 2 5x10x4 ball bearings: http://www.amazon.com/Bearing-5x10x4-Shielded-Miniature-Bearings/dp/B002BBGE56 2 Washers between the idler and the 5x10x4 bearings. http://www.mcmaster.com/#93475a230/=109ocpw If you don't use these washers your bearings won't spin. You will have to drill the washers out to 5mm I.D. 2 M4 screws for the idlers: http://www.mcmaster.com/#93070a109/=wnnqj3 2 M4 nuts for the idlers: http://www.mcmaster.com/#90725a010/=wnosvm 2 MK8 drive gears which can be found all over the place online. For example here: http://ow.ly/WSGDD Cut some M3 threaded rod and make 3 lengths that are 120mm long. These will mount the motors to the whole thing. This threaded rod goes all the way through both motors and the extruder body. Put nuts on one end, and washers and nuts on the other. It's easier if you drill out the threads from your stepper motors and secures tighter. Theoretically you don't have to do this but I have not tried it and it might be loose. M3 threaded rod: http://www.mcmaster.com/#98861a040/=10mqo2f 2 springs for the idelers: http://www.mcmaster.com/#94125k658/=yy1s7h You will have to trim the springs shorter and use trial and error to get the length just right for tension. They should be just long enough so with filament fed into the extruder you have to apply slight pressure to get the M4 screws to begin threading into the nuts. You will probably need a couple washers on the M4 screws to keep the springs from slipping past the screw heads. The same washers you used on the idler bearings will work. General instructions" The belt idlers for the X and Y axis use an m8 nut and bolt. 25mm bolt x2: http://www.mcmaster.com/#90327a158/=10mqn3u M8 nut x2: http://www.mcmaster.com/#90592a022/=10mqmmo The Z bearings inside the ends on the X axis are tightened using three 10mm m3 screws and nuts each. The X axis motor is held on by three 15mm m3 screws. The Y axis motor is held on by three 10mm m3 screws. The Z bottom rod holders are attached with 3 15mm m3 screws and nuts each. The Z top rod holders are held attached by 3 10mm m3 screws and nuts each. The Z opto endstop mount is attached with one 20mm m3 screw and nut. The Z motors are attached with 3 10mm m3 screws each. The X and Z opto endstops are attached with 1 8mm m3 screw and nut each. The Y opto endstop is attached with 1 10mm m3 screw and nut. All smooth rods are 8mm. Z axis threaded rods are 5mm: http://www.mcmaster.com/#94185a584/=10mqpg4 Of course you can make your Y axis whatever length you want, but my Y smooth rods are 520.7mm long and my Y threaded rods are 536.7mm long. You will need 8 m8 nuts to attach the Y axis ends to the threaded rods and 4 m8 nuts and lock washers placed on either side of the frame to firmly hold the base of the frame in place, attached to the Y threaded rods. The m8 threaded rods that support the frame vertically in the back should be at least 340mm long. The are held on by 3 m8 nuts. One in the top and one on either side of the hole in the frame supports. So 6 in total. The two upper frame support rod fasteners are held in place by 1 30mm m8 screw and nut each. The Y belt holder uses 3 10mm m3 screws and nuts. The Y bearing holders use 3 8mm m3 screws and nuts each (x4) The Z beam breaker holder uses 1 15mm m3 screw and nut to attach to the X motor end.. The Z beam breaker attaches to the Z beam breaker holder using 2 25mm m3 screws and nuts. This length may vary depending on how far away you place the Z opto endstop on the smooth rod. I actually only needed 15mm m3 screws. The X beam breaker holder uses one small pointed screw and no nut. I don't know the exact screw size but it's ~4mm dia. It has to be short enough to not pass all the way through the X idler end into where the X smooth rods sit. My X smooth rods are 392mm long. The X idler bearing holder is attached with one 40mm long m3 screw and 3 m3 nuts. One nut goes inside the bearing holder, one nut is used to adjust tension on the belt by placing it outside the endcap and screwing it towards or away from the printer, and the third nut holds the second nut in place. If this doesn't make sense please message me and I'll help you out. The other two holes in the X end cap are also for belt tensioning, but may not be necessary. If used they use 1 ~30mm long m3 screw and nut and apply pressure to the ends of your smooth rods to create tension. I do not use them myself. The RAMPS mount is held on by 4 8mm m3 screws and nuts. The RAMPS itself is held on by self threading (pointed) screws ~4mm dia. and ~10mm long. I may edit the screw holes here to use m3 nuts and bolts soon. The two frame supports, in addition to sharing the screws that mount the Z lower rod holders, use 3 10mm m3 screws and nuts for the second set of holes each. The 4 bed leveling thumb screws us 1 30mm m3 screw and nut each (x4). You will need 4 more of the same springs the extruder idlers use for the bed leveling screws, so 6 in total. The Y opto beam breaker screw to the bottom of your print bed assembly using 2 8mm m3 screws and nuts. My print bed is 9" x 12". It uses two sheets of aluminum. The bottom one is 2mm thick and the top is 3mm thick, approx. I used some half inch square stock in a # configuration to reinforce the bed. You can order that here: http://www.mcmaster.com/#6546k49/=10b60qk I then put a print bed heater on top of that and the glass from a 9x12 picture frame on top of the heater. Works great! I cannot find a template for my laser cut aluminum frame online anywhere, because it's from an i3XL design by Diytechshop, which has since gone out of business. http://ow.ly/W7B0n It's larger than the standard i3 frame, but these parts will all work on a regular i3, your X and Z rods will just be shorter. I will be making my own template based on my printer frame once I take my printer apart to install all these new parts. Then I can accurately get all of the dimensions and will upload the template here. You can download my configuration.h here: http://pastebin.com/4izq94YL It's configured to use a Chimera, so if you have a Cyclops just change (#define EXTRUDERS) to 1. I gave my printer the custom name "augmentation" so it'd say "augmentation ready" when it was ready to print. You can change this to whatever you like. I believe I listed all the screws and such but if I missed anything let me know! Thanks and enjoy! EDIT: Added access holes for the mounting screws for the Chimera/Cyclops in the X carriage. This way if they come loose you don't have to disassemble anything to tighten them again.https://www.youtube.com/watch?v=T9Ya5-5jXGc Print Settings Printer Brand: RepRap Printer: Prusa i3 Rafts: No Supports: Yes Resolution: 0.2mm Layer Height Notes: Only a couple of the parts require supports. They are the X motor and X idler ends. The rest I believe require no support. I recommend printing the larger parts in PLA so they don't warp and the rest can be made from ABS or PLA. Up to you. How I Designed This Designed in SketchUp 2015 with imported and edited parts from the Prusa i3XL (no longer sold by DIYTechShop, and the Wilson Smooth Rod version.
With this file you will be able to print Amadon's Prusa i3 - Wilson hybrid complete printer with your 3D printer. Click on the button and save the file on your computer to work, edit or customize your design. You can also find more 3D designs for printers on Amadon's Prusa i3 - Wilson hybrid complete printer.