Amcrest 4K POE Security Camera Mount
thingiverse
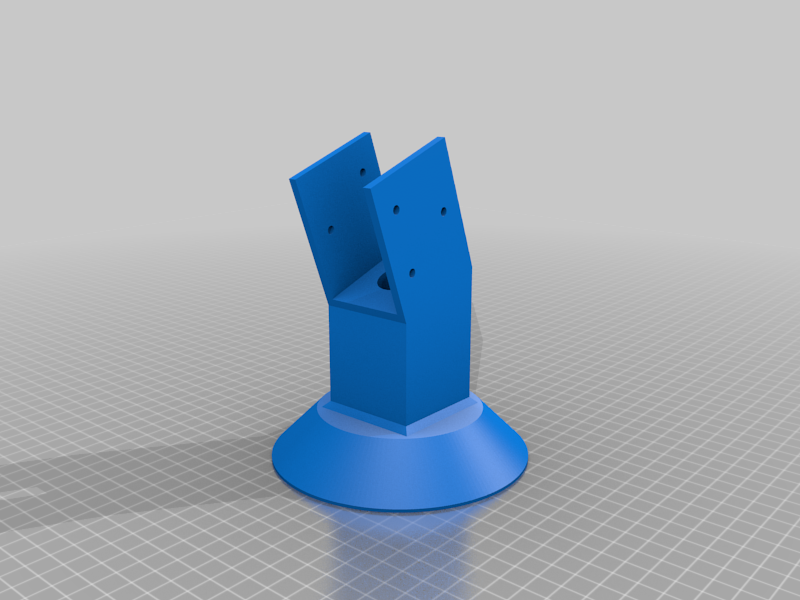
This original design mounts an Amcrest UltraHD 4K (8MP) Outdoor Security IP Turret PoE Camera to an external roof rafter of various angles. You will need six Outdoor wood screws shorter than 39mm (the thickness of my rafters). I colored my tan deck screws with a Sharpie for aesthetics. Installation steps: 1. Use the screws included with the camera to mount the metal housing to the printed mount. Make sure the screws are tight but don't strip them. 2. Install the o-ring on the camera waterproof POE connector per the instructions 3. Bring up the ladder to your camera mounting point the following items: camera, camera outside housing piece, star key wrench included with camera, printed mount with attached metal housing with loosened grub screw, waterproof POE connector pieces, 6x wood screws, and drill with screw bit. Also a Sharpie if you wish. 3. At the mounting point, stick the terminated & tested Ethernet cable (CAT5e, for example) through the mount hole from the top. Install the waterproof POE connector pieces on the CAT cable and connect it to the camera. Be sure to twist the connector hard until it clicks. 4. Push the CAT cable back up the hole, hold the mount up to the rafter, and push the waterproof connector into the hole in the mount until it bends the CAT cable against the rafter. It should stick completely into the round hole in the printed piece, and only the CAT cable should be externally visible. 5. Screw in the 6x screws securing the mount to the rafter while pressing the mount tightly against the rafter. The camera will be dangling at this point, so be sure the waterproof connector is secure. 6. Wrap the extra cable between the camera and waterproof POE connector around the hollow area inside the printed piece, working the camera into your desired location. This can be tricky, but it will fit. Be sure nothing gets in front of the rubber pieces on the metal housing that the camera presses against. 7. Attach the outside camera housing to the mount and secure the set screw with the star key wrench. Keep the set screw loose enough to make final angle adjustments then tighten it when the angle looks good. If the camera won't tighten completely into the housing like shown in the pictures, there is likely a cord in the way and you should remove the camera and fix it. Suggest printing in PETG for UV and weather resistance. I've had six of these mounts installed for a few months so far with zero issues, even after a couple high wind storms. Leave a comment with any questions or issues. Included are STL files for roof angles 18, 20, 22, and 24 degrees. The original Fusion 360 file is also included for easy remixing and modification to your needs. Like this design? Buy me a coffee!
With this file you will be able to print Amcrest 4K POE Security Camera Mount with your 3D printer. Click on the button and save the file on your computer to work, edit or customize your design. You can also find more 3D designs for printers on Amcrest 4K POE Security Camera Mount.