AMIGAPI 1000 - Amiga 1000 (3:1) case for your Raspberry Pi
thingiverse
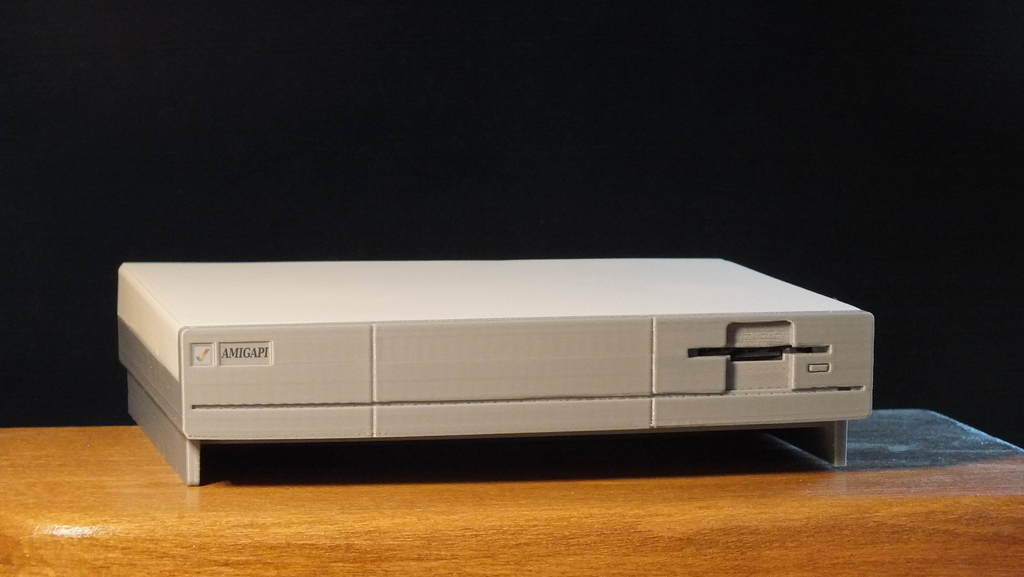
The AMIGAPI 1000 is an exact 3:1 scale model of the Amiga 1000, designed specifically for your Raspberry Pi. This model includes a 2.5" hard drive, SD extension, and 30 mm fan. You can also use it with just your Pi if you prefer. This case makes a great enclosure for the RPi, but what's even more impressive is its homage to the original design. I'm still amazed at how much computer power fits into such a small space today compared to the original Amiga, which was an incredible piece of hardware in its time. The floppy drive works, albeit with some limitations; I only tested it with micro SDs, so I'm not sure about 3.5" floppies. Even the RPi status LEDs are visible through the hole for the floppy LED. To assemble this project, you'll need a few additional components beyond the printed parts: * A Raspberry Pi 3 B+ (any full-size model will do) * A SATA to USB controller (not sure if it will fit; preferably use an external drive with a built-in controller) * An SD extension (micro SD/TF to micro SD/TF - shorter cables are better) * A SATA 2.5" hard drive or SSD (optional, but recommended for storage) You'll also need a 30x30x7 mm cooling fan (use one of the screws from the case). The RPi, hard drive, SD extension, and fan should clip into place without requiring any screws. I added a single screw at the back to secure it in place. The assembly process is straightforward: simply print the three pieces (in 3D) and assemble them. You shouldn't need any supports, but be sure to print the bottom and top pieces upside down. Apply a few drops of glue to attach the bottom piece (it's easier with the fan installed). The SD extension slides into its slot and the cable goes in below. There's also a hole at the back for the USB cable connecting the HD controller to one of the RPi USB ports. My controller is from an old external hard drive, which has a mini USB connector that fits perfectly when the HD is turned upside down. Feel free to modify this project and share your creations with me!
With this file you will be able to print AMIGAPI 1000 - Amiga 1000 (3:1) case for your Raspberry Pi with your 3D printer. Click on the button and save the file on your computer to work, edit or customize your design. You can also find more 3D designs for printers on AMIGAPI 1000 - Amiga 1000 (3:1) case for your Raspberry Pi.