Amsterdamman's Stabilized Z axis Herringbone Gear for Reprap Ormerod
thingiverse
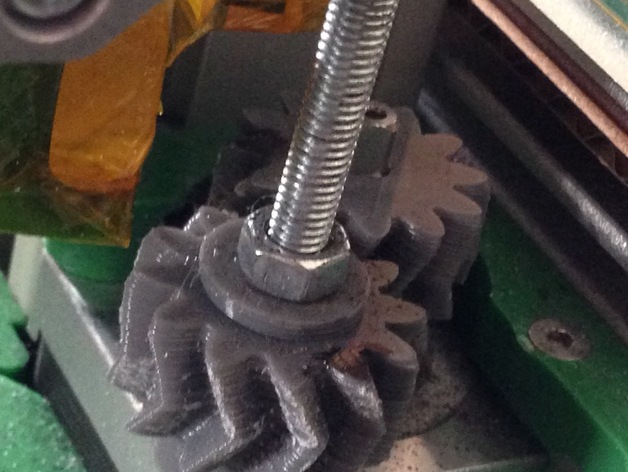
Edit Both gears slightly changed - Drive Gear: I found a small off-center in the position of the drive gear hole. This corrects that error. The Stabilized Gear: I removed the flare around the inner hex nut hole which makes it slightly tighter on the top giving the bearing a better surface to sit on. Stabilized Z-axis herringbone gear with nuts on both sides of the gear. I was unsatisfied with the performance of my Z axis and the lack of centered rotation I saw on the threaded Z axis rod. I printed some herringbone gears but they didn't fit my machine - maybe it was the fault of my printer, I just started last month. I pulled apart the gears in Sketchup and started to rebuild parts. Eventually I ended up rebuilding the entire profile of the gear using the dimensions of the original but reworking the rest of the gear. Many iterations later I had a nice set of working and lash free herringbone gears on my Z axis and 98% of my Z issues have been solved between the gears, the extended Z axis nut holder and a set of Aluminum X-axis arms from Dave in the UK. But the threaded rod was still not rotating centered due to the slight angle the gear takes when put against the threaded rod nut and the bearing top. My biggest improvement was to flip the nut cavity from the top to the bottom just over the bearing. This allows the second nut to squeeze the entire gear from above and centers it on the threaded rod. I printed a M5 washer as well since I didn't have one here, but did have a 3D printer!!
With this file you will be able to print Amsterdamman's Stabilized Z axis Herringbone Gear for Reprap Ormerod with your 3D printer. Click on the button and save the file on your computer to work, edit or customize your design. You can also find more 3D designs for printers on Amsterdamman's Stabilized Z axis Herringbone Gear for Reprap Ormerod.