
Analog SimRacing-eBrake
thingiverse
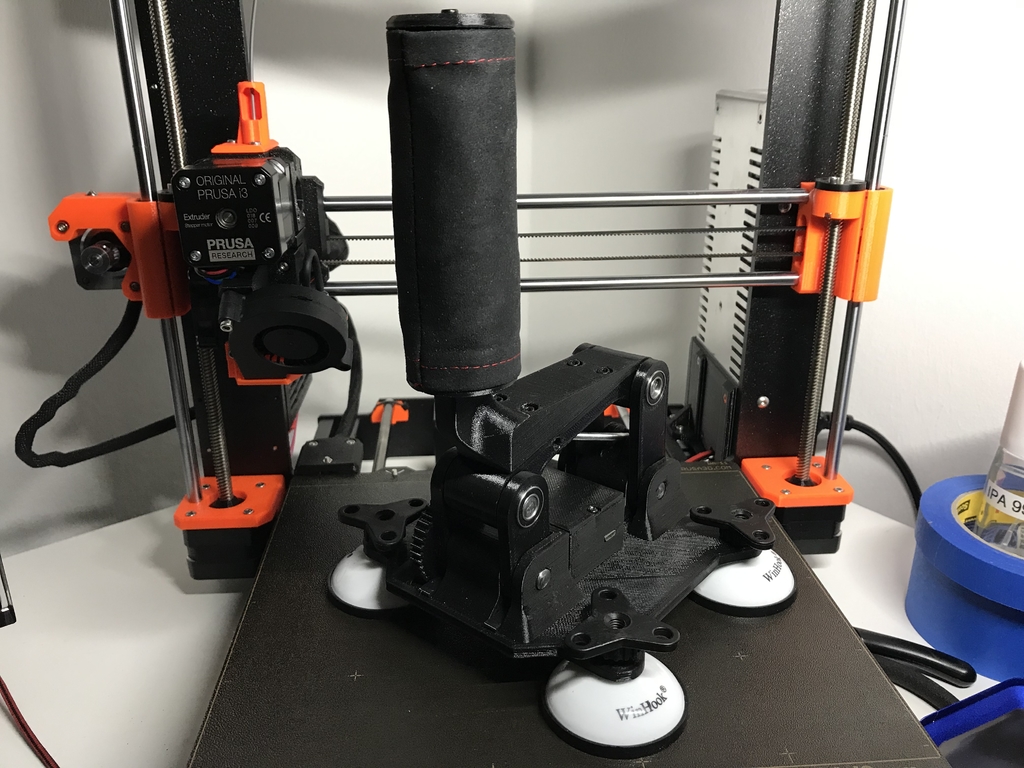
I Designed A Compact Analog E-Brake For Sim-Racing That You Can Place On Top Of Your Table Using Suction Cups. Parts List (May Be Incomplete): Name | Amount | Needed For... M3x29 Hex Socket Screws 3 Grip ("Griffhälften Links/Rechts") M3 Washers 3 Grip ("Griffhälften Links/Rechts") M3 Nut 3 Grip ("Griffhälften Links/Rechts") M3x15 Countersunk Screw 1 "Abdeckstutzen" On Top Of The Grip M3x15 Hex Socket Screws 2 Fixing "Griff" On "Oberteil" M3x20 Hex Socket Screws 2 Fixing "Griff" On "Oberteil" M3 Washers 4 Fixing "Griff" On "Oberteil" M3 Nut 4 Fixing "Griff" On "Oberteil" WinHook Suction-Cups 4 You May Be Able To Use Other Suction-Cups eBrake Basis 1 Its The Whole Base Of The E-Brake Hebelarm 50mm 2 Levers At The Back End Of The "eBrake Basis" Hebelarm 30mm 1 Front Right Lever On The "eBrake Basis" Hebelarm 30mm Poti 1 Front Left Lever That Will Drive The Potentiometer Zahnrad Poti 1 Gear That Will Be Pressed On The Potentiometer eBrake Oberteil 1 Upper Part That Fits The Levers Hebel 1 Goes On Top Of The "eBrake Oberteil" Griffhälfte Links 1 Left Side Of The Grip Griffhälfte Rechts 1 Right Side Of The Grip Abdeckstutzen 1 Goes On Top Of Both Grips (Just A Design-Thing) 300° Potentiometer 1 Electronics-Housing - See Photo Arduino Pro Micro 1 Electronics-Housing - See Photo Elektronikgehäuse 1 Is The Electronics-Housing, On Top Of eBrake Basis Deckel Elektronikgehäuse 1 Cover For The Electronics-Housing Gummipuffer 2 Bumpers That Need To Be Printed In TPU Script For The Arduino: https://github.com/AM-STUDIO/Analog-E-Brake It Was Designed For Stuff I Had Laying Around So Maybe You Need Some Tweaking To Fit Parts You Will Buy. Keep In Mind To Print The Bumpers (Gummipuffer) Best In TPU. They Are Necessary To Regulate The Moving-Angle Of Both Front Levers To 90 Degrees. The Gearset Is Designed As A 3,34:1 Ratio To Convert 90°-Lever-Movement To 300°-Potentiometer-Movement. Also Keep In Mind To Carefully Insert The Potentiometer Into The Electronics-Housing While Pressing The Potentiometer-Gear Onto The Potentiometer-Rod. At This Point You Have To Double Check The Turning Direction Of Both Potentiometer And Front Left Lever (One With The Large Gear) Fit Each Other! Otherwise You Have To Disassemble Potentiometer-Gear, Turn The Potentiometer To The Right 0°-Limit And Fit Again. Inspired By: https://www.youtube.com/watch?v=kv0FTpRLFMY In This Video You Will Also Find The Wiring Of The E-Brake. Note: Due To Regulations Of The Library It Has To Be An Arduino Pro Micro (Or Clone). A Arduino Nano (For Example) Will Not Be Compatible. If You Achieve Values Of 100% E-Brake When Your E-Brake Is In Its Normal Position And 0% If You Pull It To The 90°-Limit, You Have To Reverse The Potentiometer-Value In The Arduino Script Or Inside Your Racing Game Settings. After Designing, Printing, Setting Up The Arduino, Soldering All Wires (Note: There Is Very Little Space In The Housing So Better Check Cable Lengths And Test-Assemble Before Soldering!), Building Everything It Really Is A Nice Plug-And-Play-Solution For Sim-Racing! Fun Fact: Grips Are Designed To Be Fitted With Self-Sewed Grips Where The Fold Fits Between The Two Parts Of The Grip. My Wife Sewed A Nice Black Alcantara Grip With Red Stitches For My E-Brake! *CoupleGoalsAchieved*
With this file you will be able to print Analog SimRacing-eBrake with your 3D printer. Click on the button and save the file on your computer to work, edit or customize your design. You can also find more 3D designs for printers on Analog SimRacing-eBrake.