Andon Light Project Box
thingiverse
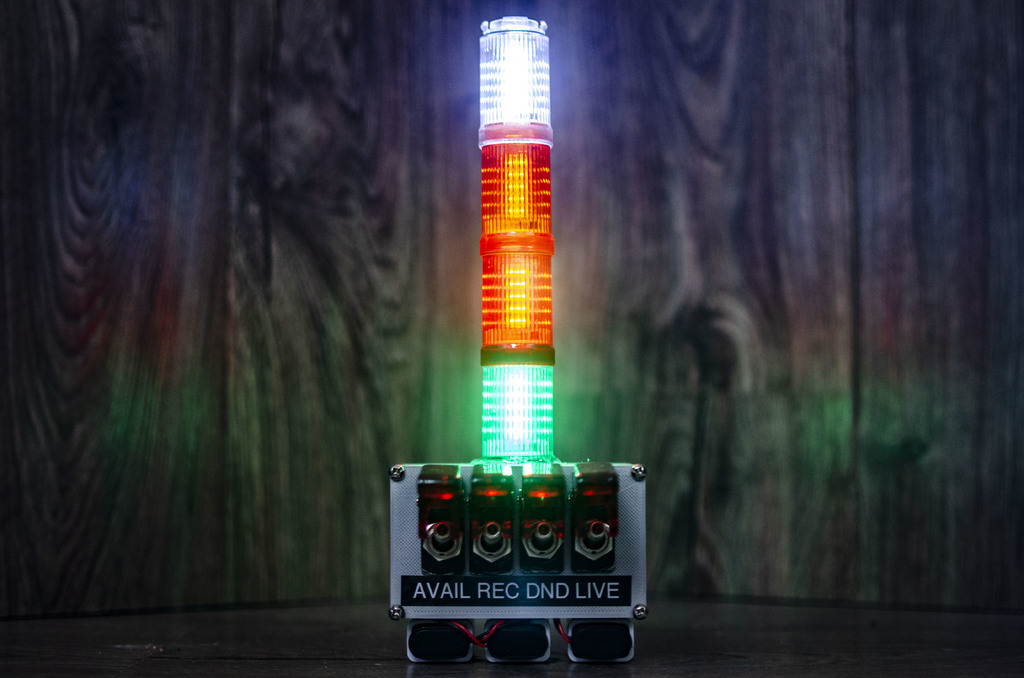
The purpose of this andon light is to show others outside your room if it’s okay to enter! The parts that you need for this project are: 4 Toggle Switchs 3 9 V Battery Clip Connectors 4 24V Indicator Lights, Red+Green+Yellow+White (I used a stack light from work that was being thrown out due to a faulty siren) Some wire A scrap piece of wood And a project box that can fit all your items within. (I 3d modeled and printed my own project box for this) There I a link in the description for all these parts. The total cost of this projects is $30 The tools you’ll need for this are: A soldering iron A hot glue gun A drill Some clamps A pair of plyers And optionally a label maker, or something equivalent. You should only need about 1 hour to complete this project. Especially it you do not cut you hand like I did by being impatient and not clamping down the project box to a piece of scrap wood while drilling it. Do not just hold onto the project box with your bare hands while drilling holes into it. I decided to use 3M VHB double sided foam tape to mount this to my door, you can also drill holes through the back of it to mount it directly if you like. some issues I ran into: I did not use enough nine-volt batteries to power the indicator lights. I recommend 3 9v batteries to power 24v indicator lights. I was a bit impatient when wiring up the toggle switches and wired them up backwards. This was solve very easily by swapping the wires back around. Some things I would change about this project: I would like to have a cover for the nine-volt batteries, so they are not visible. This thing kind of looks like a nefarious device in its current state… With that in mind, I do not want to put them directly inside the box so I have to open it every time I need to replace the batteries. maybe a good idea would be to hot glue the battery connectors inside a slotted cutout so you can easily slide the batteries in and out of the bottom or top of the device. I do like how this turned out otherwise, and it functions as intended. Now I will not have interruptions while I record, or am working on a project. Some other things you can do to enhance this: connecting these lights to an Arduino to ad a little more control. With the Arduino added, and maybe a wifi adaptor, you could have it be wirelessly activated with inputs from another device. You could connect this to a raspberry pi, and have it activate whenever you run some specific software, or when you software is in a different state. Instead of the toggle switches, you could use a 5 way switch. There a plenty of way to enhance this project and make it your own! If you are inspired by this project, and make your own, please share it in the forum! There is a link to the write up on this project right here: http://forum.electreak.com/topic/7-andon-light/
With this file you will be able to print Andon Light Project Box with your 3D printer. Click on the button and save the file on your computer to work, edit or customize your design. You can also find more 3D designs for printers on Andon Light Project Box.