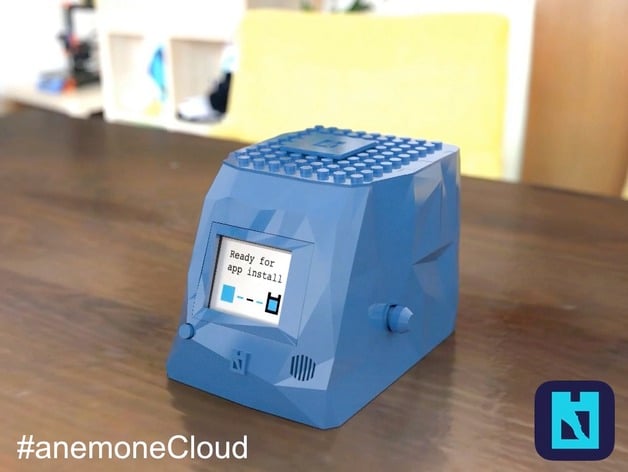
Anemone Tentacle Mk1 (Arduino YÚN Case)
thingiverse
It looks like you've shared a detailed lesson plan for creating an Anemone Tentacle open hardware device. Here's a summary of the key points: **Materials:** * Arduino TFT LCD Display * Rotary Encoder KY-040 * Buzzer YL-44 * Microswitch TC-0108-T * Red Switch P-PB303B * Green Super Flux LED 913PG2C (x2) * Optocoupler BPC-817C (x2) * Resistor 220 Ohm (x2) * Resistor 10 Kiloohm (x1) * Prototype Shield with Small Breadboard * Stripboard Single Side PCB 5x7cm * RJ-11 Connector Box WEBP 6-4 LP 833-045 * Insulated wire on coil 0,4mm/25m Blue * Breadboard Connectors PROSKIT OP-E351 * Female Headers Row 40 * Male Headers Row 20 Straight * Male Headers Row 20 90-deg * Jumper Cables M-M, M-F, F-F, 40pcs, 10cm * Jumper Cables M-M, M-F, F-F, 40pcs, 20cm **Total Cost:** €114.84 **Skills Learned:** * Soldering * Electronics * Programming **Duration of Lesson:** 18 hours (4 hours preparation + 10 hours 3D printing + 4 hours assembly) **Preparation:** * To 3D print the Tentacle case, you need: + A 3D printer (ABS compatible = with heated bed) + ABS filament * In theory, PLA filament can also be used, but it has not been tested. **Rubric and Assessment:** * The student assessment is a success when: + A. Students were able to construct a working Anemone Tentacle device and install the software on it. + B. (harder variant) Students were able to construct a working Anemone Tentacle device, install their own Anemone application using OTA update. **References:** * The Anemone Cloud platform www.anemone.cloud * Official Anemone GitHub Repository * Anemone Platform Documentation
With this file you will be able to print Anemone Tentacle Mk1 (Arduino YÚN Case) with your 3D printer. Click on the button and save the file on your computer to work, edit or customize your design. You can also find more 3D designs for printers on Anemone Tentacle Mk1 (Arduino YÚN Case).