Anet 32bit
thingiverse
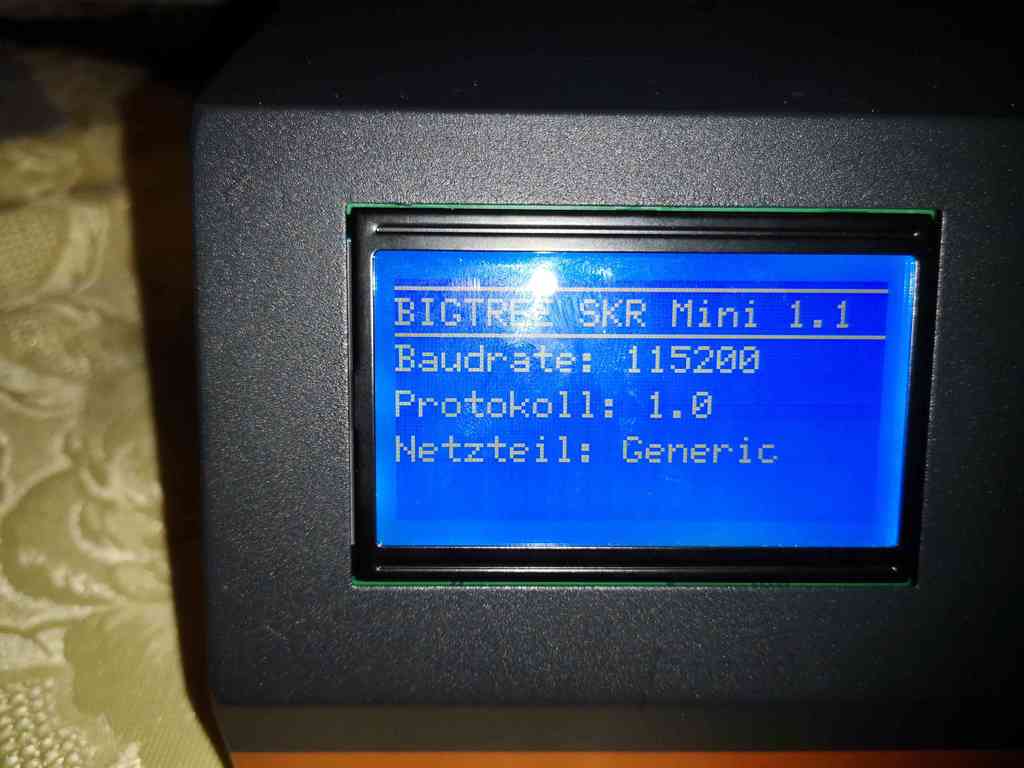
Do you want to upgrade your Anet E12 / E16 with 32-bit? Here's a step-by-step guide. Requirements: be prepared for more than just a basic upgrade! Materials needed: 1. SKR Mini V1.1 board (90x70mm) 2. Four stepper drivers 3. One mosfet for heatbed 4. PC board adapter 5. Mosfet holder Additional requirements: cables, dexterity, and programming skills in Marlin 2.0. Print the circuit board adapter and mosfet holder. Remove the printer's mainboard by disconnecting it from power and opening the housing. Refine the SD card slot (18mm wide) and USB port (14mm) towards the display. You'll need a file narrower than 1.6mm for the SD card slot. Once done, attach the board adapter and SKR board, checking if the USB slot and SD card fit. Mount the mosfet holder. Special cable: EXP1 to ANET-LCD; you'll need a 26cm 10-pin flat cable and two 10-pin Tub connectors. On the EXP1 side, remove the fourth wire from the composite, coming with a 1-pin DuPont connector on the reset (EXP2/Pin8), marked by a red cable. Watch out! On the Anet side, the red wire is on pin 10, so plus and minus come on pin 2 (plus) and pin 1 (minus). Turn two wires. On the ANET-LCD, solder a 6cm long cable to the LCD post well on Pin 7, attaching a DuPont connector that will later connect to J3/Pin 7 (reset). Limit switches have different polarity: positive outside, negative in the middle. Move the negative pole to the middle so it can fit into the connector. See Pic 20. Fan connections are also polarized differently; simply turn the Tub connectors. See Pic 19. That's the entire hardware conversion. Software: In the "Marlin-bugfix-2.0.x_12864P_16div_Demo / Marlin / scr / pins / stm32" directory, change the following in the file "pins_BTT_MINI_V1_1.h": * "#define BTN_ENC PB11 to #define BTN_ENC PB6" * "#define LCD_PINS_RS PC12 to #define LCD_PINS_RS PC14" * "#define BTN_EN1 PD2 to #define BTN_EN1 PC15" * "#define BTN_EN2 PB8 to #define BTN_EN2 PC13" * "#define LCD_PINS_ENABLE PB6 to #define LCD_PINS_ENABLE PB7" * "#define LCD_PINS_D4 PC13 to #define LCD_PINS_D4 PC11" In Configuration_adv.h, change: * "#define SDCARD_CONNECTION LCD to #define SDCARD_CONNECTION ONBOARD" Make the following settings in Configuration.h so that the LCD and SD slot work properly: * "#define SDSUPPORT" * "#define REPRAP_DISCOUNT_FULL_GRAPHIC_SMART_CONTROLLER" The Anet 12864 LCD now works with this. All other settings are normal in the Configuration.h or Configuration_adv.h.
With this file you will be able to print Anet 32bit with your 3D printer. Click on the button and save the file on your computer to work, edit or customize your design. You can also find more 3D designs for printers on Anet 32bit.