Anet A6 Heatbed Leveling & Z Axis Jigs
thingiverse
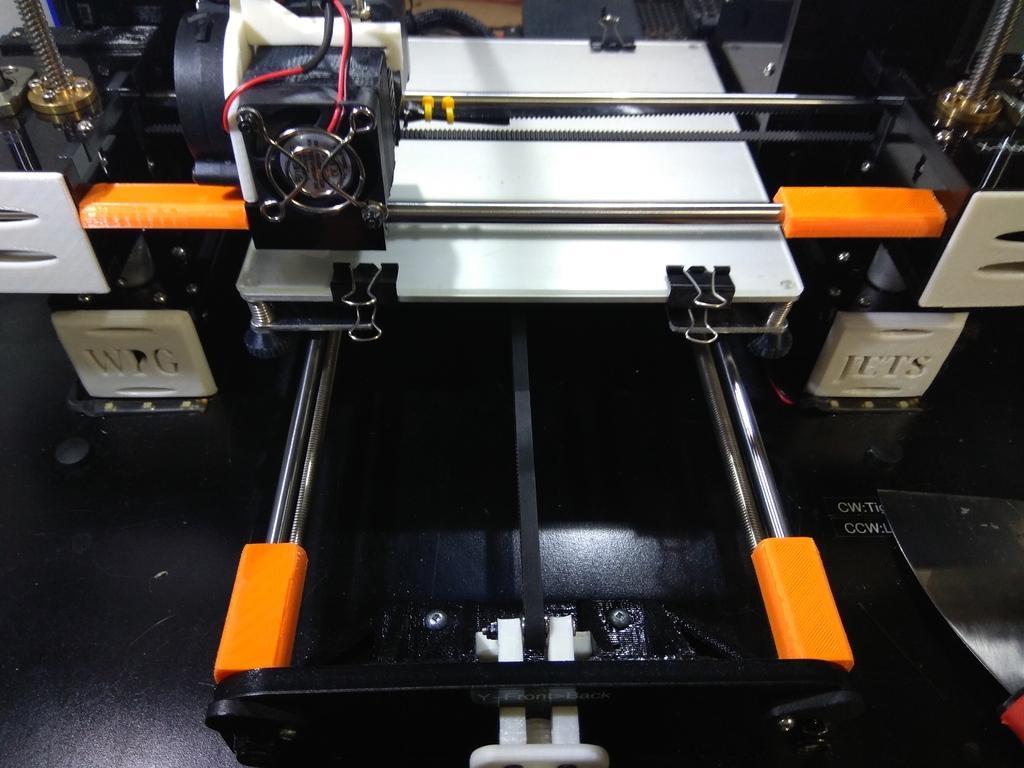
CAUTION: Ensure all jigs are removed before powering on your printer. I designed these heatbed leveling jigs to increase accuracy and consistency when leveling the heat-bed on my Anet A6. Using these jigs will allow you to check and adjust the heat bed leveling at consistent points, resulting in better accuracy. The jigs marked with “.X-H.” are for the front horizontal extruder X Axis rod, place one on each side. The jig marked with “Y-F” is for the horizontal heat bed rods running front to back, place it on both left and right rods at the front against the front cross frame piece. The jig marked "Y-R" is for rear heat bed, place it on the acrylic cross piece (midway) connecting the left and right frames together; refer to the photo for proper orientation of jigs. With these pieces in place, you can now level your heatbed by moving it and extruder until they stop at each jig. The file containing the Z Axis Default Height Jigs requires printing two copies. These jigs are used to equalize the Z Axis Boxes on both sides. Move the heat bed all the way to the rear position, then place the two Z Axis Default Height Jigs under the front horizontal rod; one on each side, adjust the individual X Axis Box using the threaded rods as needed until the rod makes contact with the shaped top of the jigs on each side. Once both sides are even, electronically move the Z Axis up; be cautious not to move it down, as this may damage your stepper motors. The jig marked with a “Z” (Z_Axis_Level) can only be used on printers like the Anet A6 with two horizontal rods for the extruder. This jig will indicate how level your two boxes are in relation to each other, giving you an idea of how level your extruder is. It's not essential but may be a useful tool before long prints. Print this file and attach a line level from hardware stores (if available) to the plate. I added another item (Heatbed Level Starting Point) to set my heatbed at a starting height, eliminating the need to turn all screws to their lowest setting. This allows enough clearance for your extruder tip not to touch the heatbed; specifically for a 3mm Borosilicate Glass heatbed so that all four corners are equal, saving you time. The handle (end with green paint) makes it easy to place and remove, especially at the rear of the heatbed. I also designed a place to store the jigs (file called Calibration_mount_HB) when not in use; it can be mounted to the wall. Positive and negative feedback is welcome, but please be respectful.
With this file you will be able to print Anet A6 Heatbed Leveling & Z Axis Jigs with your 3D printer. Click on the button and save the file on your computer to work, edit or customize your design. You can also find more 3D designs for printers on Anet A6 Heatbed Leveling & Z Axis Jigs.