Anet A8 Controller's Microprocessor Replacement
thingiverse
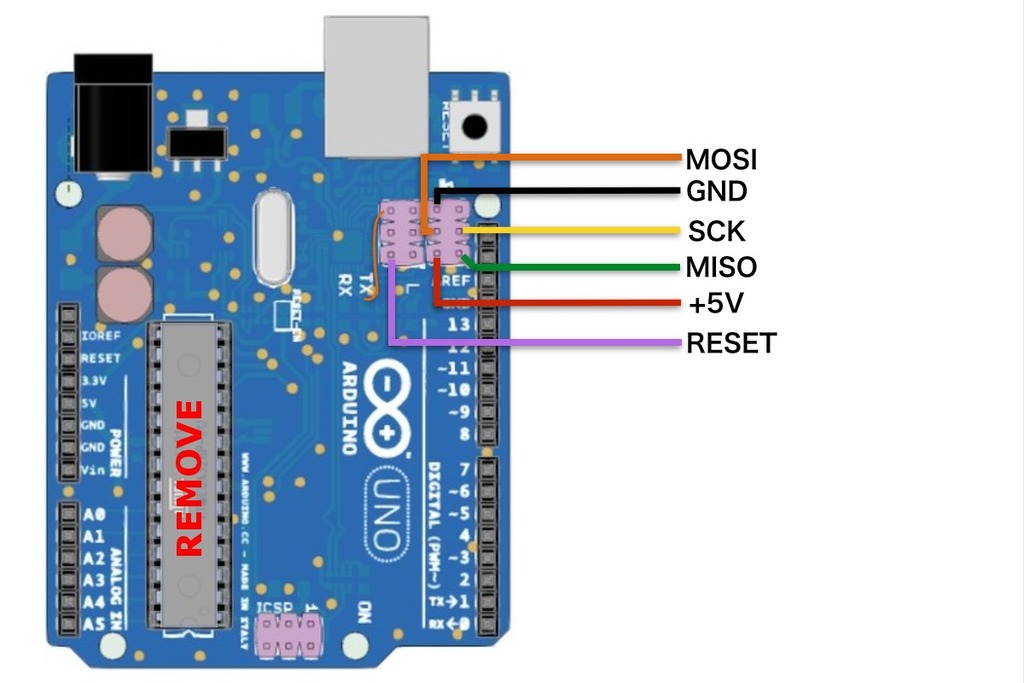
Problems: When upgrading my Anet A8 printer, I made a critical mistake by not turning off the power supply first. This led to damage on the main controller chip. Solved: The solution was straightforward - replace the damaged chip and re-flash it with the correct firmware. Steps: 1st: Carefully remove the damaged chip from the board and replace it with a new one. Remember, you'll need your power supply later when re-flashing the firmware. 2nd: If you already have an AVR ISP programmer, skip this step. However, if you have an Arduino handy, check out the tutorial at http://make.kosakalab.com/make/electronic-work/avrisp-mk2/uno-r3_avrisp-mk2_en/. If not, feel free to skip this post or find a suitable ISP programmer. 3rd: First, install AVR Studio and open Tool > Device Programming. Connect your ISP programmer to the board, following the pinout shown in the picture provided. Programming parameters: Fuse: Set the fuse bytes carefully - 0xFD;0xDA;0xD6 (from top to bottom in the programming fuse tab). This is crucial! Memory: Find the attached files for memory configuration. MY MISTAKE: In my case, I accidentally flashed incorrect fuse bytes, which prevented the AVR Atmega1284P chip from being recognized by the ISP programmer. To resolve this, supply a clock source to the XTAL1 pin of the chip before re-flashing the fuse byte. If you've experienced similar issues, please share your solutions in the comments! Finish! Good luck with the upgrade process. If you encounter any problems, feel free to comment below for assistance!
With this file you will be able to print Anet A8 Controller's Microprocessor Replacement with your 3D printer. Click on the button and save the file on your computer to work, edit or customize your design. You can also find more 3D designs for printers on Anet A8 Controller's Microprocessor Replacement.