Anet A8 Dual Bowden Conversion
thingiverse
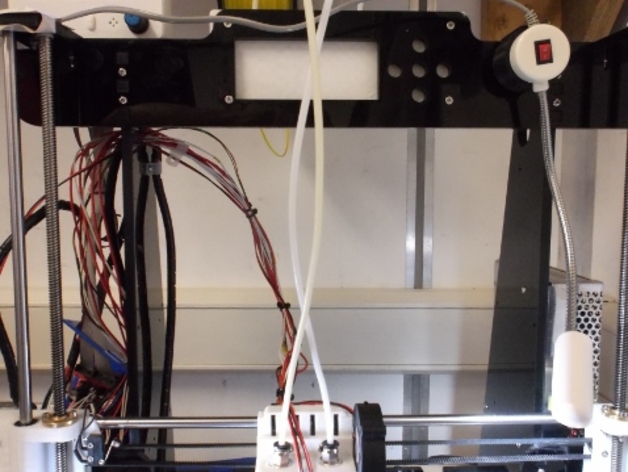
In an effort to gain more accuracy out of my printer, and gain the ability to print in dual colors, I've come up with this design. I also felt that I would be able to gain some printing speed by decreasing the moving mass on the print head. I've tried to keep the hot ends as close together as possible, so as not to lose build space. Both nozzles have access to the entire build plate. Also, the auto level servo mount was designed to not lose space or interfere with the side of the machine. You MUST route your heating and thermistor wires carefully so that they don't hit the frame when homing the X axis or on the far side of the build plate. This design, like several others, deflects hot end cooling air out the sides of the mount, keeping it away from the build plate. I also have found that most small servos have quite a bit of slop in the gear train. Most of the servo arm designs I've seen have the button on the switch offset from the center line of the servo shaft. When the switch hits the build plate, the force causes the arm rotate slightly (taking up the slop), thereby changing the actual reading each time it hits the plate. By keeping the switch button of the switch in line with the shaft of the servo, forces are applied more to the shaft bearing surfaces and not to the gear train. You get less deflection/movement during auto level operations (this one change made a HUGE difference in my auto level / printing). I've included 2 servo arms. The arm with holes was designed around MY switch. I urge you to print the arm WITHOUT holes and use your switch as a template to drill mounting holes. IMPORTANT!! During assembly I found that the servo mount was hitting the X drive belt. I had to insert washers between the back of the carriage and the servo mount to clear the belt. I am working on a new design to fix this. MISC NOTES: I printed everything in PLA. I have not seen any melting issues with the mounts yet, but I run the hot end fans all the time. When running dual extruders, the RAMPS board does not have a way to turn on / throttle the work piece cooling fan. You need an extender board. I have one on order, but right now I have my cooling fan tied to voltage through a switch.... I have to manually turn it on when needed, and it only runs at full speed. I'm only printing in PLA, so after the first layer, I turn it on. Print Settings Printer: Anet A8 Rafts: Doesn't Matter Supports: Yes Resolution: .2 or .3 Infill: Yes Notes: For rigidity, I used fairly high infill amounts. I also used 3 perimeters, and 3 bottom/top layers. On the extruder mount, I think i used 75% infill and higher layers to keep the zipties from breaking the mount. Don't over tighten them or it will break. The lower cooler is quite thin, and your printer must be fairly accurate. However, I am working on a second version to increase thickness slightly, and to give a little more room off the hot ends. Post-Printing Some clean up may be needed. I've tried to make the use of supports as little as possible. The only place needed was for the lower cooler slot, lower cooler duct and the holes for the nut locations. The extruder mount has channels for the zip ties to pass through. The channels aren't that big, so most printers should be able to bridge without issues. For the hot end mount: After printing, my hot ends fit perfect in the opening, and when tightened down, do not move. However, if yours do move, you may need to gently sand the mating faces (not the half circles) a little to give some more clamping force. The mount was designed to give 32mm spacing between nozzle openings. After printing a couple of things, they are off a teeny, tiny amount. I am still playing with the offset amounts in my printing software, but it's down to about .01mm. Just enough feel a difference in colors. How I Designed This This was designed in Sketchup, and printed using Simplify3D. I am trying to find the original things I used to give me parts and ideas for this entire design. When I find them I will give proper credit. In the mean time, THANKS to everyone who's parts I got inspiration from!! I am really limited on my access to hardware (deployed in the middle east), so I've tried to reuse existing hardware from the Anet A8 kit as much as possible. Hence the zip ties for securing the extruder motors to the mount. I used the cooling fans that came with the hot ends. The 50mm fan is friction fitted to upper cooling duct (which is also friction fit to the lower duct). You could add a drop of glue if you feel it's needed. It also uses one bolt screwed into the rear mount. There is no mount hole designed into my rear mount. I simply drilled a small hole in it using the fan as a guide. It doesn't take much to hold the fan in place, so don't over tighten the bolt. I may upload a new version of the rear mount with a nut location. The extruder mount mounts to the rear of the cross piece using the holes and hardware that held the original display. I have converted to a RAMPS setup, so I no longer use that display. Custom Section I reused existing hardware when possible. However, you may need to purchase a few things. The hot ends I purchased included the air fittings, tubing, thermistors, heat cartridges, fan ducts, and cooling fans. I did not use the ducts. After tightening everything on the hot ends, mine came up about .8mm difference in length from the tip of the nozzle to the end of the housing (minus air fittings). The mount allows each hot end to move up and down about .5mm so it's pretty easy to get them both the same distance from the build plate. Here's what I purchased off Amazon for this conversion: 2 X J head hot end:https://www.amazon.com/gp/product/B010MSTVZO/ref=oh_aui_detailpage_o06_s01?ie=UTF8&psc=1 1 X MK8 Extruder:https://www.amazon.com/gp/product/B011QCFGPO/ref=oh_aui_detailpage_o06_s03?ie=UTF8&psc=1 M2 / M3 hardware kit:https://www.amazon.com/gp/product/B014OO5KQG/ref=oh_aui_detailpage_o06_s02?ie=UTF8&psc=1 I also purchased these, but these are optional (although I'm finding they do help): Anycubic Barrel Stainless Steel Nozzle Throat with PTFE Tube:https://www.amazon.com/gp/product/B0188G31AS/ref=oh_aui_detailpage_o01_s03?ie=UTF8&psc=1
With this file you will be able to print Anet A8 Dual Bowden Conversion with your 3D printer. Click on the button and save the file on your computer to work, edit or customize your design. You can also find more 3D designs for printers on Anet A8 Dual Bowden Conversion.