Anet A8 E3D V6 Bowden Dual Extruder Mount Pruisa i3 Clone X Carriage
thingiverse
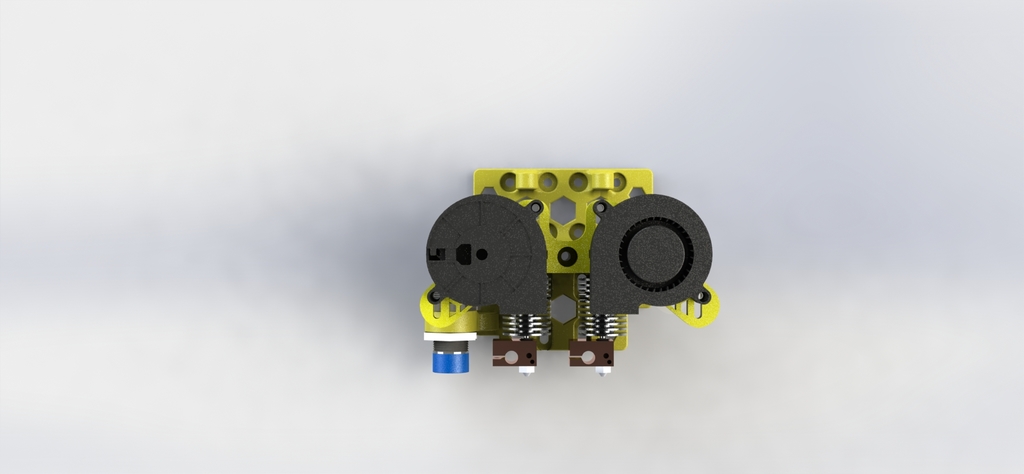
#Please see the newer version [Here](https://www.thingiverse.com/thing:2766701) It features a much better design with more compatibility and better cooling! Updated 1-18-18 READY TO GO! See it run here: https://youtu.be/Nrn9100MQbY See my Rear Sensor Mount version here https://www.thingiverse.com/thing:2763157 All instructions are for the Anet A8. Reduced some sizes, moved some things and cleaned it up. I added some zip tie holes in the sides and improved tolerances. I made slotted holes because my printed X mounts changed the dimensions a bit. I have printed, installed and now used this part. Below are instructions on how to set it up. I printed them with 1.8mm wall and 30% fill. I also made a set at 1.2mm wall and 15% fill that worked perfectly. Both in PLA. This includes guides like my thing https://www.thingiverse.com/thing:2732685 built into the mount. Get the latest Skynet3D firmware from https://github.com/thijsk/Skynet3d and please update your firmware as follows: Enable RAMPS boards, this is for the common ones like https://goo.gl/XW91zh [Amazon.com link] PLEASE pay attention and be sure to choose the correct code for your motherboards. See boards.h in the Skynet firmware for a list. define MOTHERBOARD BOARD_RAMPS_14_EEB Enable dual extruders: define EXTRUDERS 2 Offsets for the extruders: define HOTEND_OFFSET_X {0.0, 35.00} define HOTEND_OFFSET_Y {0.0, 0.00} For the probe it's : define X_PROBE_OFFSET_FROM_EXTRUDER -35 // X offset: -left +right [of the nozzle] define Y_PROBE_OFFSET_FROM_EXTRUDER 4 // Y offset: -front +behind [the nozzle] define Z_PROBE_OFFSET_FROM_EXTRUDER -5 // Z offset: -up +down You will need: 1) E3D style extruders 2) RAMPS 1.4 or 1.5 3) Marlin/Skynet firmware 4) 40mm M4 Screws and Nuts for the cap, 3 of them 5) 50mm blower fan 6) Wires, connectors, crimpers, and a soldering iron helps. I have made a guide in PDF form available here https://goo.gl/1s8jSR for setting the offsets. You will need a serial connection to your printer and I found using Octoprint is really easy. Here's a crapCAD schematic of the optocoupler board I made to run the 12v probe completely isolated from the RAMPS board.  Thank you! Enjoy and please like, comment and share!
With this file you will be able to print Anet A8 E3D V6 Bowden Dual Extruder Mount Pruisa i3 Clone X Carriage with your 3D printer. Click on the button and save the file on your computer to work, edit or customize your design. You can also find more 3D designs for printers on Anet A8 E3D V6 Bowden Dual Extruder Mount Pruisa i3 Clone X Carriage .