Anet A8 LASER Bracket - Rear Mount - v2
thingiverse
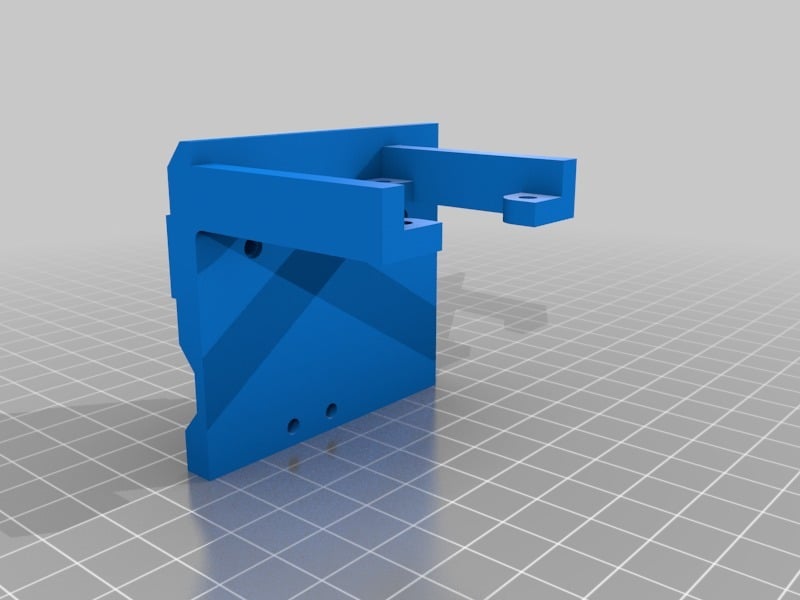
As advertised, here is Version 2 of my bracket. Now, the fan holder and the holes to fix the laser were shifted about 6.1 mm to the left. Consequently, the carriage will now reach the endstop (in default position) on the x-axis. I used CROSSJOIN's well-designed Sensor Mount as a base for my Laser Mount for the Neje Laser engraver's Laser module. Above the Laser module, I added a holder for 40x40 mm fans to provide cooling. The laser is secured by two M3 screws from behind. The bracket should be attached behind the carriage. It works seamlessly with this design - it should function out of the box for you too. Only applicable to Version 1: !!! IMPORTANT !!! Because of the fan holder, the carriage won't reach the Endstop (if the endstop is in "default" position) on the X-Axis. So, you'll need to move it some mm to the right or place something on the carriage to hit the end stop. Additionally, the carriage will now be in end-position earlier than before. You should adjust the "Travel limits after homing (units are in mm)" for the X_MIN_POS in your firmware. Please use Version 2 if you haven't already unless you have a good reason to stick with Version 1 ;).
With this file you will be able to print Anet A8 LASER Bracket - Rear Mount - v2 with your 3D printer. Click on the button and save the file on your computer to work, edit or customize your design. You can also find more 3D designs for printers on Anet A8 LASER Bracket - Rear Mount - v2.