Anet A8 Mainboard Cover / circuit board cover
thingiverse
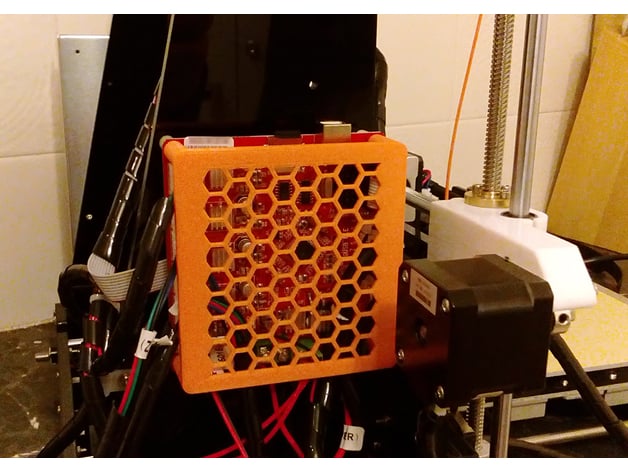
Although it doesn't need it, I made a cover for the mainboard of my Anet A8. My cats seem very interested in all the flickering lights and repairing cats and or 3D printers is expensive. I didn't want to have to add a fan, so the open hex grid should not obstruct airflow to the heat sinks. To attach the cover, just remove the M3 nuts and screw the M3 screws into the holes in the legs. The hole is just small enough to give the thread something to bite into, without being too hard to screw into. If you want something a little more secure, you could place the M3 nut over the hole, then press the nut into the plastic with a hot soldering iron, making sure you keep the nut level. Print Settings Printer: Anet A8 Rafts: No Supports: No Resolution: 0.2mm Infill: 20% Notes: Nothing special needed. I just used the Cura defaults for my printer to print. It took about 2 and a half hours and used about 7m of PLA (20g). Post-Printing I have been asked how I press the reset button. The wrong end plastic pen fits through for now, but if it becomes an issue, I might make a hexagonal button extension that fits through the nearest hole. How I Designed This I took some measurements for size and screw placement and created a simple cover in 123D Design.
With this file you will be able to print Anet A8 Mainboard Cover / circuit board cover with your 3D printer. Click on the button and save the file on your computer to work, edit or customize your design. You can also find more 3D designs for printers on Anet A8 Mainboard Cover / circuit board cover.