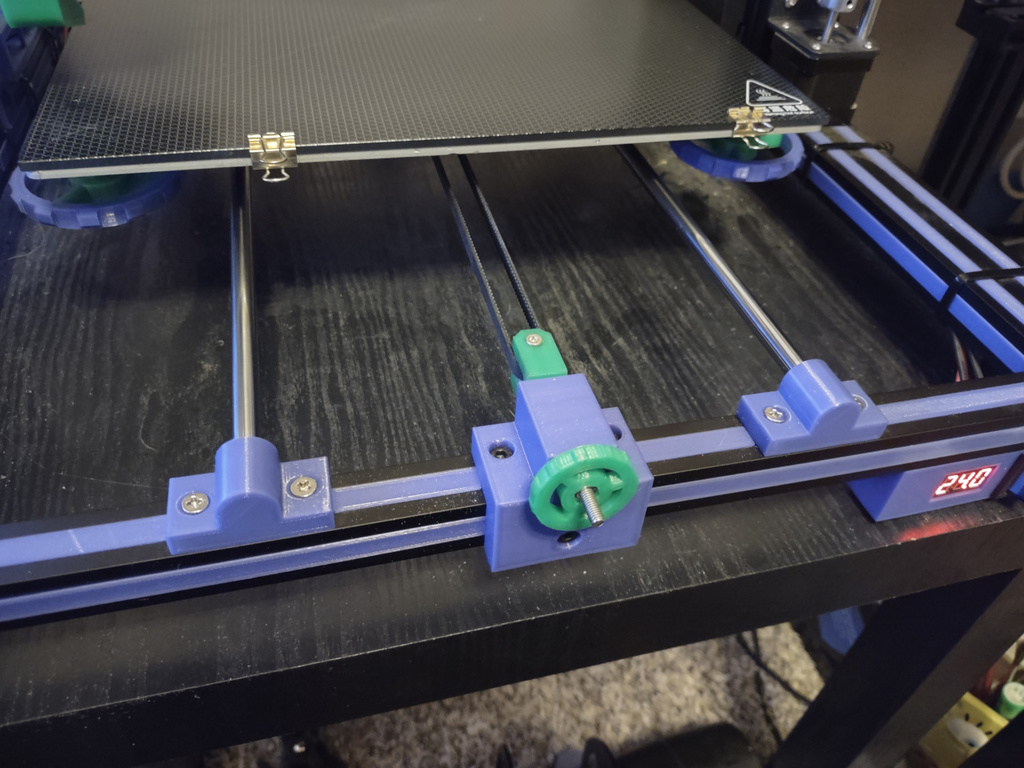
Anet A8 Plus Y axis tensioner
thingiverse
I originally modeled this as a "proof of concept" for the steel frame build I'm doing to my classic Anet A8, but it worked so much better than the cumbersome double wingnutted tensioner that came with the A8 Plus, I'm posting it here. The receiver portion of this model attaches to a 20x20 aluminum extrusion, as is the case for the A8 Plus, using three M4 X 8mm socket head screws and T nuts. Note: For ease of assembly, I slip the single T-nut that goes in the front face of the frame, then pre-install the top two screws and T-nuts to the receiver before attaching it. I run the front screw into the seated T-nut as I'm installing the receiver, then I tighten all 3 screws. Trying to install the receiver with all 3 screws and T-nuts attached may prove rather difficult. A M4X 40mm hex cap screw must be fed through the idler arm before attaching the two piece idler bearing to the arm with a M3x16mm socket head screw and m3 nut. The assembled idler arm is then inserted to the receiver, a M4 washer installed, then finally the knob with a M4 nut pre-inserted.
With this file you will be able to print Anet A8 Plus Y axis tensioner with your 3D printer. Click on the button and save the file on your computer to work, edit or customize your design. You can also find more 3D designs for printers on Anet A8 Plus Y axis tensioner.