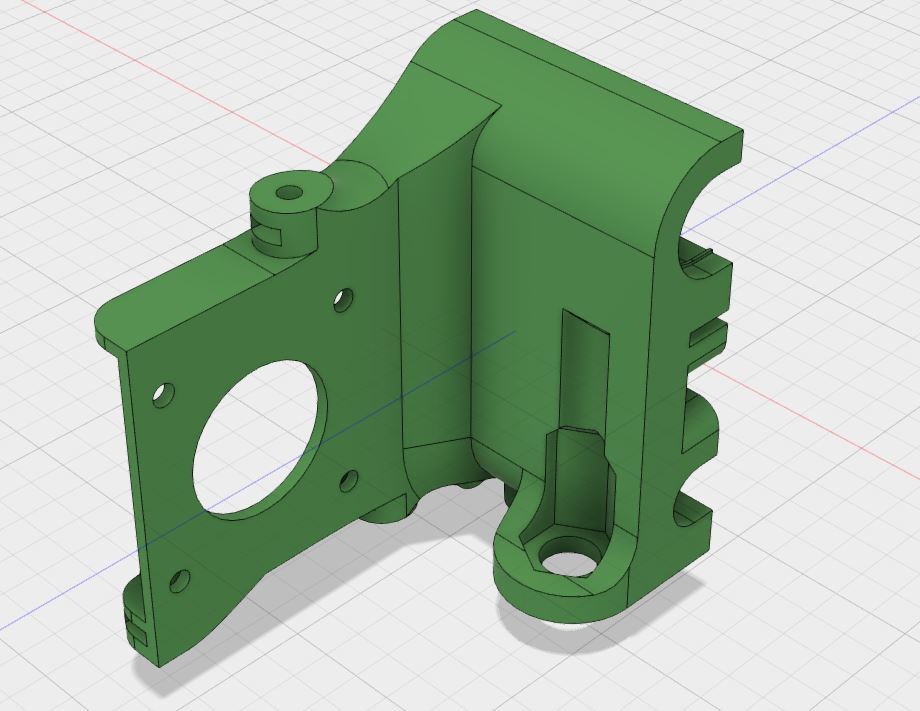
Anet A8 Titan Aero X Carriage
thingiverse
This is a remix of [Original Prusa i3 MK2 E3D Titan Aero Upgrade](https://www.thingiverse.com/thing:2192480) for the Anet A8. You'll need an appropriately sized fan duct from the original too. For the default Anet motors this is the [39mm duct](https://www.thingiverse.com/download:3470575). I've mostly just amended the belt holder and channel to align with the 16 tooth gears as supplied with the A8. You'll probably need to use glass fibre reinforced belts (which I'd recommend using anyhow) as the supplied ones may be too thick to fit. I also recommend using it with Leo_N's [Anet A8 X-Idler Mounts](https://www.thingiverse.com/thing:1919544) as the Anet A8's X rods are spaced slightly further apart. Using the Anet supplied X carriage will cause some binding of the linear bearings; it still works, but may reduce print quality and increase wear on the motors. The Anet board seems incapable of supplying the correct current to anything other than the supplied motors. If you have the older version of the Anet board you may be to use the smaller motor as available for the Aero. There are no adjustable trimpots on my board, and I couldn't get the E3D pancake motor nor a clone to work. So as much as I didn't want to, I had to use the supplied Anet motor with the 39mm duct. Firmware settings provided are predicated on the use of [SkyNet3D](https://www.facebook.com/skynet3ddevelopment/)/[Marlin](https://github.com/MarlinFirmware/Marlin). **configuration.h settings**: \#define DEFAULT_AXIS_STEPS_PER_UNIT {100, 100, 400, 496} \#define DEFAULT_MAX_FEEDRATE {400, 400, 8, 1.5} \#define DEFAULT_MAX_ACCELERATION { 1000, 1000, 100, 1000 } \#define INVERT_X_DIR true \#define INVERT_E0_DIR true Once you've done this, recompile and flash the printer with the new firmware. For DEFAULT_AXIS_STEPS_PER_UNIT the last value is the Extruder Stepper, in my case 496. Your value may well be different so use a [guide](http://reprap.org/wiki/Triffid_Hunter%27s_Calibration_Guide#E_steps) to help you work it out. If you use M92 Exxx to set the value you may need to use the Load Settings option on the LCD to get the changes to apply. The maximum feed rate is ~1/25th of the original, which seems very low, but this hasn't caused me any issues printing at 40mm/s with 0.32mm layer height. Any higher that this and my [rigid.ink](http://r.sloyalty.com/r/vGN2toWSdWdl) (referral link) PLA at 180C wasn't feeding accurately as the gear was grinding through the filament. **N.B.**: M8 proximity probes don't provide enough detection range to pick up the Aluminium heat bed. And nothing bigger fits in the mount. When I get a moment I'll see about sorting an attachment for M12 or larger probes. **Edit 2017/09/011:** First sensor mount is up. It fits the [Tronxy XY-08N](https://www.gearbest.com/3d-printer-parts/pp_591321.html) and similar. It's also adjustable enough to allow the use of an [E3D Volcano](https://e3d-online.com/volcano-sensor-cartridge-block) hot end. Cylindrical mounts should follow pretty quickly, along with firmware offsets. As an aside, I've switched to using [Simplify3D](https://www.simplify3d.com/) v4 and I have to say I'm very impressed. Out of the box it prints faster (well over half an hour quicker for this model at 0.24mm and 40mm/s) with better quality than Cura 2.6.2 that I've spent weeks tweaking. I miss the ability to print directly to OctoPrint. And damn it's expensive, only about 5 quid less than I paid for the A8. But I'm sorely tempted to keep it.
With this file you will be able to print Anet A8 Titan Aero X Carriage with your 3D printer. Click on the button and save the file on your computer to work, edit or customize your design. You can also find more 3D designs for printers on Anet A8 Titan Aero X Carriage.