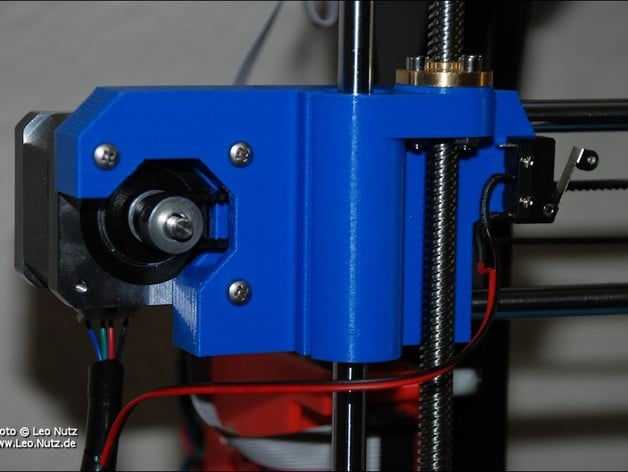
Anet A8 X-Carriage Mounts
thingiverse
I designed these X-carriages to fit my needs. They are, for the most part, the same as the original carriages that came with the kit. The major reason in creating these was to ensure the correct distance between the two ilders in relation to the guided rods. Before you start print make sure your printer is precisely calibrated!! Assembly instructions: Make sure both X-guide rods are 436mm in length. Make sure the rods are not bent. For easier insertion I recommend burring the end of the 436mm guide rods first. This makes it easier to insert them into the idlers. Due to tolerances in the print I also recommend using an 8mm drill to smooth the holes on the carriage. Only one careful pass is necessary. The rods must still fit snugly! Insert the 2 rods in the left carriage until they reach the end. Loosen all the guide mount screws on the extruder bracket. Mount the assembled extruder to the guided X-rods. Carefully mount the right carriage to the guide rods until it reaches the end. Now you can mount the whole extruder assembly with carriages and X-guide rods to the Z-guide rods. Lastly re-tighten the guide mount on the extruder bracket until the whole extruder unit moves freely but not loose. I've also included an X-carriage tensioner. I thought this solution was a great idea to tension the belt : http://www.thingiverse.com/thing:1683070 You will need 2 x M3x25mm screws and 2 x M3 nuts to mount the tensioner to the right carriage. The disc is for straightening the threaded shaft should it be off center and doesn't freely go through the top frame hole. To make corrections you will need to sand the disc to the appropriate angle for correct fit. I also recommend that the linear bearing be positioned in the center of the carriage. For this I created a bolt tool that can be used to push the bearing all the way in until the bolt tool is even with the carriage surface. These carriages are not a must have. Print them out if want to do some small improvements. Please let me know if you have a problem with the design so I can improve it if necessary. Also please post a picture with comments if you have made one. Thanks. Leo Update 21.1.2017: I've added a second version of the left motor carriage. It now has a channel for the X-stop cable. Update 25.1.2017: Version 1.1 of both carriages. The X-stop switch has been re-positioned making it easier to lay the cable behind the carriage. Some small modifications were also made. Update 18.4.2017: Uploaded "X_Idler_Right_Tensioner-9.4_Leo_N" to accommodate GT2-16 pulley. Update 24.5.2017: Uploaded "X_Idler_Right_Tensioner-9.0_Leo_N" to accommodate GT2-16 pulley for well calibrated printers. Update 7.6.2017: Uploaded "X_Idler_Right_Tensioner-11.4_Leo_N" to accommodate GT2-16/20 pulley (11mm wide) for 6mm belts. Update 10.12.2018: I've uploaded version 1.1 of both carriages as "step" files so that users can modify the carriages. A tip would be appreciated if you find them useful. Print Settings Printer: Anet A8 Rafts: Doesn't Matter Supports: No Resolution: 0.28 Infill: 25% Notes: Print speed 35mm/s with a 1.2mm shell thickness and 1.2mm top / bottom thick closures. For the Disc and the Bolt Tool use 100% infill!
With this file you will be able to print Anet A8 X-Carriage Mounts with your 3D printer. Click on the button and save the file on your computer to work, edit or customize your design. You can also find more 3D designs for printers on Anet A8 X-Carriage Mounts.
