anet A8 Z-axis endstop position adjuster
thingiverse
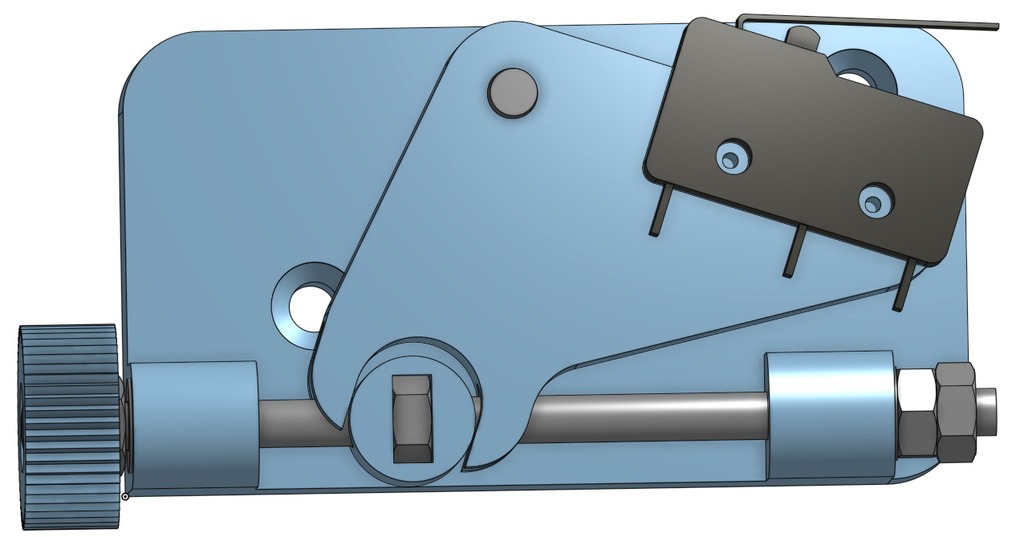
You can adjust the position of the z-axis endstop switch. 1. Insert an M3 nut into the middle slit of the slider. 2. Place the M3 nut into the hole on the front of the main body part. 3. Screw in the M3x18mm thread from the back of the main body to fasten the crank. 4. Pass the crank hole through the pin. 5. Insert the slider into the crank. 6. Install an M3x60mm thread or a similar type. 7. Use original flat head threads and bolts for the main body part. 8. Print out the necessary parts. *) You can use a full thread instead of a 60mm thread screw. In that case, you will need to design a nut holder or download my design and print it to turn the thread. If you use an M3x60mm thread and want to adjust with your screwdriver instead of your finger, you don't need to print the nut head I designed. In any case, you need two nuts (and a washer) to prevent movement in the axial direction of the thread at the end of the thread.
With this file you will be able to print anet A8 Z-axis endstop position adjuster with your 3D printer. Click on the button and save the file on your computer to work, edit or customize your design. You can also find more 3D designs for printers on anet A8 Z-axis endstop position adjuster.