Anet E12; Z-axis sync screws and run on one stepper motor and reduce bed leveling.
thingiverse
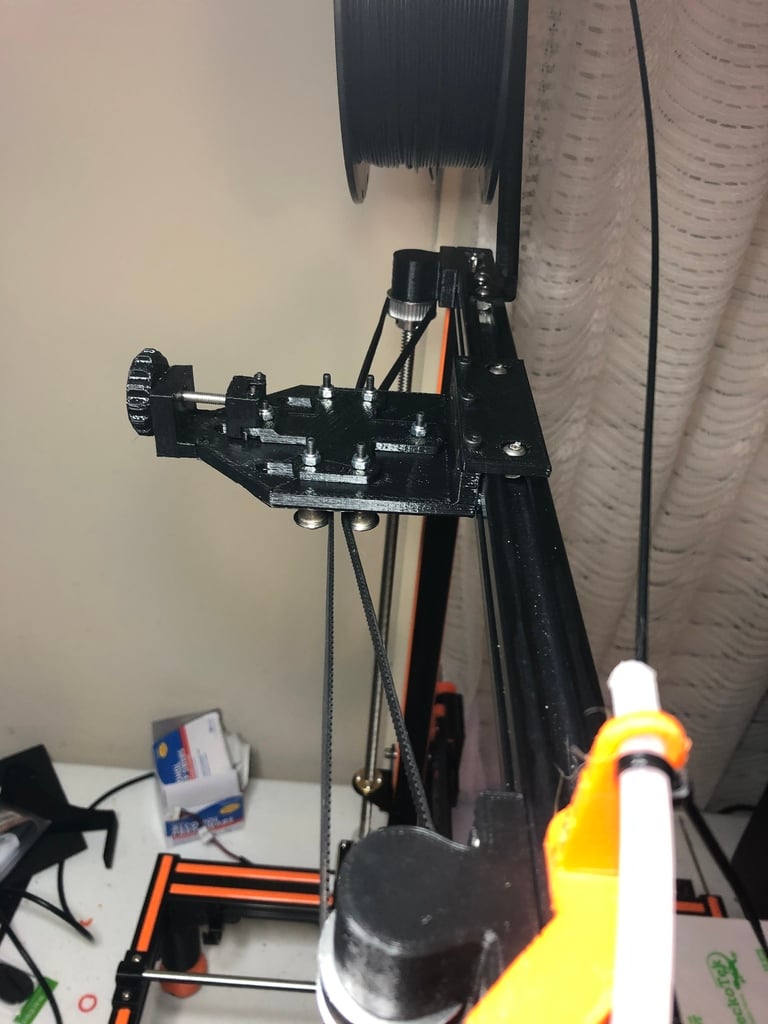
I reworked the design to integrate seamlessly with the E12 and improve upon its functionality. 1. Tightening only one side of the belt can cause issues with turning the lead screws in opposite directions, resulting in height discrepancies between the left and right sides. My design tightens both sides of the timing belt simultaneously. 2. With my design tightening on both sides at once, it engages more teeth on the pulleys of the lead screws, making it possible to run on a single z-axis stepper motor. 3. A tension adjustment knob is included for precise adjustments as needed. Required parts: GT2 Timing Pulleys 40 Tooth 2GT Synchronous Wheel Parts Bore 8mm Aluminium Gear Teeth Width 6mm - 2 GT2 Driver Belt 860-2GT-6 Timing Belt in Closed Loop Rubber L=860mm W=6mm 430 Teeth - 1 (note: not compatible with E10 or CR10 due to excessive length) Idlers GT2-6, toothless, 3mm bore - 4 Idler Pulley 20 Teeth 3mm Bore 6mm width Timing Pulley Wheel Aluminum - 2 Miscellaneous Hardware: M4 x 40 Button Head Hex Socket Cap Screws - 1 M4 Nylon locking nut - 1 M3 x 30 socket head screws - 6 M3 x 12 socket head screws - 3 M3 Nylon locking nut - 6 M2 x 16 socket head screws - 2 M2 x 20 socket head screws - 2 Rail mounting screws & t-nuts - 2 Print each part separately and assemble the components, taking note that some assembly requires additional steps due to layer direction issues. Superglue may be necessary for reinforcement. After installing the z-sync system, correct the heights across the x-axis rail by following these steps: 1. Use your jog controls to home X, Y, Z, then perform a second Z home (this will be a slow and precise movement). 2. Jog the X-axis out about 10mm. 3. On the X-limit switch side of the printer, use the calipers depth rod to measure the height from the rail down to the metal part of the horizontal support below. Lock the reading using the set screw on the calipers. 4. Move over to the other side and check if the readings are close enough. 5. If necessary, loosen the set screws for the stepper to lead screw coupler (only those for the lead screw) and the timing pulley on top of the lead screw. 6. Adjust the height by twisting the lead screw while ensuring that you don't turn the stepper motor or the other lead screw via the sync. 7. Re-tighten the set screws for the stepper to lead screw coupler and the timing pulley after achieving the desired height readings. 8. Jog your z-axis up 10mm or more, then perform X home, Y home, Z home, and one additional Z-home. Finally, jog the x-axis out 10mm and retake the x-rail measurements. Your printer should now be functioning accurately.
With this file you will be able to print Anet E12; Z-axis sync screws and run on one stepper motor and reduce bed leveling. with your 3D printer. Click on the button and save the file on your computer to work, edit or customize your design. You can also find more 3D designs for printers on Anet E12; Z-axis sync screws and run on one stepper motor and reduce bed leveling..