Angle Grinder (belt sander attachment)
thingiverse
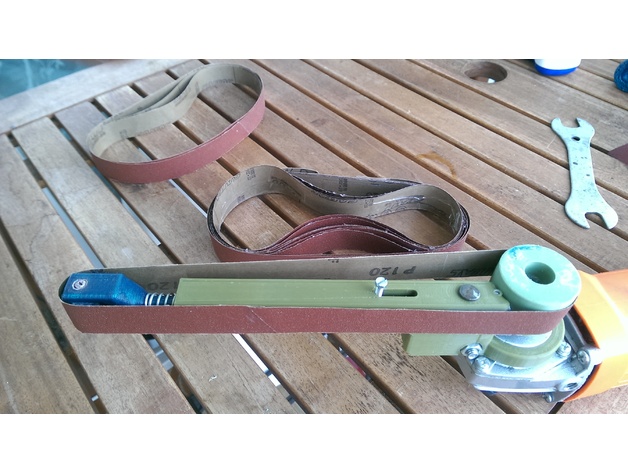
Angle grinder belt sander attachment (Videos of the working tool at the end) Post-Printing NEEDED MATERIAL: (for the structure) m5 threaded rod / 5mm bar (x4) m3 threaded rod (x3) 3mm nut 3mm screw 5mm bolt 5mm nut (for the roller) 10mm(diameter) hard disk ball bearing long 2mm screw 2mm nut (x2) some washers about 10mm (inner diameter) spring STEPS: STEP 1 Push the first 5mm bar into the first hole and cut it to length (as in the following picture): STEP 2 Push the others two 5mm rods into the two holes and cut them to length. Then do the same with the two m3 threaded rods (as in the following picture): STEP 3 insert the 5mm nut and bolt for locking the structure to the grinder: STEP4 Now take the m3 threaded rod, bend it, cut it to length, and insert it into the groove (as in the picture): STEP 5 Push the last 5mm rod into the hole and cut it to length : STEP 6 Push the hard disk bearing into the roller, as in the picture: STEP 7 Insert and lock the two 2mm nuts into the grooves that you see in the picture using a bit of glue, then assemble the parts: STEP 8 insert the 3mm nut and the spring as in the picture: STEP 9 Insert the roller structure just assembled (blue part) into the main structure (green part) and lock it in it, by inserting a 3mm screw into the nut at the end of the roller structure:
With this file you will be able to print Angle Grinder (belt sander attachment) with your 3D printer. Click on the button and save the file on your computer to work, edit or customize your design. You can also find more 3D designs for printers on Angle Grinder (belt sander attachment).