Animatronic Eye Mechanism V2
thingiverse
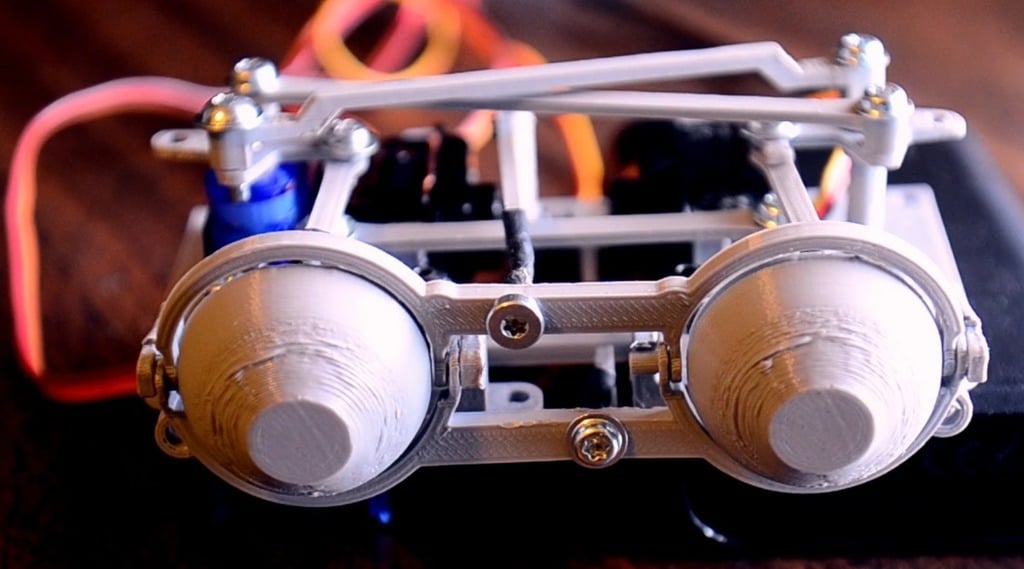
Video: https://www.youtube.com/watch?v=j3ok9grzXH8 Animatronic eyes using 4 9G servos. Builds from my last design by adding a second eye and eyelids. How to build it ==================== ### You need: - 8 M3x5 screws - 8 M3x7 screws - 4 micro servos - Wire (like a paperclip) or 2 small screws - Shrinkwrap - Your favorite RC receiver, servo controller, or microcontroller ### Printing: - Print 2 of eye.stl and eye_mount.stl - you need to mirror one copy left-to-right - Print 1 of everything else - Print eye.stl with the flat part on the print bed. - eye_mount.stl should be printed sideways, with the flat side down, as should eye_top, eye_bottom, eye_top_lever, and eye_bottom_lever. - eye_servo_plate should be printed as is. - most of the other links should be flipped 180* before printing. ### Assembly: Center all your servos, then attach single-sided servo horns to two of them. Depending on the brand, you may need to clip off the last 5mm or so to get them to fit. Then install your servos with their included mounting screws. Use just 1 screw for the two servos that lay on their side since we'll use the other screws for holding on the eye mounts, which can be installed now. Then start assembling the linkages toward the front and work your way back. Use 7mm screws to hold the cross-links onto the servo horns, and 5mm for everything else. Once all the parts are in place, use ~1 cm long strips of shrinkwrap to attach the links to the eyes and eyelids. Shrink them with a soldering iron, just be careful not to destroy the parts themselves!
With this file you will be able to print Animatronic Eye Mechanism V2 with your 3D printer. Click on the button and save the file on your computer to work, edit or customize your design. You can also find more 3D designs for printers on Animatronic Eye Mechanism V2.